Posted on

How to Properly Flush and Service a Diesel Fuel Tank

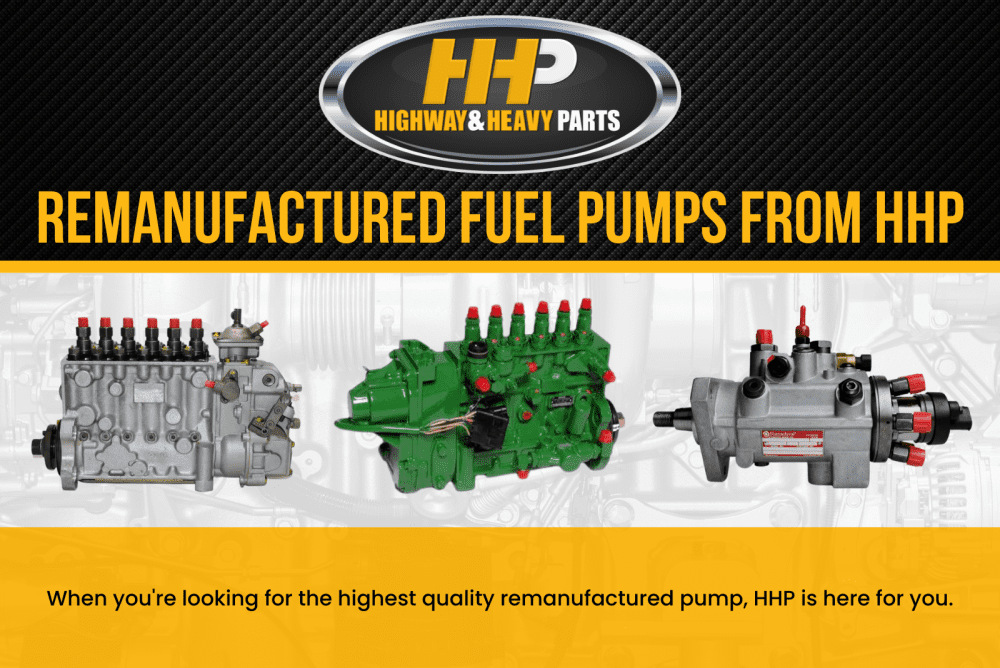
Cummins Celect Diesel Fuel Pump

Are you wondering if you need a fuel system flush for your diesel engine? If you’ve never had it done, there’s a good chance you do. In fact, a basic flush and filter change should be done every 30,000 miles or six months. Short trips and biodiesel make this interval even more necessary.

Why should you flush your diesel fuel tank regularly? Think about your fuel injectors like spray bottles. When the nozzle is clogged, the spray becomes thin or uneven. This results in issues like dirty combustion, faster filling of your DPF, frequent regens, bad fuel economy, and worn parts.

A flush is a diesel fuel tank maintenance item that prevents a lot of major problems before they start.

Why You Should Flush and Service Your Diesel Fuel Tank

 Diesel fuel isn’t as stable as gasoline. Over time, it absorbs moisture from the air, and that moisture settles at the bottom of the tank, which is the lowest point and the closest point to your fuel pickup. Standing water encourages microbial growth (often called diesel bug), which produces a dark sludge that clogs filters and corrodes metal components from the inside out.

On top of moisture, diesel tanks accumulate:

  • Rust and scale flaking off the tank walls, especially in older steel tanks
  • Asphaltene sludge, a tar-like byproduct of aging fuel
  • Algae and bacteria colonies that thrive in the fuel-water interface
  • Fine sediment stirred up from the tank floor during driving

None of this gets fully caught by your fuel filter. In fact, some of it passes straight through to the injectors, and some settles back down in the tank once the vehicle is parked. Over months and years, it builds into a nasty layer that gets pulled into the fuel system every time you drive.

That’s bad news for your diesel engine’s performance. But the good news is that a flush clears all of this out before it becomes a bigger issue. If you don’t flush and service your diesel fuel tank regularly, you risk faster soot accumulation, accelerated injector wear, and stress on your high-pressure fuel pump.

Compared to the cost of replacing an injector or fuel pump, a full flush is cheap insurance.

Preparing For a Flush and Service

Before we discuss how to flush a diesel fuel tank, gather your tools and materials. Depending on your vehicle and how thorough a job you’re doing, you’ll want the following:

Tools and equipment

  • Vehicle ramps or jack stands (tank access usually requires getting underneath)
  • Socket set and wrenches (sizes vary by make/model)
  • Fuel line disconnect tools (for quick-connect fittings)
  • A fuel transfer pump or siphon kit
  • A large drain pan rated for fuel (5+ gallons)
  • Shop rags and absorbent pads
  • Nitrile gloves and safety glasses
  • A flashlight or work light

Materials

  • Fresh diesel fuel (enough to refill the tank)
  • A diesel fuel system cleaner/flush additive (or a dedicated flush fluid, depending on method)
  • New fuel filter(s) — primary and secondary if your vehicle has both
  • New fuel filter O-rings/seals
  • Fuel-safe thread sealant if reinstalling any fittings

A few precautions

  • Work in a well-ventilated area, away from open flame or sparks
  • Have a fire extinguisher rated for fuel fires nearby
  • Dispose of old fuel and sludge according to local hazardous waste regulations. Don’t pour it down a drain.
  • If your vehicle is under warranty, check whether the service needs to be done by a certified shop to keep your coverage

How to Flush a Diesel Fuel Tank – Step By Step

  1. Relieve fuel system pressure. Locate the fuel pump relay or fuse and disable it, then run the engine until it stalls. This depressurizes the lines before you disconnect anything.
  2. Drain the tank. Locate the drain plug if your tank has one, and let the fuel run into your drain pan. If there’s no drain plug, use a fuel transfer pump or siphon through the fill neck or an access point. Get out as much fuel as possible. Gravity alone may not suffice.
  3. Drop the tank (if needed). For a deep clean, especially on a tank with heavy sediment, support the tank with a jack, disconnect the straps, fuel lines, vent hoses, and the sending unit, then lower it clear of the vehicle.
  4. Inspect and clean the interior. Remove the sending unit or access plate and look inside with a flashlight. Rinse the tank with fresh diesel or a compatible tank-cleaning solution, swirling it to loosen sludge and sediment, then drain it out completely. Repeat until the rinse comes out clean. For badly contaminated tanks, a specialized fuel tank cleaning service with agitation or ultrasonic cleaning may be worth the cost.
  5. Check for rust and damage. Look closely at the tank walls, baffles, and fittings. Surface rust can sometimes be treated with a tank sealant. But significant corrosion or pinholes means the tank should be replaced rather than reinstalled.
  6. Replace the fuel filters. Swap out the primary filter and the secondary filter near the engine. Prime the new filters with fresh fuel where possible to reduce air in the system on startup.
  7. Reinstall the tank and reconnect everything. Reattach the sending unit with a new gasket, reconnect fuel lines, vent hoses, and electrical connectors, then raise the tank back into position and secure the straps.
  8. Refill with fresh diesel. Add a fuel system cleaner or conditioner if you’re using one, then fill the tank most of the way with clean, fresh diesel.
  9. Bleed the fuel system. Many diesels need manual priming after a dry filter change. Use the primer bulb or pump if equipped, or crank the engine in short bursts to draw fuel through the lines. Always follow your vehicle’s specific bleeding procedure.
  10. Start the engine and check for leaks. Let it idle and inspect every fitting you touched. Watch for a smooth idle and normal startup behavior. Hesitation or rough running usually means there’s still air in the lines.

Maintenance and Long-Term Care Tips

Keep the tank as full as possible. A fuller tank means less space for condensation to form, which slows water accumulation.

Use a quality fuel additive periodically, especially one with biocide properties if you store fuel for long periods or live in a humid climate.

Change fuel filters on schedule, even if you haven’t done a full flush. This is your first line of defense against contamination reaching the injectors.

Watch your fuel source. Buy from busy, reputable stations where fuel turns over quickly; stagnant fuel in an underground tank can pass its problems on to you.

Be extra cautious with biodiesel blends. Biodiesel is more prone to microbial growth and can loosen old sludge deposits, so shorten your service interval if you run higher blends (B20 and above).

Watch for warning signs between services. Hard starts, rough idle, loss of power, or a fuel smell can point to contamination building up faster than expected.

Diesel engines are durable, efficient, and powerful, but they also have unique maintenance considerations that make them different from gas engines. Staying ahead of fuel tank contamination with regular flushes and filter changes is one of the simplest ways to protect that durability and keep your engine running the way it was built to run.

Take advantage of expert advice and the parts you need to service a diesel fuel tank with Highway and Heavy Parts. We’re here to help you keep your equipment on the road.

FAQs: Flush and Service a Diesel Fuel Tank

How often should you flush a diesel fuel tank?

Most diesel engines need a fuel system flush and filter change every 30,000 miles or six months, whichever comes first. Vehicles that make a lot of short trips or run on biodiesel blends should be flushed more often, since both conditions speed up moisture buildup and microbial growth inside the tank.

What are the warning signs that a diesel fuel tank needs cleaning?

Hard starts, a rough idle, loss of power, and a strong fuel smell are all signs that contamination is building up faster than your fuel filters can handle it. If you keep replacing filters and they clog again quickly, the tank itself is likely the source of the problem.

Can you flush a diesel fuel tank without removing it from the vehicle?

Yes, for light contamination you can drain the tank, rinse it through the fill neck or an access point, and refill it with fresh diesel and a fuel system cleaner. Heavily contaminated tanks with thick sludge or scale usually need to be dropped so you can inspect and clean the interior properly.

What causes sludge to build up inside a diesel fuel tank?

Sludge forms when moisture collects at the bottom of the tank and mixes with rust, asphaltene deposits, and sediment. That water also creates the conditions for microbial growth, sometimes called diesel bug, which produces the dark, tar like sludge that clogs filters and damages the fuel system over time.

Is diesel algae the same thing as diesel bug?

Not exactly. What people commonly call diesel algae is usually microbial contamination made up of bacteria, fungi, and biofilm rather than true algae, since fuel tanks are dark and algae needs sunlight to grow. Learn more in our guide to diesel fuel algae and microbial contamination.

Do you need to replace the fuel filters after flushing a diesel tank?

Yes, always install new primary and secondary fuel filters after a flush. Old filters have already absorbed contamination and won’t provide clean protection once fresh fuel is circulating through the system.

How long does a diesel fuel tank flush and service take?

A basic drain, rinse, and refill can take a few hours, while dropping the tank for a full interior cleaning and inspection typically takes a full day, depending on the vehicle and how much sediment or rust needs to be addressed.

What happens if you never flush your diesel fuel tank?

Skipping regular flushes lets rust, sludge, and microbial growth accumulate until they reach your fuel injectors and high-pressure fuel pump. Over time this leads to dirty combustion, faster DPF filling, more frequent regens, worse fuel economy, and expensive component wear.

Can bad diesel fuel damage your fuel injectors?

Yes, contaminated fuel is one of the most common causes of injector wear and failure. Water, sediment, and microbial sludge that pass through a clogged or aging filter reach the injectors directly, where they cause uneven spray patterns, incomplete combustion, and long-term damage. Our diesel fuel contamination guide covers this in more detail.

Posted on

How to Test Diesel Fuel Injector Return Rate (Fuel Return/Leak-Off Test)

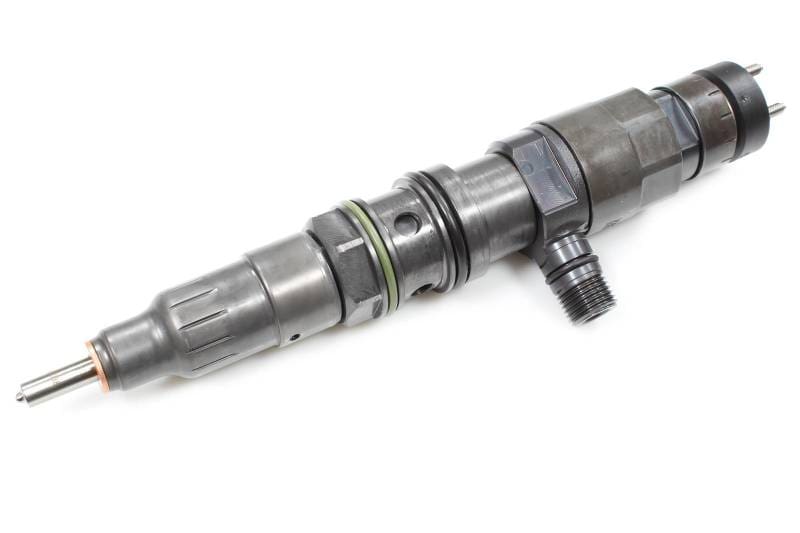
Cummins diesel engine fuel injector

The common rail injector system is widely used in diesel applications. Fuel injectors in a common rail system operate like electronic valves, receiving high-pressure fuel from a shared rail and opening at precise timing to spray it into the engine cylinders. This system relies on constant pressure and highly-tuned timing. Diesel fuel injector issues can show up in the fuel return rate.

The diesel fuel injector return rate describes how much high-pressure fuel bypasses the injector’s internal clearances and returns to the fuel tank rather than entering the engine. If the bypass is low and controlled, this is normal for cooling and lubrication. However, a high return flow rate drops rail pressure and can cause engine failure.

Why the Fuel Return Rate Test is Important

In high-pressure common rail diesel systems, fuel injectors rely on internal hydraulic control valves to regulate injection timing and pressure. A precise amount of fuel is designed to bypass the valve and return to the fuel tank during normal operation. However, as internal components wear down from heat, high mileage, or contaminated fuel, these valves begin to leak excessive fuel back through the return circuit.

Performing a fuel return rate test (or leak-off test) is one of the most effective non-invasive diagnostics for finding the reason behind diesel engine horsepower loss. Here’s why it’s critical:

1. Identifying No-Start and Hard-Start Conditions

Modern common rail systems require a minimum threshold of fuel rail pressure—typically between 3,000 to 5,000 PSI depending on the engine—before the ECM will allow the injectors to fire.

When an injector’s internal control valve wears out, high-pressure fuel escapes into the low-pressure return line during cranking. If one or more injectors are leaking excessively back to the tank, the high-pressure fuel pump can’t build enough pressure in the rail to meet the firing threshold, resulting in extended cranking times or a total no-start condition.

2. Isolating Performance Drops and Misfires

Excessive return flow directly robs the fuel rail of hydraulic pressure while the engine is running under load. This loss of pressure leads to several obvious drivability symptoms:

Engine Misfires and Rough Idling: Low rail pressure prevents proper fuel atomization, causing incomplete combustion in the affected cylinders.

Power Loss Under Acceleration: As fuel demand increases, a high return rate prevents the system from maintaining rail pressure, often triggering a “Limp Mode” condition or rail pressure low codes.

Excessive Smoke and Drivability Issues: Poor pressure management disrupts the precise multi-injection events needed for clean diesel combustion.

3. Preventing Unnecessary Replacements

Common rail diagnostic trouble codes rarely point directly to a single failed injector; instead, you will often see generic low rail pressure or cylinder balance fault codes.

Without a return rate test, it is nearly impossible to tell whether a low-pressure issue is caused by a failing high-pressure pump, a faulty rail pressure regulator, or a single leaking injector. The leak-off test measures the mechanical return output of each injector individually, allowing you to isolate what’s failing and avoid replacing unnecessary parts.

Tools and Safety Gear Needed

Before you get started in conducting a fuel return rate test, it’s important to gather some tools and safety gear.

Specialized Diagnostic Tools:

  • Diesel common rail injector flow meter kit
  • Clear vinyl tubing (if building a custom DIY rig)

General Shop Hand Tools: Hose clamp pliers, pick set for retaining clips, line plugs/caps.

Scan Tool (Optional but Recommended): OBD2 scanner capable of reading real-time fuel rail pressure.

Personal Protective Equipment (PPE): Safety glasses, nitrile gloves, and shop towels.

Step-by-Step Fuel Return Test Procedure

Performing a fuel return test allows you to measure the internal leakage of each injector under actual operating conditions. Follow these steps to safely and accurately isolate failing injectors.

Step 1: Safety and System Preparation

Park the vehicle on a level surface, set the parking brake, and allow the engine to cool down. Turn off the ignition and wait at least 5–10 minutes for residual pressure in the rail to bleed down completely.

Clean the cylinder head around the injectors, return lines, and fuel rail with brake cleaner and compressed air. Preventing dirt or debris from entering open fuel ports is critical to avoiding component damage.

Put on safety glasses and chemical-resistant gloves.

Step 2: Disconnect Factory Return Lines

Locate the fuel return circuit running across the top of the injectors. Carefully remove the retaining clips or spring clamps securing the fuel return line fittings to each injector using a pick tool or hose clamp pliers. These plastic fittings can be brittle, so apply gentle pressure.

Pull the return line assembly off each injector return port. Plug or cap the main rubber return line leading back to the fuel tank or fuel filter housing to prevent air intrusion or siphon spills.

Step 3: Install the Flow Meter Test Kit

Select the correct quick-connect adapters from your flow meter kit that match your injector return ports. Push the adapters securely onto the return port of each injector until they snap into place.

Run the tubing from each adapter to its corresponding graduated bottle in the flow meter rack. Mount or hang the bottle rack securely in the engine bay, ensuring the tubes are equal in length, routed away from hot exhaust components, and clear of belt drives.

Step 4: Execute the Test Run

For a No-Start Condition (Cranking Test):

Disconnect the camshaft position sensor or crank sensor to prevent the engine from starting during the test. Crank the engine for 10 to 15 seconds. Observe the fuel rising in the clear tubes or bottles. Stop cranking immediately if one container fills rapidly.

For a Running / Hard-Start Condition (Idle Test):

Start the engine and let it idle. Allow the engine to run for 2 to 3 minutes, or until fuel reaches a clear, readable mark in the graduated cylinders. If necessary, hold the engine at a steady 1,500–2,000 RPM for 30–60 seconds to test return rates under moderate rail pressure (refer to manufacturer specs for exact test parameters).

Shut the engine off as soon as you see a clear difference in fuel levels.

Step 5: Record Volume and Tear Down

Read the fuel level in milliliters across all graduated cylinders at eye level. Record the exact volume for each corresponding cylinder number. Carefully disconnect the adapters, catching any residual fuel with shop towels.

Inspect the O-rings on the factory return line fittings. Replace any damaged O-rings before reattaching the return line harness and securing the retaining clips. Start the engine and inspect all return connections for fuel leaks before reinstalling any engine covers.

Interpreting the Results

Once you have completed the test run, evaluating the collected fuel volume is straightforward. By comparing the fluid levels across all graduated cylinders, you can quickly identify whether your injectors are operating within normal tolerances or if excessive internal wear is compromising your fuel system.

A uniform low return indicates healthy control valves across all injectors. However, an injector returning significantly more fuel than the others (between 20 and 30% variance) has an internally leaking control valve and requires replacement.

If all cylinders show a high volume of returned fuel, it indicates widespread internal valve wear—frequently caused by contaminated fuel or high mileage. In this scenario, multiple injectors will need to be replaced.

If you get zero return on a cylinder, that indicates a blocked return port or severely stuck nozzle.

Next Steps and Best Practices

After you’ve confirmed an abnormal return rate on one or more cylinders, resolving the issue is fairly straightforward with a few best practices.

Replace in Sets vs. Individually: If a single injector shows extreme back-leakage on a lower-mileage engine, replacing just that unit is usually fine. However, if the vehicle has high mileage or the test reveals marginally high return rates across all cylinders, replace the entire set to ensure balanced combustion and prevent additional problems.

Always Use New Sealing Hardware: Never reuse old sealing components. Always install a new copper crush washer at the base of the injector and replace the rubber O-rings on the body. Reusing old copper washers allows combustion gases to blow past the seal, creating heavy carbon buildup that locks the injector into the cylinder head.

Use New Hold-Down Bolts: Most diesel injector hold-down bolts are torque-to-yield fasteners designed to stretch when torqued to specification. Reusing old bolts risks snapping them off in the head or failing to maintain proper clamping force, which leads to premature washer failure.

Clean the Injector Bore Thoroughly

Before dropping the new injector into place, clean the injector bore and seating surface in the cylinder head using specialized brass bore brushes and a vacuum attachment. Any carbon deposit, grit, or residue left at the bottom of the bore will prevent the new copper washer from sealing correctly, causing compression leaks and incorrect nozzle protrusion.

Prime and Bleed the Fuel System

Don’t crank a diesel engine dry after opening the fuel system. High-pressure pumps and injectors rely on diesel fuel for lubrication, and dry cranking can cause damage quickly.

Low-Pressure Priming: Cycle the ignition key to the “RUN” position several times (or activate the fuel pump prime function with a scan tool) to purge air from the low-pressure lines and fuel filter housing.

Bleeding High-Pressure Lines: On systems that require manual bleeding, crack the high-pressure line fittings at the injectors slightly while cranking until the fuel emerges without bubbles, then torque them to spec before final starting.

Verify the Repair

After starting the engine, let it reach normal operating temperature and perform a thorough inspection by checking for any fuel leaks around the fuel rail, line fittings, and return circuit connections.

Monitor real-time fuel rail pressure PIDs on a scan tool to ensure desired vs. actual pressure matches closely during idle and under load. If necessary, re-run a brief leak-off test to verify that return rates across all cylinders are now uniform and within manufacturer specifications.

Get Everything You Need to Perform a Leak-Off Test

At Highway and Heavy Parts, we have the expert advice and quality parts you need to perform a fuel return test on your diesel engine. Get in touch today for detailed diagnostic advice or to find out more about what you need to test your rig and get back on the road.

FAQs: Diesel Fuel Injector Return Rate

What is diesel fuel injector return rate?

The return rate is how much high-pressure fuel bypasses an injector’s internal clearances and flows back to the fuel tank instead of spraying into the cylinder. A small, controlled amount is normal and helps cool and lubricate the injector. A high return rate drops rail pressure and can lead to poor performance or engine failure.

What is a diesel injector leak-off test?

A leak-off test, also called a fuel return rate test, measures how much fuel each injector sends back to the tank during cranking or idle. By capturing the return flow from every injector in graduated cylinders, you can compare volumes side by side and pinpoint which injector has an internally leaking control valve.

What are the symptoms of a leaking diesel injector?

Common signs of excessive injector return include hard starting or a no-start condition, rough idle, misfires, power loss under acceleration, excessive smoke, and low rail pressure trouble codes or limp mode. These happen because leaking injectors bleed off the rail pressure the engine needs for proper fuel atomization.

How do you test diesel fuel injector return rate?

After the engine cools and the rail pressure bleeds down, disconnect the factory return lines and install a flow meter kit on each injector return port. Route the tubing to graduated bottles, then crank the engine for a no-start test or idle it for a running test. Measure the fuel collected from each cylinder and compare the volumes.

Why does a leaking injector cause a no-start condition?

Common rail engines need a minimum rail pressure, often between 3,000 and 5,000 PSI, before the ECM lets the injectors fire. When an injector’s control valve leaks during cranking, the high-pressure pump cannot build enough pressure to reach that threshold, which causes long crank times or a complete no-start.

What is a normal diesel injector return rate?

A healthy engine shows a uniform, low return across all injectors. An injector returning roughly 20 to 30 percent more fuel than the others has an internally leaking control valve and needs replacement. Zero return usually points to a blocked return port or a severely stuck nozzle.

What causes high fuel return on a diesel injector?

Excessive return flow comes from worn internal hydraulic control valves. Heat, high mileage, and contaminated fuel break these components down over time, letting high-pressure fuel escape into the return circuit. When every cylinder returns a high volume, it usually signals widespread wear across the whole set.

Should you replace diesel injectors individually or as a set?

If one injector shows extreme back-leakage on a lower-mileage engine, replacing that single unit is usually fine. On high-mileage engines, or when several cylinders show marginally high return rates, replace the full set to keep combustion balanced and prevent repeat failures.

What tools do you need for a fuel return rate test?

You need a diesel common rail injector flow meter kit with graduated cylinders, hose clamp pliers, a pick set for retaining clips, and line plugs or caps. An OBD2 scanner that reads real-time fuel rail pressure is helpful, along with safety glasses, nitrile gloves, and shop towels.

Posted on

These Are The Parts Experienced Diesel Shops Replace Together

Why the Best Repairs Often Include More Than the Failed Part

When a diesel engine comes apart for a major repair, most technicians are focused on one thing: fixing the problem that brought the truck into the shop.

Maybe it’s a cracked cylinder head. Maybe a failed turbocharger. Maybe it’s time for a complete in-frame overhaul after hundreds of thousands of hard-working miles.

The failed component gets replaced, the engine goes back together, and the truck returns to work.

But experienced diesel shops know that’s only part of the equation.

The real question isn’t just “What failed?” It’s “What else has experienced the same wear, the same heat, or the same amount of service life?”

Replacing companion components isn’t about selling more parts. It’s about preventing customers from paying for the same labor twice.

If a repair requires hours—or even days—of teardown just to access one component, replacing another related part while everything is already apart can often save significant labor, reduce downtime, and improve the overall reliability of the repair.

That doesn’t mean every companion part should automatically be replaced. Every engine, every application, and every repair is different.

But experienced diesel technicians know there are certain combinations worth evaluating every time the engine is open.

Let’s look at five of the most common examples.

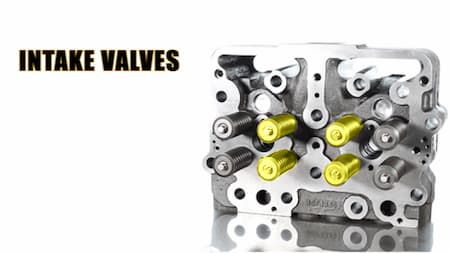
Cylinder Heads and Head Bolts: One Seals the Engine, the Other Keeps It That Way

A cylinder head usually gets plenty of attention during an engine repair.

If it’s cracked, warped, or otherwise damaged, replacing it is often an easy decision.

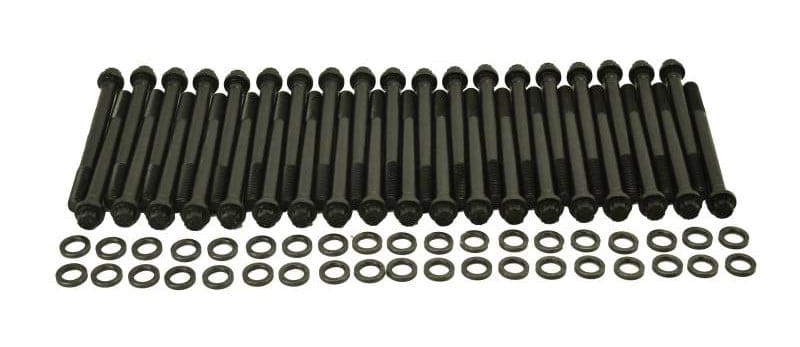
What sometimes receives less attention are the head bolts.

While they may look like simple fasteners, they’re responsible for one of the most important jobs in the engine: maintaining the clamping force that keeps the cylinder head sealed against the engine block.

Without that clamping force, combustion pressure, coolant, and engine oil all have opportunities to escape where they shouldn’t.

Why the Two Work Together

Think of the cylinder head and head bolts as a team.

The cylinder head provides the sealing surface.

The head bolts provide the pressure that keeps everything sealed.

One can’t perform correctly without the other.

Many modern diesel engines use torque-to-yield head bolts, which are designed to stretch slightly during installation to achieve the proper clamping load.

Once they’ve been stretched, they may not return to their original specifications.

Reusing them can reduce the amount of clamping force applied to the new cylinder head.

That doesn’t automatically mean failure will occur—but it does increase the risk of problems that could require tearing the engine back apart.

What Happens If Only the Head Gets Replaced?

Imagine installing a brand-new cylinder head.

The sealing surfaces are perfect.

The gasket is new.

Everything is torqued correctly.

But several of the reused head bolts have already gone through years of heat cycles and thousands of hours of engine operation.

Over time, one bolt may no longer maintain the same amount of clamping force as the others.

The result could include:

  • Head gasket leaks
  • Coolant loss
  • Compression leaks
  • Oil contamination
  • Premature gasket failure

None of those problems are caused by the new cylinder head.

They’re caused by the system as a whole.

The Cost Difference Is Small Compared to the Labor

Head bolts are typically a small portion of the total repair cost.

Replacing a cylinder head, however, involves significant labor.

If a sealing issue develops later because worn fasteners were reused, much of that labor has to be repeated.

That’s why many experienced shops evaluate head bolts whenever they’re already replacing the cylinder head.

The goal isn’t simply replacing more parts.

It’s protecting the investment the customer has already made in the repair.

Crankshafts & Bearings and Why Small Clearances Matter

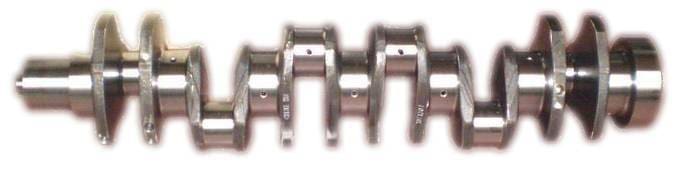
Replacing a crankshaft is one of the biggest repairs you’ll perform during an engine rebuild. It’s the backbone of the engine, converting the pistons’ up-and-down motion into the rotational power that keeps the truck moving.

But a crankshaft never works alone.

Every rotation depends on the main bearings supporting the crankshaft in the block and the connecting rod bearings allowing the rods to rotate smoothly around the crank journals. These bearings aren’t just pieces of metal—they’re precision wear surfaces that protect the crankshaft while maintaining the correct oil clearance.

That’s why experienced diesel shops rarely look at a crankshaft without also evaluating the bearings.

Bearings Are Designed to Wear

Unlike the crankshaft, bearings are designed to be sacrificial.

Over hundreds of thousands of miles, they gradually wear as they support the crankshaft through millions of rotations. They absorb tiny contaminants, heat cycles, and normal friction so the crankshaft doesn’t have to.

In many cases, worn bearings are the first indication that something inside the engine has changed.

You may find:

  • Normal wear after high mileage
  • Scoring from contaminated oil
  • Heat discoloration from lubrication issues
  • Uneven wear caused by excessive clearance

Each tells a story about what the engine has experienced.

Why Replacing Only One Component Can Be Risky

Imagine installing a new or reconditioned crankshaft but reusing bearings that already have thousands of hours of wear.

The crankshaft now has a perfectly machined surface running against bearings that have already lost some of their original tolerances.

Oil clearance may no longer be ideal.

On the other hand, installing brand-new bearings on a crankshaft with worn or damaged journals creates the opposite problem. The new bearings can’t compensate for an imperfect crankshaft surface, which can lead to premature bearing wear.

Neither combination allows the lubrication system to operate as intended.

Oil Clearance Is Everything

The crankshaft doesn’t actually ride directly on the bearings.

Instead, a thin film of pressurized engine oil separates the two metal surfaces.

That oil film is only possible when clearances remain within specification.

If clearances become too large, oil pressure can drop and lubrication suffers.

If they’re too tight, oil flow is restricted and excess heat builds quickly.

Replacing both the crankshaft and bearings together gives technicians the opportunity to restore those critical clearances back to factory specifications.

Saving Labor While the Engine Is Open

Accessing the crankshaft requires substantial disassembly.

By the time the crankshaft is ready for replacement, the bearings are already exposed.

Replacing them during the same repair often adds very little labor compared to performing the work later if bearing problems develop.

For many shops, it’s a practical decision based on reliability—not simply replacing additional parts.
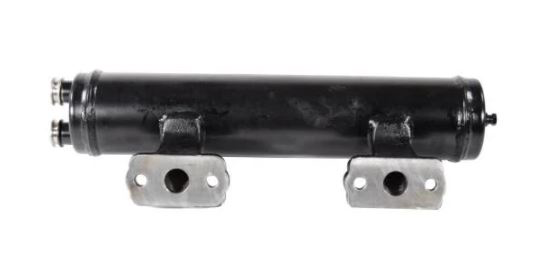
When customers invest in a major engine rebuild, they’re expecting dependable service for years to come. Replacing companion components helps support that expectation.

Liner Kits and Piston Cooling Nozzles: Protecting the New Parts You Just Installed

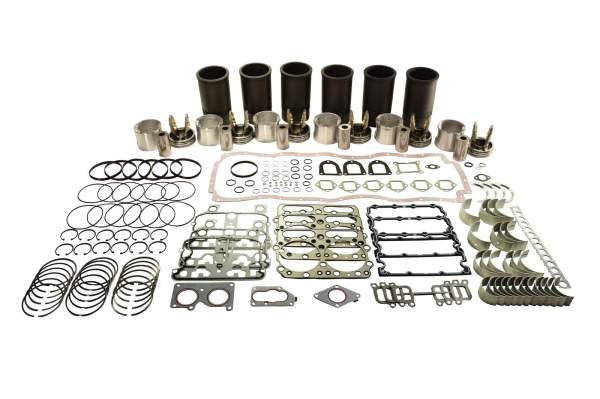
One of the most common components replaced during an in-frame overhaul is the cylinder liner kit.

A new liner kit gives the engine fresh cylinder walls, pistons, piston rings, and wrist pins—essentially providing a new foundation for combustion.

But one small component often gets overlooked.

The piston cooling nozzle.

Although it’s relatively inexpensive compared to the rest of the overhaul, it plays a critical role in protecting the new piston from excessive heat.

What Does a Piston Cooling Nozzle Do?

Every time combustion occurs, tremendous heat is generated inside the piston.

Without a way to remove that heat, piston temperatures can rise enough to reduce strength, increase wear, and shorten component life.

That’s where the piston cooling nozzle comes in.

Mounted beneath the piston, it sprays a precise stream of engine oil onto the underside of the piston crown.

That oil helps:

  • Carry heat away from the piston
  • Reduce thermal stress
  • Improve piston durability
  • Support proper lubrication

It’s a simple component with an important job.

Why Replacing Only the Liner Kit Isn’t Always Enough

Piston cooling nozzles spend years operating in hot engine oil.

Over time they can become:

  • Restricted by carbon deposits
  • Damaged during previous repairs
  • Partially clogged
  • Worn enough to affect spray pattern

The problem is that these issues often aren’t visible without close inspection.

A nozzle that isn’t delivering the correct amount of oil may still appear functional.

Now imagine installing a brand-new piston into that cylinder.

The piston is new.

The rings are new.

The liner is new.

But the cooling nozzle underneath is only delivering a fraction of the oil it should.

That new piston immediately begins operating under higher temperatures than intended.

An Inexpensive Part That Protects an Expensive Repair

Compared to the cost of an overhaul, piston cooling nozzles are relatively inexpensive.

They’re also easily accessible while the engine is apart.

Replacing them during a liner kit installation helps ensure the new pistons receive the cooling and lubrication they were designed for.

For many experienced diesel shops, it’s less about replacing another part and more about protecting the investment they’ve already made in the rebuild.

Cooling, Lubrication, and the Repairs That Can Save a Second Tear-Down

By the time you’ve completed a major engine repair, you’ve already invested a significant amount of labor.

The engine has been disassembled, inspected, repaired, and carefully reassembled. The last thing any repair shop wants is to see that same truck return a few weeks later because another component in the same system failed.

That’s why experienced technicians don’t just think about the failed part.

They think about the systems supporting that part.

Two of the best examples are the engine’s cooling system and lubrication system.

Water Pumps and Thermostats: Keeping a Rebuilt Engine at the Right Temperature

Every diesel engine depends on a properly functioning cooling system.

While the radiator often gets the most attention, two components do the majority of the work inside the engine:

One keeps coolant moving.

The other controls when and where it flows.

Together, they maintain the engine’s operating temperature.

Why They Depend on Each Other

The water pump circulates coolant throughout the engine, cylinder head, radiator, and other cooling passages.

The thermostat regulates that flow.

When the engine is cold, the thermostat stays closed to help it warm up efficiently.

As operating temperature increases, the thermostat opens, allowing coolant to circulate through the radiator.

Neither component can do its job without the other.

A perfectly good water pump can’t cool an engine if the thermostat never opens.

Likewise, a brand-new thermostat can’t prevent overheating if the water pump isn’t moving enough coolant.

They’re designed to work as one system.

Why Replacing Only One Can Lead to Problems

Imagine replacing a leaking water pump on an engine with several hundred thousand miles.

The repair goes smoothly.

Everything looks good.

A month later, the thermostat sticks closed.

Now the engine overheats—not because the water pump failed, but because another aging component in the same cooling system reached the end of its service life.

The opposite can happen as well.

A thermostat is replaced after an overheating complaint, but the original water pump has worn bearings or an eroded impeller that’s no longer moving coolant efficiently.

The overheating problem continues, leading everyone to believe the thermostat was defective.

In reality, both components were contributing to the issue.

Why Experienced Shops Often Replace Both

When coolant has already been drained and the cooling system is open, replacing both components is usually much easier than scheduling another repair later.

It’s also an opportunity to give the customer greater confidence in the repair.

Instead of fixing only today’s failure, the shop reduces the likelihood of another cooling system issue developing shortly afterward.

That doesn’t mean every water pump and thermostat must always be replaced together.

But it’s a conversation worth having whenever major cooling system work is already being performed.

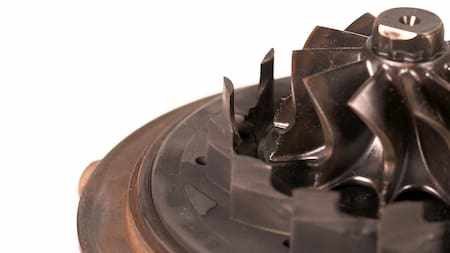
Turbochargers and Oil Supply Lines: Protecting Your New Turbo from Day One

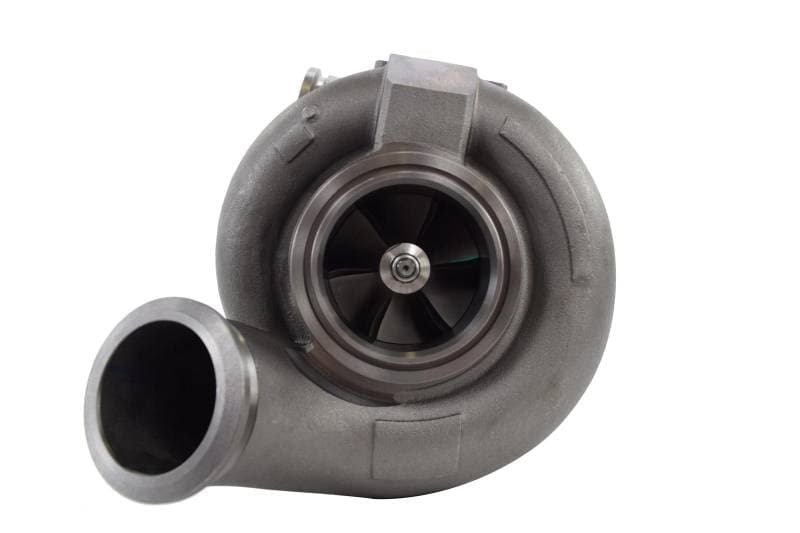
Turbochargers are among the hardest-working components on a diesel engine.

They’re exposed to extreme exhaust temperatures while spinning at speeds that can exceed 100,000 RPM.

Despite all that stress, they depend on one thing more than anything else:

Clean, unrestricted engine oil.

Without it, even a brand-new turbocharger can fail surprisingly quickly.

The Oil Supply Line Does More Than Deliver Oil

The oil supply line may seem like a simple tube, but it has one critical responsibility.

It delivers a steady supply of clean, pressurized oil to the turbocharger bearings.

That oil performs several jobs at once:

  • Lubricates the bearings
  • Removes heat
  • Reduces friction
  • Helps support the turbo’s rotating assembly

Without consistent oil flow, bearing temperatures rise rapidly.

Once that happens, damage can occur in a very short amount of time.

The Hidden Risk of Reusing an Old Oil Line

Here’s something many technicians have experienced.

A customer installs a brand-new turbocharger.

Everything is primed correctly.

The installation follows the manufacturer’s recommendations.

Then, only a short time later, the new turbo begins showing signs of failure.

The natural assumption is that the replacement turbo was defective.

Sometimes that’s true.

But often, the real problem started long before the new turbo was installed.

Over time, oil supply lines can develop:

  • Carbon buildup
  • Sludge deposits
  • Internal restrictions
  • Contamination from a previous turbo failure

Even a partial restriction can reduce the amount of oil reaching the new turbo.

The turbo itself isn’t the problem.

The lubrication system is.

A Small Part That Protects a Major Investment

Compared to the cost of replacing a turbocharger—and the labor involved—an oil supply line is relatively inexpensive.

Replacing it during the same repair helps eliminate one of the most common causes of premature turbo failure.

For many repair shops, it’s simply good insurance.

If you’re already replacing one of the engine’s most expensive components, it makes sense to evaluate the part responsible for keeping it alive.

It All Comes Back to One Question

Experienced diesel shops don’t replace companion components because it’s a rule.

They do it because they’ve seen what happens when related parts with the same age, wear, and operating conditions are left behind.

Sometimes replacing one additional component can prevent hours of labor, another tow bill, and another unhappy customer.

Every repair is different.

Every engine tells its own story.

The key is knowing which companion components deserve a closer look while everything is already apart.

Good Repairs Fix the Problem. Great Repairs Help Prevent the Next One.

No two engine repairs are exactly alike.

The engine’s mileage, operating conditions, maintenance history, and reason for failure all play a role in determining what should—and shouldn’t—be replaced.

That’s why experienced diesel technicians don’t approach companion component replacement as a checklist.

They approach it as a conversation.

If an engine is already apart, it’s worth asking:

  • Which related components have experienced the same amount of wear?
  • Which parts are difficult to access once the engine is back together?
  • Which inexpensive components could protect a much larger investment?
  • Which replacements could save the customer another round of labor in six months?

Sometimes the answer is to replace both components.

Sometimes inspection shows the original part is still in excellent condition.

The important thing is that the decision is made intentionally—not simply because the failed component was the only part that received attention.

Throughout this article, we’ve looked at five examples of companion components that experienced diesel shops often evaluate together:

  • Cylinder Heads + Head Bolts – Maintaining proper clamping force helps protect the new head gasket and sealing surfaces.
  • Crankshafts + Main & Rod Bearings – Proper bearing clearances are critical to lubrication, oil pressure, and long-term engine reliability.
  • Liner Kits + Piston Cooling Nozzles – New pistons deserve proper oil cooling to help maximize service life.
  • Water Pumps + Thermostats – A healthy cooling system depends on both coolant circulation and temperature control.
  • Turbochargers + Oil Supply Lines – A new turbocharger is only as reliable as the lubrication system supporting it.

Notice the common theme.

None of these combinations are about replacing parts for the sake of replacing parts.
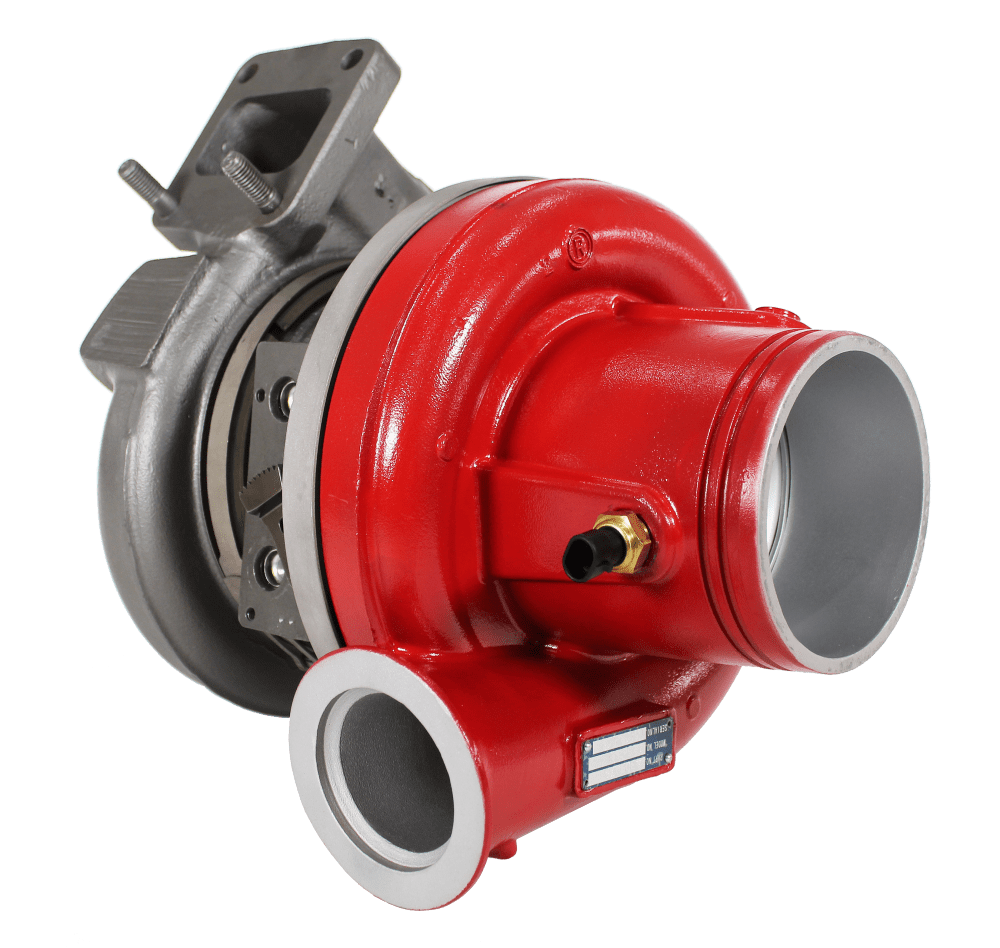
They’re about looking at the entire system instead of focusing on a single failed component.

Experienced repair shops understand that the most expensive repair isn’t always the one happening today.

Sometimes it’s the one that requires tearing the engine apart all over again because another worn component failed shortly afterward.

Taking the time to evaluate companion components while access is available can often help reduce repeat labor, minimize downtime, and give customers greater confidence in the repair they’re paying for.

It’s a philosophy built around long-term reliability—not unnecessary replacement.

So, How Many Are Already Standard Practice in Your Shop?

Every shop develops its own repair process over time.

Some companion component replacements become standard because technicians have seen the results firsthand.

Others depend on inspection findings, engine condition, customer budgets, and manufacturer recommendations.

There’s no one-size-fits-all answer.

But it’s worth asking yourself:

  • Which companion parts do we already replace together?
  • Which ones do we inspect every time?
  • Are there repairs we’ve had to repeat that could have been prevented with one additional component?

Sometimes asking those questions leads to more reliable repairs—and fewer trucks returning for the same job.

Need Help Choosing the Right Parts for Your Next Repair?

Whether you’re replacing a single component or planning a complete engine rebuild, choosing the right parts can make all the difference in the long-term reliability of the repair.

At Highway & Heavy Parts, we work with diesel repair shops, fleets, and owner-operators every day to help identify the parts that make sense for the job at hand. From complete overhaul kits to turbochargers, water pumps, cylinder heads, bearings, and more, our team is here to help you find the right solution.

Give us a call at 844-304-7688 to speak with one of our diesel parts specialists, or browse our selection online to find the components you need to keep your customers on the road.

Posted on

What Diesel Techs Actually Look For Before Recommending Engine Parts

When a diesel engine comes in with a problem, experienced technicians don’t start by picking parts. Instead, they start by asking why the failure happened in the first place. However, not every failure is immediately obvious without proper inspection.
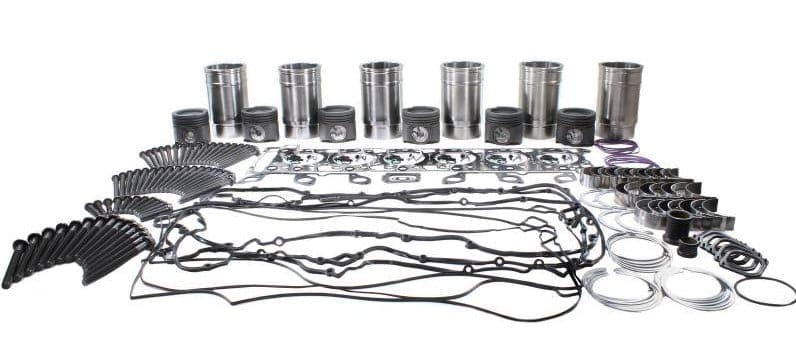
They start by asking:

What caused the failure in the first place?

Because replacing parts without understanding the root cause is one of the fastest ways to create repeat repairs.

This is the approach used by experienced diesel professionals at Highway and Heavy Parts – where real-world experience drives every recommendation.

Continue reading What Diesel Techs Actually Look For Before Recommending Engine Parts
Posted on

Highway & Heavy Parts Answers Your Diesel Engine Questions: Turbochargers

Here at Highway & Heavy Parts, we sell a lot of turbochargers. We carry a number of the industry’s leading brands for all major OEMs, and have helped diagnose a lot of our customers’ turbo failures. We provide solutions to help get them back on the road.

Continue reading Highway & Heavy Parts Answers Your Diesel Engine Questions: Turbochargers
Posted on

Highway & Heavy Parts Answers Your Diesel Engine Questions: Fuel Systems

Recently, at Highway & Heavy Parts, we’ve expanded our product offering to our customers. We now offer more fuel system components for all major OEMs.

Continue reading Highway & Heavy Parts Answers Your Diesel Engine Questions: Fuel Systems
Posted on

5 Myths About Using Aftermarket Diesel Parts Debunked!

With so many different kinds of aftermarket diesel engine parts on the market today, there’s a ton of conflicting information about their durability, performance, and manufacturing. Some people will tell you that using aftermarket parts in your engine is dangerous and would void your engine’s warranty, while others say some aftermarket parts are even better than the OEM. So who is correct?

Continue reading 5 Myths About Using Aftermarket Diesel Parts Debunked!
Posted on

What Parts We Offer; Caterpillar, Detroit Diesel and More

At Highway and Heavy Parts, it’s our mission to take the risk out of buying diesel engine parts for our customers. So we work hard to stock parts for a large range of applications.

Continue reading What Parts We Offer; Caterpillar, Detroit Diesel and More
Posted on

What’s The Benefit Of Bosch Injectors?

When you’re looking for new injectors for your DD13, DD15 or DD16 diesel engine, you probably feel like you have limited options for quality parts. If you’re like most people, you head straight to the dealership to get OEM parts.
Continue reading What’s The Benefit Of Bosch Injectors?
Posted on

Evolution Of Cummins Injectors

Not every fuel injector is built the same. When you’re looking to replace the injectors on your Cummins engine, we know you want the best.

Continue reading Evolution Of Cummins Injectors
Posted on

What Does A Cylinder Head Do?

If you’re shopping to replace your cylinder head, we know it can seem a little daunting.

Continue reading What Does A Cylinder Head Do?
Posted on

Will Electric Vehicles Replace Diesel In The Future?

The momentum toward replacing gas-powered vehicles on the road with electric vehicles is undeniably strong, as more and more manufacturers are throwing their hats in the ring. From BMW to GM, the expansion of electric vehicles on the market is set to see a record number of commercially available 100% pure battery electric vehicles as early as 2024. However, progress has not stopped there.

Continue reading Will Electric Vehicles Replace Diesel In The Future?
Posted on

What’s In Our Caterpillar C13 Diesel Engine Rebuild Kit?

Looking to rebuild your Caterpillar C13 diesel engine? We’ve got exactly what you need. Check out our popular inframe rebuild kit here! Highway & Heavy Parts is an industry leader in rebuild kits for any diesel engines, including Caterpillar. From the C7 to the C18, we got you covered.

Continue reading What’s In Our Caterpillar C13 Diesel Engine Rebuild Kit?
Posted on

Caterpillar 3406E 5Ek Piston Designs

When you’re having a problem with your diesel engine, or you’re wondering which replacement parts are right for your application, we know you’re looking for the best information.

Continue reading Caterpillar 3406E 5Ek Piston Designs
Posted on

The Evolution of Caterpillar Pistons

Here at Highway & Heavy Parts, we’re dedicated to bringing you the information you need to confidently buy diesel engine parts, expand your business, increase your profit, and successfully identify which parts will fit the job at hand.

Continue reading The Evolution of Caterpillar Pistons
Posted on

Diesel Oil Coolers Explained

An oil cooler is a fairly simple component, which means that it rarely fails. However, when doing any major engine work, it should be replaced. There are many reasons why a diesel engine can fail. And when it does, the oil cooler should be swapped out as well.Diesel Engine Oil Cooler

Continue reading Diesel Oil Coolers Explained
Posted on

How to Rebuild a Caterpillar C2.2 T/A Diesel Engine

Is it time for your Caterpillar C2.2 T/A to get a complete rebuild? (Check out our post on signs your engine needs a rebuild if you’re not sure!)

Continue reading How to Rebuild a Caterpillar C2.2 T/A Diesel Engine
Posted on

When Should You Replace Diesel Engine Fuel Injectors?

The once lazy, black smoke-chugging, locomotive-like engines are no longer. Nowadays, diesel-powered engines are cleaner than ever, produce more power, and use less fuel. But how do you know when it is time to replace their fuel injectors?

Continue reading When Should You Replace Diesel Engine Fuel Injectors?
Posted on

Should You Buy A Rebuild Or Remanufactured Head For Your Diesel Engine?

Diesel engines, especially in heavy-duty machinery and trucks, have an extremely hard life. At one point or another, they will need major service, and the heads will have to be replaced.

Continue reading Should You Buy A Rebuild Or Remanufactured Head For Your Diesel Engine?
Posted on

Should You Get A New Or Remanufactured Natural Gas Cylinder Head?

Cylinder heads fail, and when they do, you’re left with a decision whether you should purchase a new or remanufactured cylinder head. And if you’re running a natural gas engine, you might feel like you’re making this decision more often than you’d like.

Continue reading Should You Get A New Or Remanufactured Natural Gas Cylinder Head?
Posted on

Why Are There Few Options For Natural Gas Cylinder Heads?

Due in part to high demand and low supply, people have had a hard time finding cylinder heads for their natural gas engines, leading them to spend money on parts they’ll just have to replace again soon.

Continue reading Why Are There Few Options For Natural Gas Cylinder Heads?
Posted on

Is Replacing Your Diesel Camshaft Worth It?

Your truck is often put through grueling conditions and is expected to perform while giving nothing less than 100%. But just like anything else, diesel engines will have components that will fail if not properly maintained. Common parts like filters, gaskets, and even injectors will eventually need to be swapped out. It is just a matter of time.

Continue reading Is Replacing Your Diesel Camshaft Worth It?
Posted on

What Causes A Diesel Crankshaft To Bend? 4 Main Causes

If you have spent any time around an engine, regardless if it is diesel or gas-powered, you will have no doubt heard or even seen people talk about crankshafts. It is a simple, yet complicated moving part that helps keep the pistons and other vital engine components moving safely.
Continue reading What Causes A Diesel Crankshaft To Bend? 4 Main Causes
Posted on

Don’t Delete Your VGT Turbo! Standard, Wastegate, And VGT Explained

Is your VGT giving you trouble again? We know it can be frustrating when you’re looking at thousands of dollars of turbo damage yet again. And we know that it has lead many operators to pull the VGTs all together.

Continue reading Don’t Delete Your VGT Turbo! Standard, Wastegate, And VGT Explained
Posted on

Why Is My Cummins ISLG Natural Gas Cylinder Head Cracking?

Is your cylinder head in your Cummins ISL or ISLG natural engine cracked in multiple places? Are you looking for a replacement head but cant find quality options?

Continue reading Why Is My Cummins ISLG Natural Gas Cylinder Head Cracking?
Posted on

When Is It Time To Rebuild My Detroit Diesel DD15?

Rebuilding your engine can be a large and costly job. And we know that choosing the right kit for your engine can sometimes be difficult.

Continue reading When Is It Time To Rebuild My Detroit Diesel DD15?
Posted on

What’s The Difference Between Caterpillar 3406E, C15, And C15 ACERT Diesel Engines?

Choosing the best diesel engine is no easy task, especially in the information era where forums and sites write about how good “this” engine is, and how poor its competitors are. There is no question that the Caterpillar 3406E, C15, or C15 ACERT are all good engines in their own right, but, like with anything, each one has an Achilles heel if you dig deep enough.

Continue reading What’s The Difference Between Caterpillar 3406E, C15, And C15 ACERT Diesel Engines?
Posted on

Why Is My Caterpillar C15 Head Gasket Failing? Common Causes and Solutions

So, we’ve talked about various components of your Caterpillar C15 diesel engine and how you can tell if they’re causing your engine trouble. Now, we’re going to take a look at head gasket failure within a C15.

Continue reading Why Is My Caterpillar C15 Head Gasket Failing? Common Causes and Solutions
Posted on

What are the Benefits of VGT Turbos? Features & How They Function

There are some great benefits to using a VGT turbocharger in your diesel engine that you might be unaware of. With all of the turbocharger options out there, why pay more for a variable geometry turbo?

Continue reading What are the Benefits of VGT Turbos? Features & How They Function
Posted on

Why Is My Diesel Engine Air Brake Compressor Leaking?

These checks and tests are meant to be a quick and simple way to test a diesel brake air compressor and determine its functionality. There are always exceptions and rare occurrences, but these should be able to diagnose most leaking oil/coolant issues.

Continue reading Why Is My Diesel Engine Air Brake Compressor Leaking?
Posted on

The 3 Steps of the Camshaft Reconditioning Process

There are a few parts that you see as many (or more) remanufactured options for as new. Diesel camshafts are one of these parts. That’s because camshafts are pretty easy to rebuild, and if done correctly, work just as well. If you are considering replacing your old cam, you should definitely consider going with a remanufactured camshaft.

Continue reading The 3 Steps of the Camshaft Reconditioning Process
Posted on

What are Supply and Dosing Modules? A Guide to Bosch Denoxtronic Systems

At Highway & Heavy Parts, we do parts differently! We won’t sell you just any part. We won’t just sell you the lowest price part. And we certainly won’t sell you a part from an inferior supplier.

Continue reading What are Supply and Dosing Modules? A Guide to Bosch Denoxtronic Systems
Posted on

What Are The Primary Differences Between Cummins Diesel ISX and N14?

Cummins has a history of producing strong, long-lasting diesel engines, including some of the most popular ones for on-highway applications. Two of their engines in particular, the N14 and the ISX, continue to remain popular diesel choices.

Continue reading What Are The Primary Differences Between Cummins Diesel ISX and N14?
Posted on

What’s The Difference Between Detroit Diesel Series 60 12.7L and 14L Engines?

If you’ve heard of Detroit Diesel, odds are you’ve heard of their Series 60 line of engines. It includes three different engines, a 11.1L, a 12.7L, and a 14L.

Continue reading What’s The Difference Between Detroit Diesel Series 60 12.7L and 14L Engines?
Posted on

How Does a Cylinder Head Work On A Diesel Engine?

Today we’re going to go over a little bit about cylinder heads. Before diving head first into the cylinder head market, its important to have an understanding of what you’re working with.

Continue reading How Does a Cylinder Head Work On A Diesel Engine?
Posted on

What Caused A Crack In My Diesel Engine Cylinder Head?

We know how frustrating it can be when your cylinder head cracks. You’re losing coolant, have compression in your cooling system, or seeing excessive smoke, and you’re looking at lost time and money and an expensive repair.

Continue reading What Caused A Crack In My Diesel Engine Cylinder Head?
Posted on

When Can I Reuse My Cylinder Head Bolts? How To Clean And Inspect

Head bolts might seem like a minor or unimportant part, but without them, combustion wouldn’t be possible and your diesel engine wouldn’t work. They hold your cylinder head to the engine block and help the head gasket to seal properly.

Continue reading When Can I Reuse My Cylinder Head Bolts? How To Clean And Inspect
Posted on

When Does Your Cummins N14 Need A Rebuild?

We know that rebuilding your engine is a time consuming and expensive process. And that’s not even mentioning the profits you lose when your engine is out of commission.

Continue reading When Does Your Cummins N14 Need A Rebuild?