Posted on

These Are The Parts Experienced Diesel Shops Replace Together

Why the Best Repairs Often Include More Than the Failed Part

When a diesel engine comes apart for a major repair, most technicians are focused on one thing: fixing the problem that brought the truck into the shop.

Maybe it’s a cracked cylinder head. Maybe a failed turbocharger. Maybe it’s time for a complete in-frame overhaul after hundreds of thousands of hard-working miles.

The failed component gets replaced, the engine goes back together, and the truck returns to work.

But experienced diesel shops know that’s only part of the equation.

The real question isn’t just “What failed?” It’s “What else has experienced the same wear, the same heat, or the same amount of service life?”

Replacing companion components isn’t about selling more parts. It’s about preventing customers from paying for the same labor twice.

If a repair requires hours—or even days—of teardown just to access one component, replacing another related part while everything is already apart can often save significant labor, reduce downtime, and improve the overall reliability of the repair.

That doesn’t mean every companion part should automatically be replaced. Every engine, every application, and every repair is different.

But experienced diesel technicians know there are certain combinations worth evaluating every time the engine is open.

Let’s look at five of the most common examples.

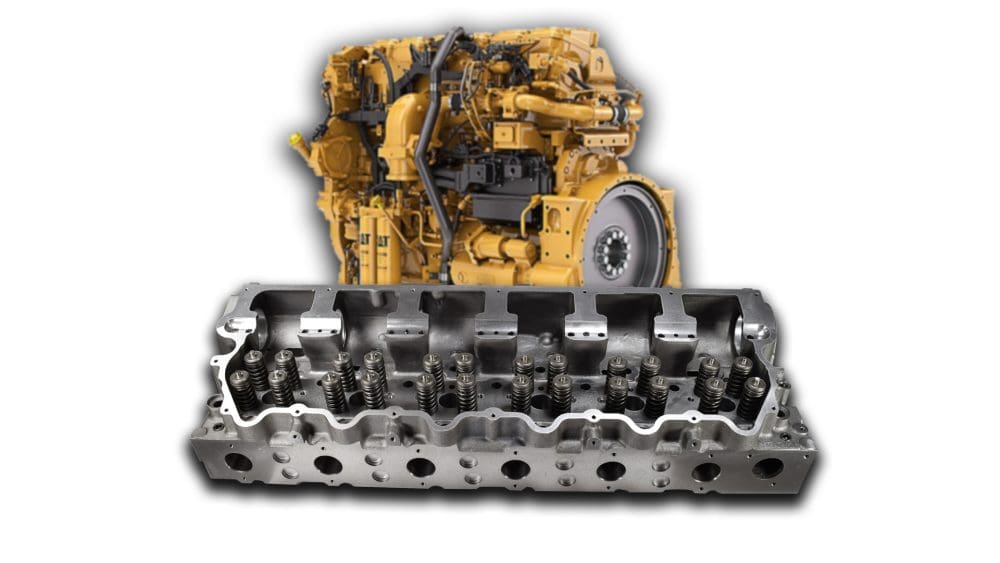
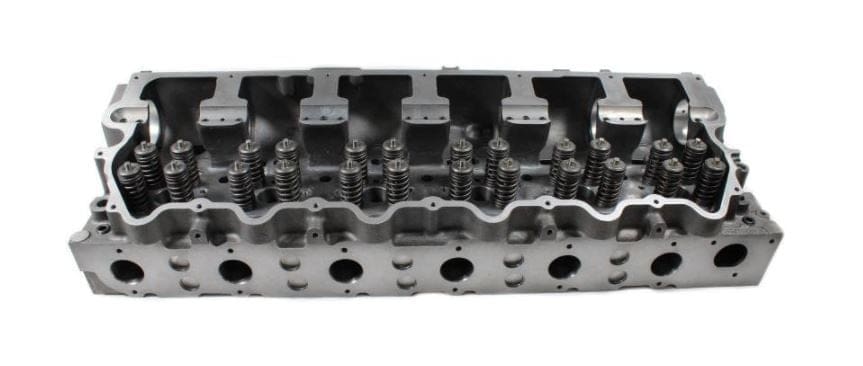
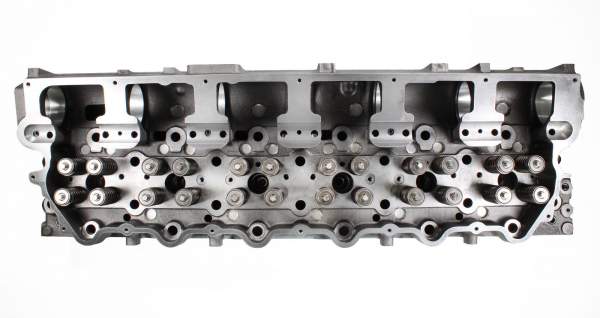
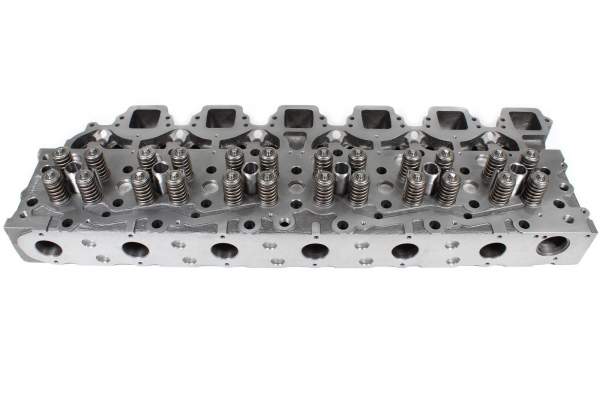
Cylinder Heads and Head Bolts: One Seals the Engine, the Other Keeps It That Way

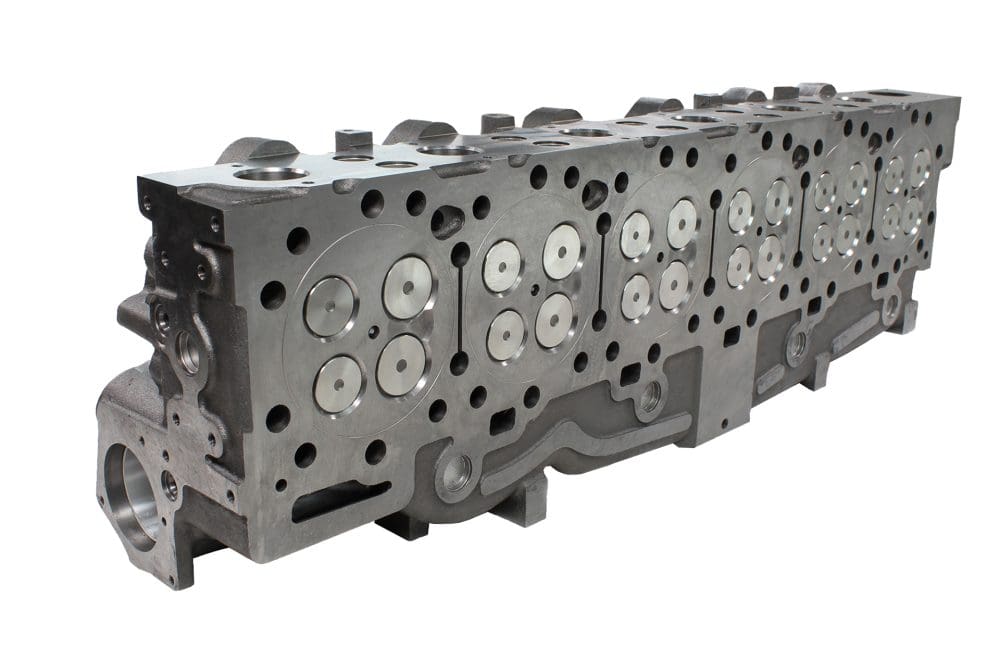
A cylinder head usually gets plenty of attention during an engine repair.

If it’s cracked, warped, or otherwise damaged, replacing it is often an easy decision.

What sometimes receives less attention are the head bolts.

While they may look like simple fasteners, they’re responsible for one of the most important jobs in the engine: maintaining the clamping force that keeps the cylinder head sealed against the engine block.

Without that clamping force, combustion pressure, coolant, and engine oil all have opportunities to escape where they shouldn’t.

Why the Two Work Together

Think of the cylinder head and head bolts as a team.

The cylinder head provides the sealing surface.

The head bolts provide the pressure that keeps everything sealed.

One can’t perform correctly without the other.

Many modern diesel engines use torque-to-yield head bolts, which are designed to stretch slightly during installation to achieve the proper clamping load.

Once they’ve been stretched, they may not return to their original specifications.

Reusing them can reduce the amount of clamping force applied to the new cylinder head.

That doesn’t automatically mean failure will occur—but it does increase the risk of problems that could require tearing the engine back apart.

What Happens If Only the Head Gets Replaced?

Imagine installing a brand-new cylinder head.

The sealing surfaces are perfect.

The gasket is new.

Everything is torqued correctly.

But several of the reused head bolts have already gone through years of heat cycles and thousands of hours of engine operation.

Over time, one bolt may no longer maintain the same amount of clamping force as the others.

The result could include:

  • Head gasket leaks
  • Coolant loss
  • Compression leaks
  • Oil contamination
  • Premature gasket failure

None of those problems are caused by the new cylinder head.

They’re caused by the system as a whole.

The Cost Difference Is Small Compared to the Labor

Head bolts are typically a small portion of the total repair cost.

Replacing a cylinder head, however, involves significant labor.

If a sealing issue develops later because worn fasteners were reused, much of that labor has to be repeated.

That’s why many experienced shops evaluate head bolts whenever they’re already replacing the cylinder head.

The goal isn’t simply replacing more parts.

It’s protecting the investment the customer has already made in the repair.

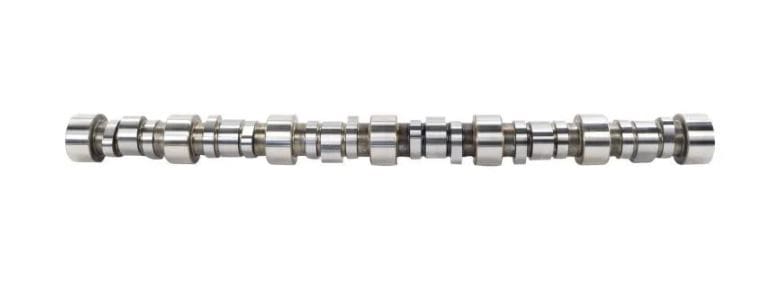
Crankshafts & Bearings and Why Small Clearances Matter

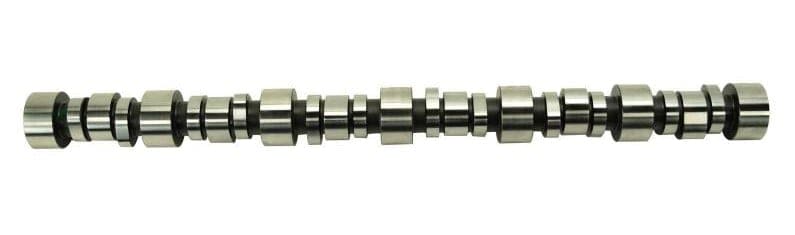
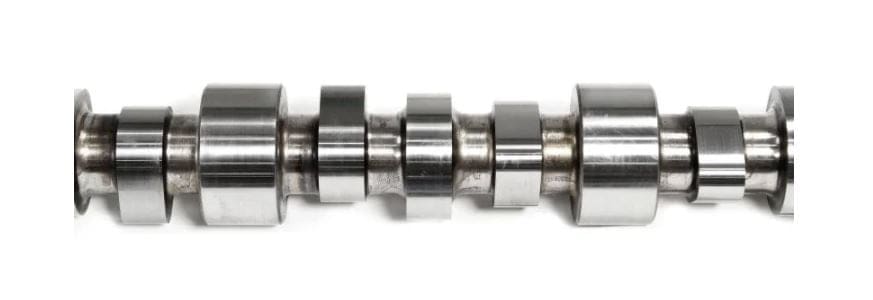
Replacing a crankshaft is one of the biggest repairs you’ll perform during an engine rebuild. It’s the backbone of the engine, converting the pistons’ up-and-down motion into the rotational power that keeps the truck moving.

But a crankshaft never works alone.

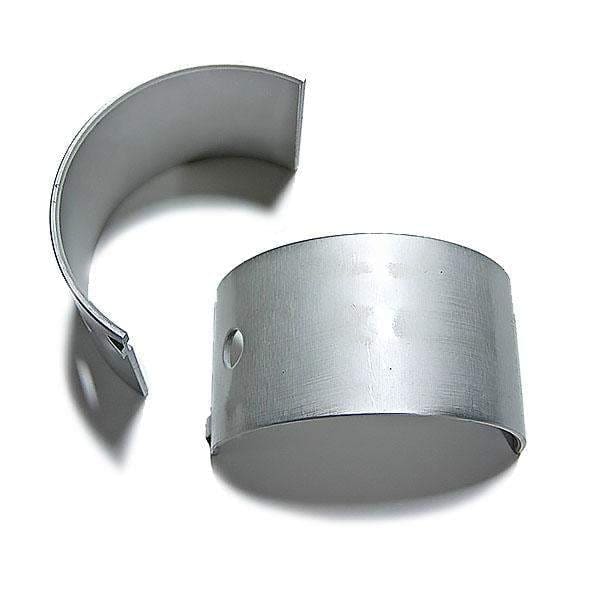
Every rotation depends on the main bearings supporting the crankshaft in the block and the connecting rod bearings allowing the rods to rotate smoothly around the crank journals. These bearings aren’t just pieces of metal—they’re precision wear surfaces that protect the crankshaft while maintaining the correct oil clearance.

That’s why experienced diesel shops rarely look at a crankshaft without also evaluating the bearings.

Bearings Are Designed to Wear

Unlike the crankshaft, bearings are designed to be sacrificial.

Over hundreds of thousands of miles, they gradually wear as they support the crankshaft through millions of rotations. They absorb tiny contaminants, heat cycles, and normal friction so the crankshaft doesn’t have to.

In many cases, worn bearings are the first indication that something inside the engine has changed.

You may find:

  • Normal wear after high mileage
  • Scoring from contaminated oil
  • Heat discoloration from lubrication issues
  • Uneven wear caused by excessive clearance

Each tells a story about what the engine has experienced.

Why Replacing Only One Component Can Be Risky

Imagine installing a new or reconditioned crankshaft but reusing bearings that already have thousands of hours of wear.

The crankshaft now has a perfectly machined surface running against bearings that have already lost some of their original tolerances.

Oil clearance may no longer be ideal.

On the other hand, installing brand-new bearings on a crankshaft with worn or damaged journals creates the opposite problem. The new bearings can’t compensate for an imperfect crankshaft surface, which can lead to premature bearing wear.

Neither combination allows the lubrication system to operate as intended.

Oil Clearance Is Everything

The crankshaft doesn’t actually ride directly on the bearings.

Instead, a thin film of pressurized engine oil separates the two metal surfaces.

That oil film is only possible when clearances remain within specification.

If clearances become too large, oil pressure can drop and lubrication suffers.

If they’re too tight, oil flow is restricted and excess heat builds quickly.

Replacing both the crankshaft and bearings together gives technicians the opportunity to restore those critical clearances back to factory specifications.

Saving Labor While the Engine Is Open

Accessing the crankshaft requires substantial disassembly.

By the time the crankshaft is ready for replacement, the bearings are already exposed.

Replacing them during the same repair often adds very little labor compared to performing the work later if bearing problems develop.

For many shops, it’s a practical decision based on reliability—not simply replacing additional parts.

When customers invest in a major engine rebuild, they’re expecting dependable service for years to come. Replacing companion components helps support that expectation.

Liner Kits and Piston Cooling Nozzles: Protecting the New Parts You Just Installed

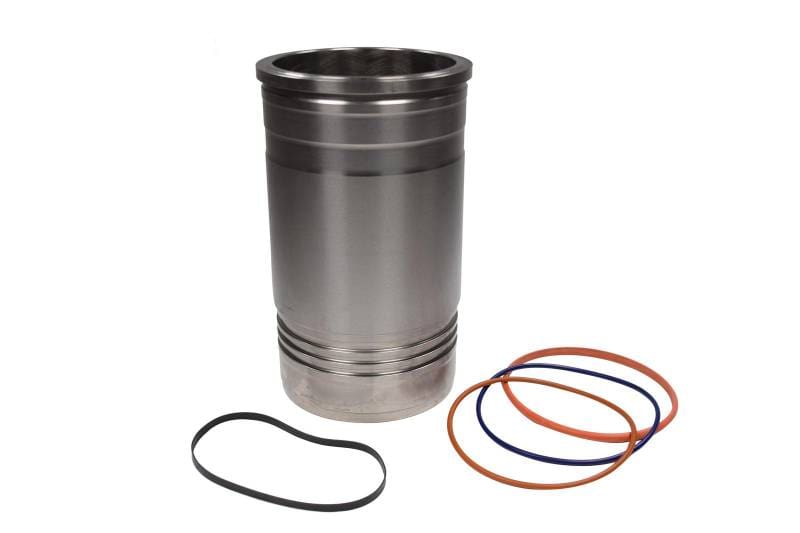
One of the most common components replaced during an in-frame overhaul is the cylinder liner kit.

A new liner kit gives the engine fresh cylinder walls, pistons, piston rings, and wrist pins—essentially providing a new foundation for combustion.

But one small component often gets overlooked.

The piston cooling nozzle.

Although it’s relatively inexpensive compared to the rest of the overhaul, it plays a critical role in protecting the new piston from excessive heat.

What Does a Piston Cooling Nozzle Do?

Every time combustion occurs, tremendous heat is generated inside the piston.

Without a way to remove that heat, piston temperatures can rise enough to reduce strength, increase wear, and shorten component life.

That’s where the piston cooling nozzle comes in.

Mounted beneath the piston, it sprays a precise stream of engine oil onto the underside of the piston crown.

That oil helps:

  • Carry heat away from the piston
  • Reduce thermal stress
  • Improve piston durability
  • Support proper lubrication

It’s a simple component with an important job.

Why Replacing Only the Liner Kit Isn’t Always Enough

Piston cooling nozzles spend years operating in hot engine oil.

Over time they can become:

  • Restricted by carbon deposits
  • Damaged during previous repairs
  • Partially clogged
  • Worn enough to affect spray pattern

The problem is that these issues often aren’t visible without close inspection.

A nozzle that isn’t delivering the correct amount of oil may still appear functional.

Now imagine installing a brand-new piston into that cylinder.

The piston is new.

The rings are new.

The liner is new.

But the cooling nozzle underneath is only delivering a fraction of the oil it should.

That new piston immediately begins operating under higher temperatures than intended.

An Inexpensive Part That Protects an Expensive Repair

Compared to the cost of an overhaul, piston cooling nozzles are relatively inexpensive.

They’re also easily accessible while the engine is apart.

Replacing them during a liner kit installation helps ensure the new pistons receive the cooling and lubrication they were designed for.

For many experienced diesel shops, it’s less about replacing another part and more about protecting the investment they’ve already made in the rebuild.

Cooling, Lubrication, and the Repairs That Can Save a Second Tear-Down

By the time you’ve completed a major engine repair, you’ve already invested a significant amount of labor.

The engine has been disassembled, inspected, repaired, and carefully reassembled. The last thing any repair shop wants is to see that same truck return a few weeks later because another component in the same system failed.

That’s why experienced technicians don’t just think about the failed part.

They think about the systems supporting that part.

Two of the best examples are the engine’s cooling system and lubrication system.

Water Pumps and Thermostats: Keeping a Rebuilt Engine at the Right Temperature

Every diesel engine depends on a properly functioning cooling system.

While the radiator often gets the most attention, two components do the majority of the work inside the engine:

One keeps coolant moving.

The other controls when and where it flows.

Together, they maintain the engine’s operating temperature.

Why They Depend on Each Other

The water pump circulates coolant throughout the engine, cylinder head, radiator, and other cooling passages.

The thermostat regulates that flow.

When the engine is cold, the thermostat stays closed to help it warm up efficiently.

As operating temperature increases, the thermostat opens, allowing coolant to circulate through the radiator.

Neither component can do its job without the other.

A perfectly good water pump can’t cool an engine if the thermostat never opens.

Likewise, a brand-new thermostat can’t prevent overheating if the water pump isn’t moving enough coolant.

They’re designed to work as one system.

Why Replacing Only One Can Lead to Problems

Imagine replacing a leaking water pump on an engine with several hundred thousand miles.

The repair goes smoothly.

Everything looks good.

A month later, the thermostat sticks closed.

Now the engine overheats—not because the water pump failed, but because another aging component in the same cooling system reached the end of its service life.

The opposite can happen as well.

A thermostat is replaced after an overheating complaint, but the original water pump has worn bearings or an eroded impeller that’s no longer moving coolant efficiently.

The overheating problem continues, leading everyone to believe the thermostat was defective.

In reality, both components were contributing to the issue.

Why Experienced Shops Often Replace Both

When coolant has already been drained and the cooling system is open, replacing both components is usually much easier than scheduling another repair later.

It’s also an opportunity to give the customer greater confidence in the repair.

Instead of fixing only today’s failure, the shop reduces the likelihood of another cooling system issue developing shortly afterward.

That doesn’t mean every water pump and thermostat must always be replaced together.

But it’s a conversation worth having whenever major cooling system work is already being performed.

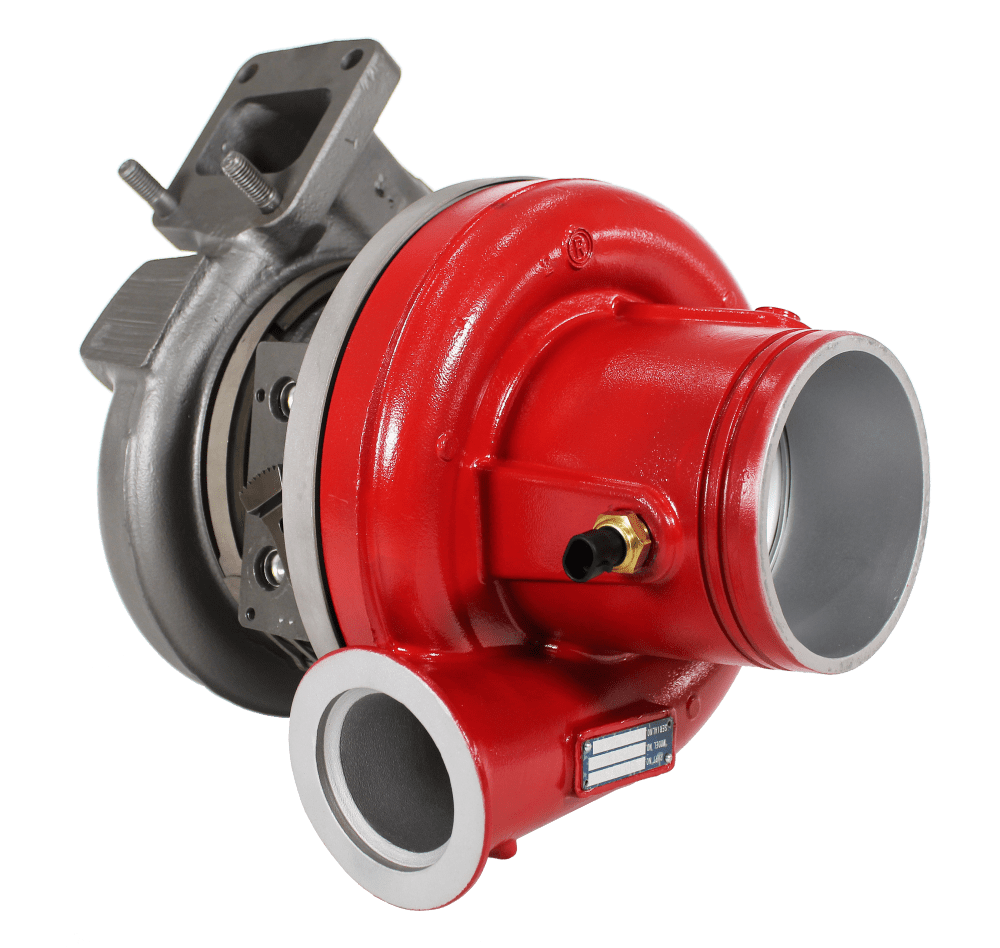
Turbochargers and Oil Supply Lines: Protecting Your New Turbo from Day One

Turbochargers are among the hardest-working components on a diesel engine.

They’re exposed to extreme exhaust temperatures while spinning at speeds that can exceed 100,000 RPM.

Despite all that stress, they depend on one thing more than anything else:

Clean, unrestricted engine oil.

Without it, even a brand-new turbocharger can fail surprisingly quickly.

The Oil Supply Line Does More Than Deliver Oil

The oil supply line may seem like a simple tube, but it has one critical responsibility.

It delivers a steady supply of clean, pressurized oil to the turbocharger bearings.

That oil performs several jobs at once:

  • Lubricates the bearings
  • Removes heat
  • Reduces friction
  • Helps support the turbo’s rotating assembly

Without consistent oil flow, bearing temperatures rise rapidly.

Once that happens, damage can occur in a very short amount of time.

The Hidden Risk of Reusing an Old Oil Line

Here’s something many technicians have experienced.

A customer installs a brand-new turbocharger.

Everything is primed correctly.

The installation follows the manufacturer’s recommendations.

Then, only a short time later, the new turbo begins showing signs of failure.

The natural assumption is that the replacement turbo was defective.

Sometimes that’s true.

But often, the real problem started long before the new turbo was installed.

Over time, oil supply lines can develop:

  • Carbon buildup
  • Sludge deposits
  • Internal restrictions
  • Contamination from a previous turbo failure

Even a partial restriction can reduce the amount of oil reaching the new turbo.

The turbo itself isn’t the problem.

The lubrication system is.

A Small Part That Protects a Major Investment

Compared to the cost of replacing a turbocharger—and the labor involved—an oil supply line is relatively inexpensive.

Replacing it during the same repair helps eliminate one of the most common causes of premature turbo failure.

For many repair shops, it’s simply good insurance.

If you’re already replacing one of the engine’s most expensive components, it makes sense to evaluate the part responsible for keeping it alive.

It All Comes Back to One Question

Experienced diesel shops don’t replace companion components because it’s a rule.

They do it because they’ve seen what happens when related parts with the same age, wear, and operating conditions are left behind.

Sometimes replacing one additional component can prevent hours of labor, another tow bill, and another unhappy customer.

Every repair is different.

Every engine tells its own story.

The key is knowing which companion components deserve a closer look while everything is already apart.

Good Repairs Fix the Problem. Great Repairs Help Prevent the Next One.

No two engine repairs are exactly alike.

The engine’s mileage, operating conditions, maintenance history, and reason for failure all play a role in determining what should—and shouldn’t—be replaced.

That’s why experienced diesel technicians don’t approach companion component replacement as a checklist.

They approach it as a conversation.

If an engine is already apart, it’s worth asking:

  • Which related components have experienced the same amount of wear?
  • Which parts are difficult to access once the engine is back together?
  • Which inexpensive components could protect a much larger investment?
  • Which replacements could save the customer another round of labor in six months?

Sometimes the answer is to replace both components.

Sometimes inspection shows the original part is still in excellent condition.

The important thing is that the decision is made intentionally—not simply because the failed component was the only part that received attention.

Throughout this article, we’ve looked at five examples of companion components that experienced diesel shops often evaluate together:

  • Cylinder Heads + Head Bolts – Maintaining proper clamping force helps protect the new head gasket and sealing surfaces.
  • Crankshafts + Main & Rod Bearings – Proper bearing clearances are critical to lubrication, oil pressure, and long-term engine reliability.
  • Liner Kits + Piston Cooling Nozzles – New pistons deserve proper oil cooling to help maximize service life.
  • Water Pumps + Thermostats – A healthy cooling system depends on both coolant circulation and temperature control.
  • Turbochargers + Oil Supply Lines – A new turbocharger is only as reliable as the lubrication system supporting it.

Notice the common theme.

None of these combinations are about replacing parts for the sake of replacing parts.

They’re about looking at the entire system instead of focusing on a single failed component.

Experienced repair shops understand that the most expensive repair isn’t always the one happening today.

Sometimes it’s the one that requires tearing the engine apart all over again because another worn component failed shortly afterward.

Taking the time to evaluate companion components while access is available can often help reduce repeat labor, minimize downtime, and give customers greater confidence in the repair they’re paying for.

It’s a philosophy built around long-term reliability—not unnecessary replacement.

So, How Many Are Already Standard Practice in Your Shop?

Every shop develops its own repair process over time.

Some companion component replacements become standard because technicians have seen the results firsthand.

Others depend on inspection findings, engine condition, customer budgets, and manufacturer recommendations.

There’s no one-size-fits-all answer.

But it’s worth asking yourself:

  • Which companion parts do we already replace together?
  • Which ones do we inspect every time?
  • Are there repairs we’ve had to repeat that could have been prevented with one additional component?

Sometimes asking those questions leads to more reliable repairs—and fewer trucks returning for the same job.

Need Help Choosing the Right Parts for Your Next Repair?

Whether you’re replacing a single component or planning a complete engine rebuild, choosing the right parts can make all the difference in the long-term reliability of the repair.

At Highway & Heavy Parts, we work with diesel repair shops, fleets, and owner-operators every day to help identify the parts that make sense for the job at hand. From complete overhaul kits to turbochargers, water pumps, cylinder heads, bearings, and more, our team is here to help you find the right solution.

Give us a call at 844-304-7688 to speak with one of our diesel parts specialists, or browse our selection online to find the components you need to keep your customers on the road.

Posted on

What Is the Real Cost of a Repair Shop Comeback? Why Repeat Repairs Hurt More Than Most Shops Realize

A truck leaves the shop after a major repair.

The customer is satisfied.

The invoice has been paid.

The technician cleans the bay, closes the work order, and moves on to the next job.

Everything looks like a successful repair.

Then, a few weeks later, the truck comes back with the same complaint.

Suddenly, what looked like a profitable job is consuming more technician time, another service bay, additional diagnostics, and customer support. The schedule changes, warranty paperwork begins, and another paying repair has to wait.

Most repair shops immediately think about the obvious costs of a comeback.

Replacement parts.

Warranty labor.

Freight charges.

Additional diagnostic time.

Those costs are easy to identify because they show up on invoices and repair orders.

But they’re usually only part of the story.

The most expensive repair in your shop may be the one that’s already been completed.

That may sound backwards, but think about what happens when a truck comes back.

Suddenly, the repair that looked profitable is consuming another service bay, more technician time, additional diagnostics, warranty paperwork, customer communication, and valuable scheduling space.

The most expensive part of a comeback often isn’t the repair itself. It’s everything happening around it—the lost productivity, the interrupted workflow, the customer who begins questioning the repair, and the revenue your shop never has the opportunity to earn because resources are tied up fixing the same truck twice.

No repair shop can eliminate comebacks entirely.

Modern diesel engines are complex, and some failures simply aren’t predictable.

The goal isn’t perfection.

The goal is understanding what a comeback truly costs your business and finding ways to reduce repeat repairs whenever possible.

Because when shops look beyond the replacement part and start evaluating the full impact of a comeback, they often uncover opportunities to improve profitability, customer satisfaction, and overall shop efficiency.

Need another perspective before replacing major diesel components? Our diesel parts specialists work with repair shops every day to discuss common failure patterns, review applications, and help identify the right replacement components for the job. Call Highway & Heavy Parts at 844-304-7688 to speak with our team.

What Most Shops Think a Comeback Costs

Ask ten service managers what a comeback costs, and you’ll probably hear similar answers.

“The replacement part.”

“A few hours of warranty labor.”

“Some additional diagnostic time.”

Those answers aren’t wrong.

They’re just incomplete.

The direct costs of a comeback are usually easy to measure because they appear on paperwork and financial reports.

Typical direct expenses include:

  • Warranty labor
  • Replacement parts
  • Additional diagnostic time
  • Freight or expedited shipping
  • Administrative processing
  • Customer communication
  • Warranty documentation

Every shop expects to encounter these costs from time to time.

But focusing only on those expenses can create a misleading picture of what a comeback actually costs.

The direct repair expense is simply the visible portion of a much larger problem.

Many of the biggest costs never appear on an invoice.

The Hidden Costs That Never Show Up on an Invoice

This is where comebacks become much more expensive than most people realize.

A repeat repair doesn’t just require another technician.

It pulls resources from nearly every part of the business.

While the truck is back in the shop, someone has to:

  • Answer customer phone calls.
  • Update the repair order.
  • Rearrange the service schedule.
  • Coordinate parts availability.
  • Process warranty paperwork.
  • Communicate with vendors.
  • Explain delays to other customers.

Meanwhile, technicians are spending valuable time revisiting yesterday’s repair instead of completing today’s work.

The service manager is adjusting schedules instead of planning the week ahead.

The parts department is sourcing components for work that was expected to be finished.

Individually, none of these tasks seem significant.

Together, they consume hours that could have been spent generating new revenue.

That’s why the true cost of a comeback is often much greater than the cost of replacing the failed component.

The direct repair costs are easy to see.

The hidden business costs are much harder to measure—but they’re often much larger.

The Bay Space Nobody Talks About

Every service bay represents earning potential.

Whether your shop has five bays or fifty, each one is designed to generate revenue.

When a comeback occupies one of those bays, something else has to wait.

Imagine a truck returns because a repair needs to be revisited.

The technician begins diagnosing the issue again.

The truck remains in the bay for most of the day.

Now ask yourself what isn’t happening during that time.

Another customer can’t use that bay.

A scheduled overhaul may need to be postponed.

Emergency work becomes harder to fit into the schedule.

Potential revenue is delayed—or lost entirely.

The comeback didn’t just cost the shop additional labor.

It prevented the shop from earning revenue somewhere else.

That’s an opportunity cost many repair shops never calculate.

Yet for busy shops operating near capacity, it can become one of the largest hidden costs of repeat repairs.

Technician Time Is One of Your Shop’s Most Valuable Assets

Experienced diesel technicians are difficult to find.

They’re also one of the biggest investments a repair shop makes.

Every productive hour they spend diagnosing, rebuilding, or repairing engines contributes directly to the shop’s success.

When that same technician has to revisit a repair that has already been completed, those hours are no longer generating new revenue.

Instead of helping another customer, they’re solving yesterday’s problem.

That doesn’t mean anyone made a mistake.

Diesel engines are complex systems.

Components often fail because of another underlying issue that wasn’t immediately apparent during the original repair.

Under pressure to get trucks back on the road, it’s possible to replace the failed component while the root cause remains hidden.

That’s why repeat repairs shouldn’t automatically be viewed as technician failures.

They should be viewed as opportunities to improve the diagnostic process.

The more consistently a shop identifies the complete cause of a failure—not just the failed component—the more likely it is to reduce unnecessary comebacks over time.

Every hour spent on a comeback is an hour that can’t be billed to another customer.

Over weeks, months, and years, those lost hours can have a meaningful impact on shop profitability.

Not sure whether you’ve identified the root cause or just replaced the failed component? Before ordering major diesel engine parts, talk with one of our diesel parts specialists. We’ll help you review your application, discuss common failure patterns, and identify the replacement components your repair may require. Call 844-304-7688 to speak with our team

Customer Confidence Is Easy to Lose and Difficult to Earn Back

The financial impact of a comeback may last a few hours or a few days.

The impact on customer confidence can last much longer.

Think about the situation from your customer’s perspective.

They trusted your shop with an expensive repair. They approved the estimate, planned around the downtime, and expected the truck to return to work.

Then it comes back with the same complaint.

Even if your shop handles the situation professionally, the customer naturally begins asking questions.

  • Was the original diagnosis correct?
  • Was everything inspected?
  • Is there another issue that hasn’t been found yet?
  • Should I expect another failure in a few weeks?

Those questions don’t necessarily mean the customer has lost confidence in your technicians.

They simply mean they’re looking for reassurance that the problem is being solved—not just managed.

For fleet managers, the concern is often operational.

A truck that’s back in the shop isn’t hauling freight, making deliveries, or generating revenue.

For owner-operators, the impact is even more personal.

Every extra day off the road can mean missed loads, delayed payments, and income that can’t be recovered.

That’s why communication matters just as much as the repair itself.

Customers understand that mechanical failures happen.

What they want to know is that your shop is committed to finding the complete solution and standing behind the work.

Shops that consistently communicate their findings, explain what caused the failure, and demonstrate a thorough diagnostic process often build stronger customer relationships—even when unexpected issues arise.

The Most Expensive Comebacks Usually Start with an Incomplete Diagnosis

Not every comeback happens because someone made a mistake.

Modern diesel engines are incredibly complex, and many component failures are the result of another issue somewhere else in the system.

When shops are busy and customers need trucks back on the road, it’s understandable to focus on replacing the failed part.

The challenge is that the failed part isn’t always the actual problem.

Sometimes it’s simply the first component to show the symptoms.

For example, imagine a turbocharger fails.

Replacing the turbocharger may get the truck running again.

But if contaminated oil, restricted oil flow, or another lubrication issue caused the original failure, the replacement turbocharger could experience the same problem.

The turbo wasn’t the root cause.

It was the result.

The same thing can happen with other common diesel repairs.

A blown head gasket may actually be the result of an overheating issue.

A failed injector may point to contaminated fuel or another fuel system problem.

A sensor may simply be reporting an abnormal operating condition rather than causing it.

The objective isn’t to inspect every component on every repair.

The objective is to ask one additional question before replacing parts:

“Why did this component fail?”

That simple shift in thinking often leads to better diagnostics, more complete repairs, and fewer repeat failures.

Diagnosing a difficult engine problem? Our diesel parts specialists work with repair shops every day to discuss common failure patterns, application-specific concerns, and replacement options. If you’d like another perspective before ordering parts, call Highway & Heavy Parts at 844-304-7688.

The Cost You Never See on the Financial Statement

Every business tracks revenue.

Most businesses track expenses.

Very few businesses measure opportunity cost.

Opportunity cost is the revenue your shop could have earned if those same technicians, service bays, and resources had been working on new customer repairs instead of repeat work.

Imagine your busiest technician spends six hours completing warranty work on a comeback.

That’s six hours that couldn’t be billed to another customer.

Now multiply that across several comebacks each month.

Suddenly, the cost isn’t just labor.

It’s the engine overhaul that couldn’t be scheduled.

It’s the emergency repair another customer took somewhere else.

It’s the fleet account that couldn’t be accommodated because the schedule was already full.

Those lost opportunities rarely appear on a financial report.

But they affect profitability just the same.

The direct repair costs are visible.

The hidden business costs are much harder to calculate.

And in many cases, they’re significantly larger.

The Best Shops Focus on Solving Problems—Not Just Replacing Parts

Successful repair shops understand that every failed component has a story.

Sometimes that story is straightforward.

A worn-out component reached the end of its service life.

Other times, it’s more complicated.

A lubrication issue damages multiple components.

Contaminated fuel creates failures throughout the fuel system.

An overheating event causes damage that extends well beyond the original complaint.

The goal isn’t to replace every related component “just in case.”

The goal is to understand what caused the failure in the first place.

That mindset changes the entire repair process.

Instead of simply replacing what’s broken, technicians begin asking better questions.

Service managers begin documenting inspections more thoroughly.

Customers gain confidence because they understand why repairs are being recommended.

Over time, that approach doesn’t just reduce comebacks.

It helps build a reputation for solving difficult diesel engine problems correctly the first time.

Whether you’re troubleshooting a repeat repair or planning a major engine overhaul, our team is here to help.

 We can discuss common failure causes, review your application, and help identify the replacement components your repair requires. Call 844-304-7688 to speak with a diesel parts specialist today.

Reducing Comebacks Starts Long Before the Truck Leaves the Shop

No repair shop can eliminate comebacks completely.

Unexpected failures happen.

Hidden damage exists.

Diesel engines are complex, and sometimes multiple issues appear at the same time.

The goal isn’t perfection.

The goal is reducing the likelihood of repeat repairs by building consistent processes that help technicians identify the complete problem—not just the failed component.

The shops that experience fewer comebacks typically don’t have better luck.

They have better habits.

Focus on the Root Cause

The simplest question is often the most important one:

Why did this component fail?

Replacing the failed part solves today’s problem.

Understanding why it failed helps prevent tomorrow’s.

Whether it’s lubrication, contamination, overheating, or another contributing factor, identifying the underlying cause often leads to a more complete repair.

Major component failures rarely happen in isolation.

When one part fails, take the opportunity to evaluate the systems connected to it.

For example:

  • A turbocharger failure may warrant an inspection of the lubrication system.
  • An injector failure may justify checking for fuel contamination or filtration issues.
  • An overheating event may call for a complete cooling system evaluation.

Looking beyond the failed component doesn’t mean replacing unnecessary parts.

It means making sure another issue isn’t waiting to cause the same complaint again.

Slow Down Before Closing the Repair

In a busy shop, it’s tempting to move quickly once the truck is running again.

But before handing the keys back to the customer, ask one more question:

“Are we confident we’ve solved the problem?”

A few extra minutes spent reviewing the repair can save hours—or even days—of additional work later.

Sometimes that final inspection reveals something that would have otherwise become another comeback.

Document What You Found

Good documentation benefits everyone.

It helps technicians if the vehicle returns months later.

It gives service advisors confidence when discussing repairs with customers.

And it demonstrates that the shop performed a thorough inspection—not just a parts replacement.

Customers appreciate transparency, especially on major diesel repairs.

Explaining what failed, what caused it, and what was inspected builds confidence in both the repair and your shop.

Invest in Continuous Improvement

Every comeback contains information.

Instead of asking, “Who made the mistake?”

Ask:

  • What can we learn?
  • Could our inspection process improve?
  • Is there a recurring failure pattern?
  • Do technicians need additional training or resources?

Shops that regularly review repeat repairs often uncover small process improvements that produce significant long-term results.

Reducing comebacks isn’t about eliminating every unexpected failure.

It’s about continually improving the way repairs are diagnosed, inspected, and verified.

Questions about a difficult diesel engine repair? Our diesel parts specialists are available to discuss common failure patterns, review your application, and help identify the right replacement components before the truck goes back on the road. Call Highway & Heavy Parts at 844-304-7688.

Questions to Ask Before Closing a Repair

Before a truck leaves the shop, consider asking these questions one final time.

A simple checklist can encourage a root-cause mindset and help reduce unnecessary repeat repairs.

Repair Completion Checklist

✔ What caused the original failure?

✔ Have all related systems been inspected?

✔ Could contamination still be present?

✔ Was overheating, lubrication, or fuel quality a contributing factor?

✔ Has the repair been verified under operating conditions?

✔ Could another component create the same complaint later?

✔ Have the inspection findings been documented?

✔ Has the customer been informed about what caused the failure and what was repaired?

These questions won’t prevent every comeback.

But they can help your team pause long enough to determine whether the repair addressed the complete problem—or simply the failed component.

That’s a small habit that can have a big impact over time.

The Most Expensive Repair May Be the One That’s Already Been Completed

When most people think about repair costs, they focus on the invoice.

Parts.

Labor.

Freight.

Warranty.

Those costs are real.

But they’re also the easiest ones to measure.

The hidden costs are much more difficult to see.

Every comeback has the potential to affect:

  • Technician productivity
  • Bay utilization
  • Shop scheduling
  • Administrative workload
  • Customer confidence
  • Future business opportunities

Those costs rarely appear on a financial report.

Yet they’re often what determines whether a repair was truly profitable.

The next time a truck comes back through your doors, don’t just ask:

“How much did this repair cost?”

Ask:

“What did this comeback cost our business?”

The answer usually extends far beyond the replacement part.

Understanding that difference is what separates shops that simply complete repairs from shops that continually improve them.

Good Repairs Don’t Start With Parts.

Whether you’re diagnosing a repeat repair or preparing for your next major diesel engine job, our team is here to help. Because helping you make the right repair decision is just as important as supplying the replacement parts.

Call an ASE Certified Technician
844-304-7688

Or Request a Quote Online

Posted on

What Kind of Diesel Owner Are You? Why the Best Repair Isn’t the Same for Everyone

You and another diesel truck owner experience the exact same engine failure.

The diagnosis is nearly identical. Both engines need major repairs, and both estimates come back with similar price tags.

Yet the two of you make completely different repair decisions.

One owner chooses a complete diesel engine rebuild because they plan to keep the truck for another 500,000 miles. They want confidence that the engine will continue delivering reliable service for years to come.

The other owner replaces only what’s necessary to get the truck back on the road. They’re planning to sell the truck within the next year, so investing in a more extensive repair doesn’t align with their goals.

So which owner made the right decision?

The answer is simple.

Both of them did.

One of the biggest misconceptions about diesel truck repair is that there’s one “best” way to fix every engine problem. In reality, the best repair isn’t always the least expensive option, nor is it always the most comprehensive.

The right repair depends on something much more important than the engine itself.

It depends on how you use your truck.

How long you plan to own it, how many miles you drive each year, how much downtime you can afford, your budget, and your long-term goals should all influence the repair strategy you choose.

That’s why experienced diesel technicians don’t just ask what’s broken.

They ask how the truck is used.

Understanding your ownership style can help you make smarter repair decisions, spend your money where it provides the most value, and avoid paying for repairs that don’t fit your situation.

If you’re already facing a major repair and want to talk through your options, our Diesel Parts Specialists are just a phone call away at 844-304-7688

The Short Answer

There isn’t one repair strategy that’s right for every diesel owner.

The best diesel engine repair depends on how you use your truck, how long you plan to keep it, how much downtime you can tolerate, and what you expect from the repair after it’s complete.

Two trucks can experience the exact same failure and require completely different repair strategies—and both decisions can be the right ones.

Most diesel owners fall into one of four common ownership styles. Understanding which one best describes you can help narrow the repair strategy that makes the most sense.

The key is choosing a repair that supports your goals, not someone else’s. Not sure which repair strategy makes the most sense for your truck? Our Diesel Parts Specialists are happy to talk through your options. Give us a call at 844-304-7688. 

Owner TypePrimary GoalTypical Repair Stratrgy
Long-Haul OwnerMaximum engine lifeComprehensive repair using quality components
Working OwnerMinimize downtimeBalance reliability with turnaround time
Fleet OperatorLower operating costsPlanned, standardized repairs
Heavy-Duty OwnerReliability under demanding conditionsComponents matched to the application

Some Owners Plan for the Next 500,000 Miles

For some diesel owners, replacing the truck isn’t even part of the conversation.

Maybe you’ve owned it for years. You know every maintenance record, every repair that’s been completed, and exactly how the truck has been treated. You trust the truck because you’ve invested in it, and you plan to keep investing in it.

If that sounds familiar, you’re probably what we’d call a long-haul owner.

Your priorities likely include:

  • Reliability
  • Long service life
  • Preventing future failures
  • Reducing unexpected downtime
  • Protecting your long-term investment

For long-haul owners, a major repair is rarely viewed as simply fixing today’s problem.

It’s an opportunity to extend the life of the engine.

Instead of replacing only the failed component, many choose to address related wear items while the engine is already apart. If one cylinder has experienced significant wear, the remaining cylinders may not be far behind.

If contamination damaged one bearing, identifying where that contamination originated can help prevent another failure down the road.

This approach often means investing more upfront.

But for someone planning to drive another several hundred thousand miles, preventing repeat repairs is often worth the additional cost.

Component selection matters, too.

Choosing quality replacement parts that meet the demands of the application can contribute to a more dependable repair when paired with proper installation and ongoing diesel truck maintenance.

The goal isn’t simply getting the truck running again.

It’s getting years of dependable service from the repair.

When Every Day Off the Road Costs You Money

Not every diesel owner has the luxury of planning years into the future.

For many, the truck is their livelihood.

Every day it sits in the shop is another day it isn’t hauling freight, making deliveries, pulling equipment, or generating revenue.

If your truck earns your paycheck, you’re likely a working owner.

Your priorities probably include:

  • Fast turnaround
  • Dependable performance
  • Keeping repair costs under control
  • Minimizing downtime

When your truck is your business, the cheapest repair isn’t always the least expensive decision.

Saving a few hundred dollars on parts doesn’t provide much value if the truck returns to the shop a month later with another failure.

On the other hand, replacing every possible wear component may not make financial sense if several parts still have plenty of service life remaining.

Working owners often need to find a balance.

The repair should restore reliability while getting the truck back to work as efficiently as possible.

That balance looks different for every operation. A local contractor driving a few hundred miles each week may have different priorities than an owner-operator crossing several states every trip.

Neither approach is wrong.

The best repair is the one that keeps the truck producing income while avoiding unnecessary costs.

If you’re trying to balance downtime, budget, and long-term reliability, our Diesel Parts Specialists can help you evaluate your options. Call 844-304-7688 to talk through your repair strategy. 

Managing One Truck Is Different Than Managing Twenty

A fleet manager looks at diesel engine repairs through an entirely different lens.

When you’re responsible for multiple trucks, every maintenance decision affects scheduling, productivity, operating costs, and customer commitments.

Instead of asking, “What’s the least expensive repair today?” fleet operators often ask, “What’s the best decision for the fleet over the next several years?”

If you manage multiple trucks, your priorities likely include:

  • Maximizing uptime
  • Controlling cost per mile
  • Creating predictable maintenance budgets
  • Standardizing repairs
  • Reducing unexpected breakdowns

Fleet operators understand that consistency has value.

Using standardized repair procedures and quality replacement components across similar engines can simplify maintenance planning, improve recordkeeping, and help technicians identify recurring issues before they become major failures.

Preventive maintenance also plays a much larger role.

Rather than waiting for catastrophic failures, many fleets schedule inspections and planned component replacements based on mileage, engine hours, or historical wear patterns.

A repair that lasts longer and reduces future downtime may provide greater value than one with the lowest upfront price.

For fleet operators, diesel repair costs aren’t measured by the invoice alone.

They’re measured by the total cost of keeping trucks on the road. 

When Your Truck Works Harder Than Most

Not every diesel truck operates under average conditions.

Some spend their lives pulling maximum loads through mountain grades. Others haul heavy equipment, work construction sites, power agricultural operations, or spend long hours in severe-duty applications where the engine is constantly under load.

When your truck works harder than most, your repair strategy should reflect that.

If this sounds like your operation, your priorities probably include:

  • Maximum durability
  • Reliable performance under heavy loads
  • Strong, high-quality components
  • Reducing the risk of unexpected failures

Operating conditions have a direct impact on engine wear. Heavy hauling, high engine hours, frequent idling, extreme temperatures, and demanding workloads all place additional stress on critical engine components.

Because of this, repairing only the failed part may not always be the best long-term decision.

If the engine is already disassembled, it often makes sense to inspect related components for wear and address potential issues before they become future failures. While that may increase the upfront repair cost, it can reduce the likelihood of another breakdown when the truck is needed most.

Component selection also becomes increasingly important.

Choosing replacement parts designed to withstand demanding operating conditions can improve long-term durability and help the engine perform more consistently under heavy loads. Whether it’s cylinder kits, pistons, bearings, cylinder heads, or other critical components, matching the parts to the truck’s application is just as important as repairing the original failure.

For owners operating in demanding environments, reliability isn’t simply a convenience.

It’s what keeps jobs on schedule, customers satisfied, and equipment working when it’s needed most.

Questions to Ask Before Approving a Major Repair

Before deciding on a diesel truck repair, take a step back and think beyond today’s estimate.

The repair that’s right for someone else may not be the right repair for you.

Asking a few simple questions can help you evaluate your options and choose a repair strategy that aligns with your long-term goals.

Ask Yourself:

How long do I plan to keep this truck?

A truck you plan to own for several more years may justify a more comprehensive repair than one you intend to sell soon.

How many miles or hours do I put on it each year?

Higher annual usage typically places more value on long-term reliability and durability.

How much downtime can I realistically afford?

For some owners, every day in the shop means lost revenue. Others may have more flexibility to complete a more extensive repair.

Is this truck generating income every day it’s on the road?

Revenue-producing equipment often requires a different repair strategy than recreational or backup vehicles.

Am I planning to sell or trade the truck in the near future?

Your ownership timeline can significantly influence which repair makes the most financial sense.

Is my priority the lowest upfront cost or the longest possible service life?

There’s nothing wrong with either approach—as long as it aligns with your goals.

Has the root cause of the failure been identified?

Replacing the failed component may solve today’s problem. Identifying why it failed can help prevent tomorrow’s.

Taking a few minutes to answer these questions can provide valuable perspective before making a major repair decision.

If you’re still unsure which repair approach is right for your situation, give our Diesel Parts Specialists a call at 844-304-7688. We’ll help you evaluate your options and answer any questions before you make a decision. 

There Isn’t One Right Repair—There’s the Right Repair for You

Let’s go back to the two truck owners from the beginning.

Both experienced the same engine failure.

Both received similar repair estimates.

Yet both made different decisions.

One invested in a complete diesel overhaul because they planned to keep the truck for years. The other completed only the repairs necessary to support their short-term plans before selling the truck.

Neither owner made the wrong choice.

They simply had different goals.

That’s an important distinction.

The “best” repair isn’t determined solely by the engine. It’s determined by how you use your truck, what you expect from it, and where you want it to take you next.

Whether you’re an owner-operator trying to minimize downtime, a fleet manager focused on reducing operating costs, or someone planning to keep a trusted truck on the road for another half-million miles, your repair strategy should reflect those priorities.

The most successful repairs don’t just fix the engine.

They support the way you own and operate your truck.

Need Help Deciding Which Repair Strategy Makes Sense?

Major engine repairs aren’t one-size-fits-all, and choosing the right path can feel overwhelming.

Our Diesel Parts Specialists are here to help.

We’ll work with you to understand how you use your truck, discuss your long-term goals, help identify the root cause of the failure, and recommend a repair solution that fits your application—not just your engine.

Whether you’re planning a complete diesel engine rebuild, replacing individual components, or simply comparing your options, our Diesel Parts Specialists are here to help.

Call us today at 844-304-7688 to discuss your repair and find the solution that’s right for your truck.

Posted on

How to Diagnose, Remove, and Install a Diesel Turbocharger

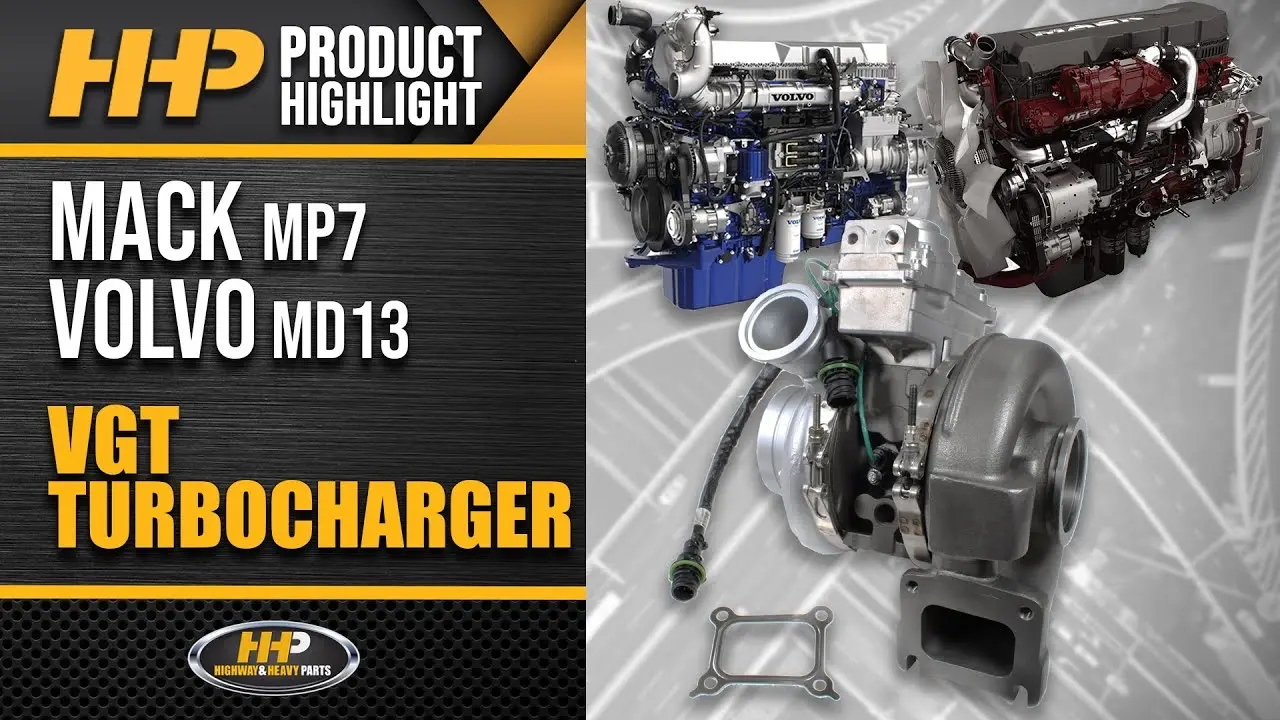
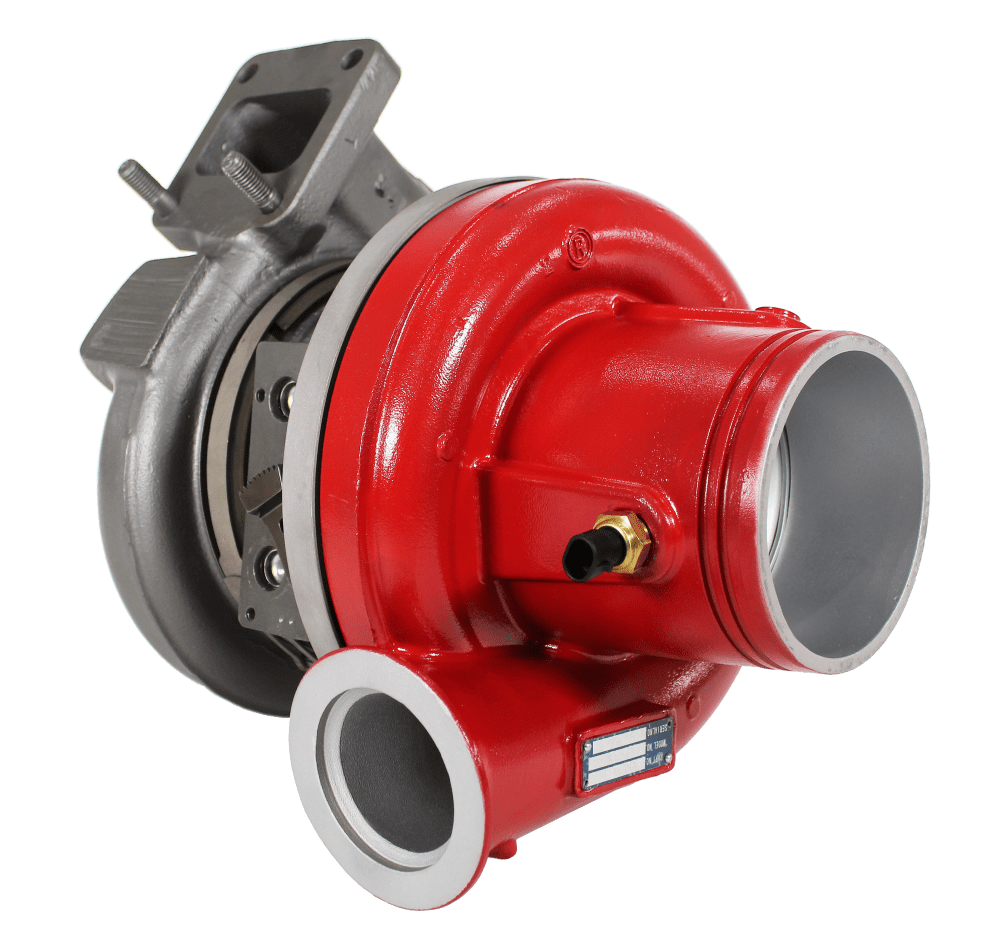
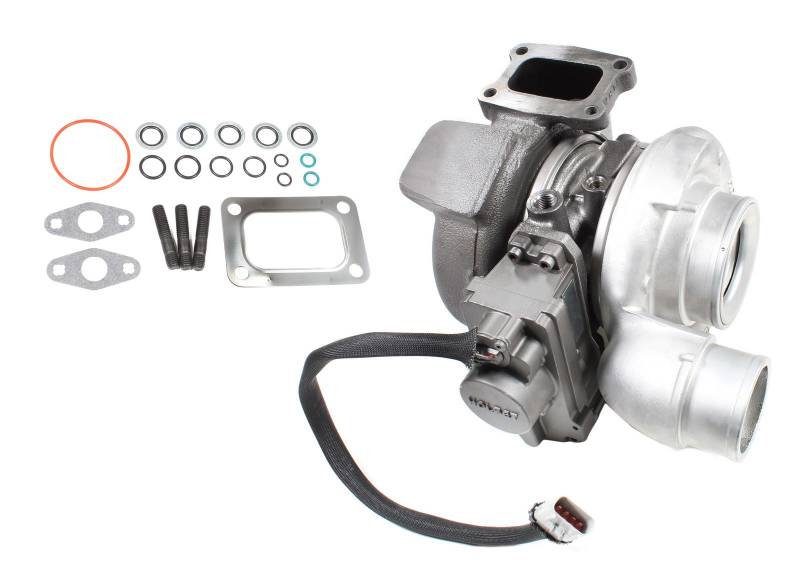
Detroit Diesel Turbocharger

A diesel turbocharger is one of the hardest-working components on a modern diesel engine. By forcing more air into the combustion chamber, the turbocharger improves power, fuel efficiency, and overall engine performance.

However, when diesel turbocharger issues develop, they can quickly lead to power loss, excessive smoke, poor fuel economy, and even major engine damage.

Whether you’re troubleshooting diesel turbocharger problems or preparing for a full replacement, proper preparation and installation procedures are critical. A bad diesel turbocharger often fails because of lubrication issues, contamination, excessive heat, or installation errors.

Before beginning any replacement, disconnect the batteries, drain the engine coolant and oil as required by your specific application, and replace the engine oil and filter. Starting a new turbocharger with contaminated oil can significantly shorten its lifespan.

This guide covers how to diagnose a diesel turbocharger, how to remove a diesel turbocharger, and how to install a diesel turbocharger correctly.

Tools Needed for Diesel Turbocharger Diagnosis and Replacement

Depending on the engine platform, you may need some or all of the following:

  • Complete socket and wrench set
  • Torque wrench
  • Screwdrivers and picks
  • Pry bars
  • Line wrenches
  • Inspection mirror
  • Flashlight
  • Shop rags
  • Oil drain pan
  • Coolant drain pan
  • Penetrating lubricant
  • Gasket scraper
  • Brake cleaner or approved solvent
  • New turbocharger mounting hardware (if required)
  • New gaskets and seals
  • Engine oil and filter
  • Safety glasses and gloves

How to Diagnose a Bad Diesel Turbocharger

Before replacing a turbocharger, it’s important to confirm that the turbo itself is the source of the problem. Many diesel turbocharger problems can actually be caused by airflow restrictions, oil supply issues, or failed sensors. Diagnostic Tests for a Leaking Diesel Fuel Injector Sleeve

Need Help Diagnosing a Bad Diesel Turbocharger?

Check for Shaft Play

One of the first steps in diagnosing a bad diesel turbocharger is inspecting the turbo shaft.

Remove the intake tube and carefully inspect the compressor wheel. Gently move the shaft side-to-side and in-and-out.

Some slight side-to-side movement is normal because the turbo rides on an oil film during operation. However, excessive radial play, contact between the compressor wheel and housing, or noticeable axial movement typically indicates bearing wear.

Signs of excessive shaft wear include:

  • Compressor wheel contacting the housing
  • Metallic scraping noises
  • Oil contamination in intake piping
  • Reduced boost pressure

If there’s significant shaft play, a turbocharger replacement is usually necessary.

Inspect the Actuator (Variable Geometry Turbos)

Variable Geometry Turbochargers (VGTs) are common on modern diesel engines and are frequent sources of diesel turbocharger problems.

The variable vanes inside the turbo can become stuck due to soot buildup, while the actuator itself may fail electronically or mechanically.

Inspect for:

  • Actuator fault codes
  • Sticking vane operation
  • Corrosion or damage to linkage
  • Unresponsive electronic actuators

A failed actuator may cause:

  • Low power
  • Overboost conditions
  • Check engine lights
  • Erratic boost pressure

Always verify whether the actuator can be serviced separately before replacing the entire turbocharger assembly.

Check for Failed Turbo Seals and Oil Leaks

A bad diesel turbocharger may develop leaking seals that allow oil to enter either the intake or exhaust system.

Inspect for:

  • Oil inside charge air piping
  • Oil accumulation in the intercooler
  • Blue exhaust smoke
  • Oil residue near turbine outlets

It’s important to determine whether the oil originates from the turbocharger or excessive crankcase pressure. A plugged crankcase ventilation system can sometimes mimic turbo seal failure.

Check for Airflow Restrictions

Airflow restrictions can also create symptoms that resemble turbocharger failure.

Inspect the following:

  • Air filters
  • Intake tubing
  • Charge air cooler (CAC)
  • Intercooler connections
  • Boost hoses
  • Exhaust restrictions

Look for:

  • Collapsed hoses
  • Plugged air filters
  • Leaking charge air connections
  • Damaged CAC cores

Many apparent diesel turbocharger problems can ultimately be traced to boost leaks or intake restrictions rather than the turbo itself.

How to Remove a Diesel Turbocharger

Once you’ve confirmed replacement is necessary, follow these steps for safe removal.

Step 1: Prepare the Engine

Before you start the removal process, follow these steps:

  • Allow the engine to cool completely
  • Disconnect all batteries
  • Drain coolant if required
  • Drain engine oil if required
  • Follow manufacturer safety procedures

Turbochargers operate at extremely high temperatures and can remain hot long after shutdown.

Step 2: Clear Access Around the Turbo

Engine compartments can be crowded, particularly on medium-duty and heavy-duty applications.

Remove components as necessary, including:

  • Intake tubing
  • Charge air piping
  • Air filter housings
  • Heat shields
  • Engine covers

It’s a good idea to take clear photos before you disassemble anything. This gives you a solid reference for reassembly later.

Step 3: Disconnect Oil and Coolant Lines

Carefully disconnect:

  • Oil supply lines
  • Oil drain tubes
  • Coolant lines (if equipped)

Inspect lines for:

  • Carbon buildup
  • Restrictions
  • Cracks
  • Corrosion

Many turbo failures stem from contaminated or restricted oil supply lines, making careful inspection critical during replacement.

Step 4: Remove the Downpipe and Up-Pipe

Next, disconnect the exhaust connections.

This typically includes:

  • Exhaust downpipe
  • Exhaust up-pipe
  • V-band clamps
  • Mounting brackets

Apply penetrating lubricant to stubborn fasteners and work carefully to avoid damaging mounting hardware.

Step 5: Remove and Lift Out the Turbocharger

After disconnecting all lines and fasteners, remove the turbocharger mounting hardware.

Carefully lift the turbocharger out of the engine.

Be aware that many diesel turbochargers are significantly heavier than they appear. Larger heavy-duty applications may require a second person or lifting equipment to safely remove the assembly.

How to Install a Diesel Turbocharger

Knowing how to install a diesel turbocharger properly is just as important as knowing how to remove one. Improper installation is one of the leading causes of premature turbocharger failure.

Step 1: Clean the Mounting Surface

Before installing the new turbocharger:

  • Remove all old gasket material
  • Clean all surfaces thoroughly
  • Inspect mounting flanges for cracks or warping

Any debris left behind can cause exhaust leaks, boost leaks, or improper mounting.

Step 2: Inspect and Clean Fluid Lines

Never assume the existing oil and coolant lines are ready for reuse.

Inspect them for:

  • Carbon deposits
  • Restrictions
  • Kinks
  • Internal contamination

Replace damaged lines whenever necessary. A restricted oil supply line can ruin a new turbocharger within minutes of startup.

Step 3: Pre-Lube the Turbocharger

One of the most important steps in replacing a diesel turbocharger is pre-lubrication.

Before installation:

* Pour clean engine oil into the oil inlet

* Slowly rotate the shaft by hand

* Ensure bearings receive initial lubrication

These steps help prevent dry startup damage.

Step 4: Install Using New Gaskets and Proper Torque Specifications

Position the turbocharger and install it using:

* Brand-new gaskets

* New seals

* New mounting hardware when specified

Torque all fasteners according to manufacturer specifications. Avoid reusing damaged gaskets or overtightening fasteners, as both can create future reliability issues.

Step 5: Reassemble and Prime the System

Reconnect the following:

  • Oil supply and drain lines
  • Coolant lines
  • Intake piping
  • Charge air piping
  • Exhaust connections
  • Sensors and electrical connectors

Refill engine fluids and install a new oil filter. Before starting the engine, prime the lubrication system according to manufacturer procedures. This may involve disabling fuel delivery and cranking the engine until oil pressure develops.

Step 6: Perform Initial Startup

Start the engine and allow it to idle.

During startup, you should verify the oil pressure, check for leaks, and listen for unusual noises. As the engine continues to run, monitor the boost system connections and verify actuator operation on a VGT system.

Allow the engine to idle for several minutes before applying load. After a brief test drive, perform a final inspection to ensure all systems are operating properly.

The Bottom Line

Understanding how to diagnose a diesel turbocharger, how to remove a diesel turbocharger, and how to install a diesel turbocharger correctly can help prevent repeat failures and costly downtime. From checking shaft play and actuator operation to properly pre-lubing and torquing the new unit, every step plays a role in the long-term reliability of the replacement.

If you’re looking for a high-quality replacement turbocharger backed by diesel experts, Highway and Heavy Parts offers premium diesel engine components, knowledgeable technical support, and fast shipping to help get your equipment back to work. Contact Highway and Heavy Parts today to find the right turbocharger and replacement parts for your application.

FAQs: How to Diagnose and Replace a Diesel Turbocharger

What are the most common signs of a bad diesel turbocharger?

The most common signs of a bad diesel turbocharger include excessive shaft play, oil contamination in the intake piping, blue exhaust smoke, reduced boost pressure, metallic scraping noises, low power, and check engine lights. On variable geometry turbocharger (VGT) systems, erratic boost pressure and overboost conditions are also common warning signs.

How do I check for shaft play on a diesel turbocharger?

To check for shaft play, remove the intake tube and inspect the compressor wheel. Gently move the shaft side to side and in and out. Some slight side-to-side movement is normal since the turbo rides on an oil film during operation. However, excessive radial play, contact between the compressor wheel and housing, or noticeable axial movement typically indicate bearing wear and the need for a turbocharger replacement.

What causes a diesel turbocharger to fail?

Diesel turbocharger failures are most commonly caused by lubrication issues, oil contamination, excessive heat, airflow restrictions, and installation errors. A restricted or contaminated oil supply line is one of the leading causes of premature turbocharger failure and can ruin a new turbo within minutes of startup.

Can airflow restrictions cause symptoms that look like turbocharger failure?

Yes. Collapsed hoses, plugged air filters, leaking charge air connections, and damaged charge air cooler (CAC) cores can all produce symptoms that closely resemble diesel turbocharger problems. Before replacing a turbocharger, always inspect the air filter, intake tubing, intercooler connections, boost hoses, and exhaust system for restrictions or leaks.

What is a Variable Geometry Turbocharger (VGT) and how does it fail?\

Variable Geometry Turbocharger (VGT) uses adjustable vanes inside the turbine housing to optimize airflow across different engine speeds and load conditions. VGTs commonly fail due to soot buildup causing the vanes to stick, electronic actuator faults, or corrosion and damage to the actuator linkage. Always check for fault codes and inspect actuator operation before replacing the entire turbocharger assembly, since the actuator can sometimes be serviced separately.

How do I prepare for a diesel turbocharger replacement?

Before beginning a diesel turbocharger replacement, disconnect the batteries, allow the engine to cool completely, and drain the engine coolant and oil as required by your specific application. You should also replace the engine oil and filter before startup, since starting a new turbocharger with contaminated oil can significantly shorten its lifespan.

Why is pre-lubrication important when installing a diesel turbocharger?

Pre-lubrication is one of the most critical steps when installing a diesel turbocharger. Before installation, you should pour clean engine oil into the oil inlet and slowly rotate the shaft by hand to ensure the bearings receive initial lubrication. Skipping this step can cause dry startup damage that ruins the new turbocharger before it ever reaches operating conditions.

What should I inspect on oil and coolant lines during a turbocharger replacement?

During a diesel turbocharger replacement, inspect all oil supply lines, oil drain tubes, and coolant lines for carbon buildup, restrictions, cracks, kinks, and internal contamination. Restricted or damaged oil supply lines are a leading cause of turbocharger failure, so any lines that are not in good condition should be replaced before installing the new turbo.

What are the proper steps to install a diesel turbocharger correctly?

To install a diesel turbocharger correctly, clean all mounting surfaces and remove old gasket material, inspect and clean all fluid lines, pre-lube the turbocharger before installation, install the turbo using new gaskets and seals, and torque all fasteners to manufacturer specifications. After reassembly, prime the lubrication system before starting the engine, then idle the engine and check for leaks, unusual noises, and proper oil pressure before applying any load.

How do I perform an initial startup after installing a new diesel turbocharger?

After installing a new diesel turbocharger, refill all engine fluids and install a new oil filter. Prime the lubrication system by disabling fuel delivery and cranking the engine until oil pressure develops. Once the engine starts, allow it to idle and verify oil pressure, check for leaks, and listen for unusual noises. Monitor boost system connections and verify actuator operation on VGT systems. Let the engine idle for several minutes before applying any load, then perform a final inspection after a brief test drive to confirm all systems are operating properly.

Posted on

Why is My Diesel Fuel Injector Sleeve Leaking? Diagnose and Repair!

Diesel Fuel Injector Sleeve

The purpose of the fuel injector sleeve in diesel engines is to provide a protective barrier between the fuel components and the coolant. The sleeve is sometimes also called an injector cup. In many diesel engines, the injector passes through the cylinder head into the combustion chamber, and the surrounding area of the head may contain coolant passages.

Fuel injector sleeve leaks can be a serious problem. It allows fuel dilution and coolant contamination, both of which can cause engine damage. Many heavy-duty diesel engines have fuel injector sleeves.

Function of a Fuel Injector Sleeve

The function of a fuel injector sleeve is to separate coolant passages from the injector bore. It also provides a mounting surface for the injectors. The precise bore and sealing surface of the sleeve allow for proper injector alignment, which ensures accurate fuel spray into the injection chamber. 

A typical fuel injector sleeve is constructed from brass, copper alloy, or steel. The sleeves are sealed with O-rings, sealant, or a press-fit. The sleeve acts as a replaceable wear surface. Instead of the fuel injector contacting the cylinder head directly, it sits inside the sleeve. If damage occurs, the sleeve can usually be replaced instead of the entire cylinder head.

 Common Symptoms of a Leaking Injector Sleeve

There are several common symptoms of a leaking fuel injector sleeve. However, the most common one is found in the coolant system. You might notice a fuel smell in the coolant or see diesel floating in the coolant reservoir. Coolant is also sometimes pushed out of the overflow bottle.

Symptoms may appear in the fuel system as well. This can include loss of fuel pressure, air in the fuel system, or an extended crank time. Performance symptoms include misfires or rough idle, white exhaust smoke, and reduced fuel economy.

In some cases, these drivability and performance issues may point to injector wear beyond the sleeve itself. Hard starts, excessive smoke, rough operation, or fuel delivery problems can all be signs that the injectors are beginning to fail.

If you’re running a Caterpillar C15 ACERT engine, understanding when injector replacement becomes necessary can help prevent additional engine damage and downtime. Read our guide on When To Replace Fuel Injectors in a Caterpillar C15 ACERT to learn the most common warning signs and what to check before failure gets worse.

 Diagnostic Tests for a Leaking Diesel Fuel Injector Sleeve

Need Help Diagnosing a Leaky Diesel Fuel Injector Sleeve?

There are a few diagnostic steps you can take for a leaking diesel fuel injector sleeve. The first is a visual inspection. Check the coolant reservoir for fuel contamination, and inspect the injectors and cylinder head area for residue and wetness.

The next step to take is a cooling system pressure test. Pressurize the system with the engine off, and then observe the injector bore for coolant seepage. A fuel system leak test can check for excessive fuel returning through the injectors and show whether fuel is entering the cooling system.

A cylinder leak test checks for combustion gases entering the coolant, while dye or UV testing involves adding dye to the coolant to identify leaks at the injector sleeves.

Common Causes of Fuel Injector Sleeve Failure

There are several possible reasons for fuel injector sleeve failure. Some mechanical causes include sleeve corrosion, a cracked sleeve due to wear, or damage due to improper installation. Worn or damaged o-rings, incorrect sealant, and heat cycling deterioration can also lead to sleeve failure.

Sleeve damage might occur due to certain engine operating conditions. For example, if the engine overheats or the coolant becomes contaminated for another reason. Maintenance-related causes include incorrect injector torque, reusing damaged sleeves, and improper cleaning of the injector bore.

Engines with wet sleeves or coolant-jacketed injectors are most prone to injector sleeve leaks. These are most often found on heavy-duty engines.

Inspection Procedure (Step-by-Step)

Step 1 – Remove the injector

Carefully disconnect the fuel lines and electrical connectors (if applicable), then remove the injector hold-down hardware according to the manufacturer’s procedure. Gently extract the injector using the proper puller or removal tool to avoid damaging the injector body or disturbing the injector sleeve in the cylinder head.

Step 2 – Inspect sleeve bore

After the injector is removed, visually inspect the inside of the sleeve bore for signs of coolant, fuel residue, corrosion, or carbon buildup. Any wetness, pitting, or discoloration may indicate sleeve leakage or deterioration of the sleeve material.

Step 3 – Pressure test the cooling system with the injector removed

Install a cooling system pressure tester and pressurize the system to the engine manufacturer’s recommended pressure. Observe the exposed injector sleeve bore for coolant seepage, which would indicate a compromised sleeve or failed seal.

Step 4 – Check sleeve seating and sealing surfaces

Inspect the top lip of the sleeve and the surrounding cylinder head surface where seals or o-rings seat. Look for damage such as cracks, deformation, scoring, or erosion that could prevent the sleeve from sealing properly against the injector or cylinder head.

Diesel Fuel Injector Sleeve Repair Options

Replacing the fuel injector sleeve or sleeves is the most common repair option for damaged or failed sleeves. It’s also important to install new seals and/or o-rings at the same time. Use the correct installation tools to ensure the sleeves are installed properly. In the event that the sleeves can’t be extracted in place, you may have to remove the head.

Prevent Fuel Injector Sleeve Leaks

To prevent sleeve damage, it’s crucial to use proper injector torque procedures when replacing injectors. Correct coolant maintenance is also necessary to avoid contamination, which can damage sleeves. Always use manufacturer-approved installation tools and consider periodic fuel system inspections to catch problems early.

Key symptoms to watch for include coolant contamination and performance issues such as white exhaust smoke and difficulty starting. It’s important to diagnose this problem early, as it can cause serious engine damage if left alone.

Where to Get the Best Replacement Diesel Fuel Injector Sleeves

If you’re wondering why your diesel fuel injector sleeves are leaking, contact our experts at Highway and Heavy Parts for timely advice. We can help you diagnose this problem before it causes major damage to your engine. Our extensive catalog is also the best place to get replacement fuel injector sleeves for your rig.

Posted on

Is My Diesel Water Pump Going Bad?

New Water Pumo for Diesel Engine

Your engine’s cooling system revolves around the water pump. A diesel water pump circulates coolant to keep your engine running at the optimal temperature. Water pumps are sometimes prone to catastrophic failure. However, there are usually subtle signs and symptoms before they fail completely.

When a diesel water pump fails, it can potentially cause major engine damage. Your engine will overheat quickly, increasing the risk of a blown head gasket, cracked head, or total engine failure. That’s why it’s important to know the symptoms of a failing water pump.

Why Does a Water Pump Fail?

There are four common reasons for water pump failure. One is a bad seal between the water pump housing and the engine block. This seal can fail if it’s improperly installed or if the coolant becomes corrosive. A vehicle that isn’t driven much is also at risk for seal failure. The purpose of this seal is to prevent coolant leaks and keep excess air out of the system. The latter function is almost more important because air pockets can cause the engine to overheat and encourage corrosion.

A loose drive pulley is another common cause. Wobbling wears out the pulley bearings, which can then cause the pump to lose efficiency. That’s why it’s always important to replace the pulley at the same time as the water pump.

Belt-driven water pumps often fail due to a worn, cracked, or slipping belt. To avoid this, inspect your belts regularly for damage. A broken belt has the same potential to damage your engine as a broken water pump.

Finally, worn bearings are a common culprit. These are essential to keeping the water pump impeller moving smoothly. If they wear out, the impeller might wobble or seize. This is likely to damage the pump, but it can also affect the timing system.

Symptoms of a Failing Diesel Water Pump

Need Help Diagnosing a Bad Diesel Water Pump?

Let’s take a look at how the symptoms of a failing water pump usually present. If you find a puddle of coolant under your vehicle, this could be due to worn gaskets and seals. For example, the seal mentioned above.

Another sign is deposit buildup. A leak in the water pump system will cause deposits to build up around the housing. A coolant leak might also cause pitting. Finding pitting or deposits essentially means that there’s a leak in the system.

Do you hear a whining or grinding noise when you step on the gas? This is potentially due to worn bearings or a failing pulley. There could be other reasons for this noise, but failing water pump bearings are likely if you have any of the other symptoms.

The immediate signs of water pump failure include your engine overheating and steam coming out from under your hood. This usually means your water pump has completely failed and is no longer moving coolant through your engine.

Severe overheating caused by a failing water pump can lead to much larger engine problems if it’s ignored for too long. Engines like the Detroit Diesel Series 60 are especially vulnerable to cooling-system-related damage that can contribute to issues like cracked heads, head gasket failure, and internal wear.

Our guide on Common Detroit Diesel Series 60 Issues and Failures breaks down some of the most common problems owners and repair shops run into – and what causes them.

Diagnosing a Bad Water Pump

Catastrophic water pump failure is obviously bad for your engine, so it’s incredibly important to catch it before it fails. Let’s take a look at how to do that.

Step 1 – Make a visual inspection for leaks. Check under the engine and on the engine block for signs of coolant. One key sign is coolant leaking from the weep hole on the pump body. This usually indicates a worn internal seal.

Step 2 – Check for noises. If you hear a high-pitched whining or grinding located at the front of the engine, it’s likely to be a failing water pump bearing.

Step 3 – Inspect the water pump pulley and belt. If you notice significant play or wobble in the pulley, that generally means worn bearings. Similarly, look for cracks and damage to the belt if applicable.

Step 4 – Monitor the engine temperature. If you see the gauge go up quickly or sit at an unusually high temperature, the water pump might not be circulating coolant efficiently.

Step 5 – Check heater performance. A failing pump might not push sufficient coolant into the heater core, which can lead to inconsistent or cold air coming out of the vents.

Step 6 – Pressure test the system to reveal hidden leaks that might not be obvious in a regular visual inspection.

Step 7 – Check for milky oil. If your water pump seal has failed, it might allow coolant to mix with the engine oil. This results in a milky oil residue on the dipstick or engine oil cap.

Tools for Diagnosing a Bad Water Pump

For most of the above steps, you don’t need any special tools. It simply requires visual inspection for certain symptoms. However, if you decide to do a cooling system pressure test, then you’ll need a pressure gauge and a flow meter.

To pressure test, you’ll need to attach a pressure gauge to the radiator and pump to the manufacturer’s recommended pressure. A pressure drop indicates a leak.

You can also do flow rate testing with a flow meter. Low flow rates indicate a clogged impeller or failing motor.

How To Prevent Water Pump Failure

The good news is that water pumps typically last a long time. Over 1,000,000 miles is not uncommon. However, they can fail due to issues that aren’t related to wear. These common water pump problems can be avoided with regular maintenance.

For example, it’s important to flush and refill your coolant regularly so that it doesn’t become corrosive. Use only high-quality coolant and distilled water for dilution if necessary.

Inspect belts and pulleys regularly. If you find small leaks or experience overheating symptoms, don’t ignore them. They won’t go away, so it’s important to find the cause before they become big problems.

Where to Get the Best Replacement Water Pumps

Are you experiencing overheating or other symptoms consistent with a failing water pump? If so, don’t wait for it to leave you stranded; prepare for a replacement today.

Highway and Heavy Parts has long been a leading supplier of quality diesel parts like water pumps. If you need to replace your water pump or need help diagnosing a problem with it, browse our full diesel cooling system catalog or get in touch with our team for expert advice.


FAQs: How to Diagnose a Bad Diesel Water Pump

Q: What are the most common signs of a failing diesel water pump?

A: The most common signs include coolant puddles under the vehicle, deposit or rust buildup around the pump housing, a whining or grinding noise from the front of the engine, engine overheating, and steam coming from under the hood. A heater that suddenly stops blowing warm air can also indicate the pump is no longer pushing coolant efficiently.

Q: How long does a diesel water pump typically last?

A: A well-maintained diesel water pump can last over 1,000,000 miles. However, premature failure can occur due to corroded coolant, a worn drive belt, a loose pulley, or damaged bearings — all of which can be avoided with routine maintenance and regular inspections.

Q: Can a bad water pump cause engine damage?

A: Yes — a failing or failed diesel water pump can cause serious engine damage. When the coolant stops circulating, the engine overheats rapidly, which can lead to a blown head gasket, a cracked cylinder head, or complete engine failure. Catching the symptoms early is critical to avoiding costly repairs.

Q: What causes a diesel water pump to fail prematurely?

A: The four most common causes of premature failure are: a failed seal between the pump housing and engine block (often due to corrosive coolant or improper installation), a loose or worn drive pulley, a cracked or slipping drive belt, and worn internal bearings. Keeping your coolant fresh and belts/pulleys inspected goes a long way toward preventing early failure.

Q: What is the weep hole on a water pump, and why does it matter?

A: The weep hole is a small opening in the water pump body designed to allow coolant or condensation to escape when the internal seal begins to wear. If you see coolant dripping or crusted residue at the weep hole, it’s a clear early warning sign that the pump’s internal seal is failing, and replacement should be planned soon.

Q: Can I still drive my diesel if the water pump is going bad?

A: It depends on how far along the failure is. Early symptoms like minor leaks or occasional noise may allow for short-term operation, but driving with a failing pump risks rapid overheating and catastrophic engine damage. It’s strongly recommended to address the issue as soon as symptoms appear rather than waiting for complete failure.

Q: Where can I find a replacement water pump for my diesel engine?

A: Highway and Heavy Parts carries over 400 diesel cooling system parts, including water pumps for Cummins, Caterpillar, Detroit Diesel, International/Navistar, Mack, Volvo, Paccar, and more. You can browse the full cooling system catalog here or call their team of diesel experts at 844-304-7688 for help finding the right part for your engine.

Posted on

Why Your Diesel Loses Power When Hot (But Runs Fine Cold)

If your diesel loses power when hot but runs strong when it’s cold, you’re not imagining it.

This is a common issue and one that gets misdiagnosed all the time.

👉 The key isn’t just what’s failing
👉 It’s why it only shows up when the engine gets hot

Continue reading Why Your Diesel Loses Power When Hot (But Runs Fine Cold)
Posted on

Bad Diesel Injector Symptoms: How to Diagnose a Failing Fuel Injector

A bad diesel fuel injector is likely to cause a variety of symptoms that should help you narrow it down. Some of the main symptoms include poor fuel economy, rough idling, difficulty starting, and excessive exhaust smoke. A modern vehicle should also display a warning light, which might be just a check engine light.

Some of these symptoms can also intersect with other problems, so narrowing them down to indicate a bad diesel fuel injector involves carefully investigating several issues, including exhaust smells, engine sounds, and overall performance. A diagnostic tool can help give you a firm conclusion as well.

Bad Diesel Injector Symptoms

To figure out whether you have a bad injector or another problem, it’s important to look at all the symptoms together. Let’s take a look at the various symptoms by category. The more that match up with your problem, the more likely it is to be a bad fuel injector. A bad injector causes uneven fuel delivery, which results in some or all of the symptoms discussed below.

Performance and Starting Problems

 Many of the symptoms of a failing injector or injectors come in the form of performance and starting problems. One of the most common is a rough idle or misfires. When this happens, the engine seems to shake or stumble, running unevenly at rest due to inconsistent fuel delivery. If you have a tachometer, you might notice the needle moving a lot and dipping down below normal.

Another issue is hard starting. In this case, you’ll experience longer cranking, or the engine might fail to start at all. This is especially noticeable when it’s cold. When the vehicle is in motion, you might notice loss of power, such as sluggish acceleration, bogging down on hills, or stumbling. The engine might also cut out unexpectedly.

Exhaust Look and Smell

Another area to look at when you’re trying to diagnose a bad fuel injector is the exhaust. You’re likely to notice excessive smoke, and it might be different colors from the usual gray. Black smoke indicates too much fuel, while white indicates unburned fuel passing through. Blue smoke can indicate burning oil, but it might be linked to bad injectors if they’re washing oil off the cylinder walls. A strong fuel smell is also common.

Sounds and Warning Lights

There are also sounds and warning lights associated with failing fuel injectors. Engine knocking or pinging is a common sound that is caused by bulk delivery of fuel instead of the usual fine mist. In most cases, failing injectors will also trigger a check engine light to let you know that something has gone wrong. Once you’ve confirmed multiple symptoms and there’s a CEL present, it’s time to diagnose the problem and find out if one or more bad injectors are the culprit.

How to Diagnose a Bad Diesel Fuel Injector

Need Help Diagnosing a Bad Diesel Fuel Injector?

The easiest way to diagnose a bad diesel fuel injector is to use an OBD-II scanner for light-duty trucks made from 1997 on. Specialized diagnostic equipment, such as the J1939 protocol, for medium-duty and heavy-duty trucks and equipment. Both look for diagnostic trouble codes, but scanners won’t tell you exactly what’s wrong; you can use the codes they give to narrow down the possibilities. Another method is to inspect the engine for leaks. Look for wet spots and a diesel smell near the injectors. Modern diesel systems can show injector balance/return rates through diagnostic tools.

Tools For Diagnosing a Bad Injector

 Let’s take a closer look at the tools for diagnosing a bad diesel fuel injector. As mentioned above, the easiest way is to use a code scanning tool (OBD-II or J1939 Protocol scanners). You can also use a digital multimeter to measure injector electrical resistance and a mechanic’s stethoscope to listen for injector clicking. To measure fuel delivery and pressure, you’ll need a fuel pressure gauge and a fuel return line kit. A compression test can help you rule out other mechanical engine issues that cause the symptoms we’ve discussed.

Fuel Injector Diagnostic Steps

Step 1 – In the initial check, use the stethoscope to listen for a steady click. No click or an unusual sound suggests failure. Look for fuel leaks, wet spots, or clean streaks around the injectors.

Step 2 – Use the proper scanning tool for your diesel engine to reveal diagnostic trouble codes for misfires or fuel pressure. You can also do a cylinder isolation test. With the engine idling, disable one injector at a time. If the injector is good, it will cause the RPM to drop. If the RPM doesn’t change significantly, then the injector is likely bad.

Step 3 – Use the multimeter to check injector resistance against manufacturer specs. If you get a reading that’s way off, it indicates an electrical fault. You can also use a scan tool to check if each cylinder is producing equal power and balanced fuel delivery. A large deviation likely means a bad injector.
Step 4 – The most accurate method used by professional shops is a bench test with specialized equipment to simulate real-world conditions and check spray patterns, pressure, and flow.

Where To Get the Best Replacement Diesel Injectors

Does your diesel engine have the above signs? Don’t wait until it gets worse. At Highway and Heavy Parts, we have an expansive range of high-quality diesel engine parts for various makes and models. Our diesel experts are standing by to help you diagnose any issues you might have with bad diesel fuel injectors. Contact us today for assistance and find the best replacement injectors in our catalog. Highway and Heavy Parts is here to ensure that you have the parts and knowledge to keep your diesel engine running.

Get the Right Fuel Injector the First Time

If your fuel injector is starting to fail, don’t wait for it to turn into a bigger problem.

👉 Verify your Engine Setup
👉 Replace Worn Injectors
👉 Restore Proper Combustion and Performance

Call our diesel experts at 844-304-7688 or browse parts online at Highway and Heavy Parts to get the right parts, faster.

Posted on

Why Diesel VGT Turbo Vanes Stick (And How to Tell If It’s the Turbo or the Actuator)

Variable Geometry Turbochargers (VGTs) are designed to adjust airflow dynamically—but when they fail, one issue shows up more than any other:

Sticking vanes. If the vanes can’t move, the turbo can’t control boost properly.

And that leads to:

  • Low power
  • Overboost or underboost
  • High exhaust temperatures
  • Fault codes

The challenge is this:

Not every VGT problem is actually a bad turbo.

Continue reading Why Diesel VGT Turbo Vanes Stick (And How to Tell If It’s the Turbo or the Actuator)
Posted on

Cummins Fuel System Problems: Symptoms, Diagnostics, and Common Failures

Cummins fuel systems are designed to deliver precise fuel pressure, injection timing, and fuel volume under extreme diesel operating conditions. Modern Cummins engines rely heavily on consistent fuel delivery to maintain combustion efficiency, throttle response, emissions performance, and starting reliability.

When a Cummins fuel system begins developing problems, the warning signs are not always dramatic at first. Generally, the symptoms begin small before turning into major performance or reliability issues.

In many cases, one of the most common early warning signs is a hard start. In other words, a Cummins engine that cranks longer than normal, starts inconsistently, loses prime, or struggles after sitting overnight may already be showing signs of fuel pressure loss, injector wear, contamination, or air intrusion somewhere in the system.


Continue reading Cummins Fuel System Problems: Symptoms, Diagnostics, and Common Failures
Posted on

Common Case/New Holland Diesel Engine Problems

Case/New Holland diesel engines – powered largely by FPT Industrial platforms – are widely used across agriculture and heavy equipment.

You’ll see them in:

  • Combines
  • Tractors
  • Construction equipment
  • Industrial applications

Engines like the 8.7L and 12.9L platforms are built for demanding environments, but like any diesel engine under load, they have common failure points.

Understanding these issues early can help prevent downtime, repeat failures, and major engine damage.

Continue reading Common Case/New Holland Diesel Engine Problems
Posted on

Why Some Caterpillar C15 ACERT Inframe Rebuilds Fail Early (And How to Prevent It)

A Caterpillar C15 ACERT inframe rebuild should restore engine performance – not lead to another failure 50,000 miles later.

But that’s exactly what happens when critical measurements, tolerances, and supporting components are overlooked during the rebuild process.

Most early failures aren’t caused by the rebuild kit itself – they’re caused by what wasn’t checked before installation.

Continue reading Why Some Caterpillar C15 ACERT Inframe Rebuilds Fail Early (And How to Prevent It)
Posted on

Why Does My Diesel Engine Sound Like a Tractor?

A diesel engine is naturally louder than a gas engine. Some clatter, ticking, and combustion noise can be normal.

But if your diesel engine suddenly starts sounding louder, rougher, or more like an old tractor, that change matters.

A “tractor-like” diesel sound usually points to one of three things:

  1. Combustion noise
  2. Mechanical noise
  3. Exhaust or accessory noise

The important question is not just what the sound is.

It is whether the sound is new, getting louder, or paired with symptoms like low power, smoke, hard starting, or oil pressure concerns.

Continue reading Why Does My Diesel Engine Sound Like a Tractor?
Posted on

Perkins Engine Rebuild: Why the Crankshaft Won’t Turn After Assembly

You finish a Perkins engine rebuild, go to rotate the crankshaft. And it won’t move.

Or worse, it turns slightly and then binds.

This is one of the most frustrating problems after a rebuild, and it almost always comes down to clearance, alignment, or assembly issues.

If a crankshaft won’t turn freely after assembly, something is wrong. There is no “break-in” that will fix it.

Quick Answer: Why the Crankshaft Won’t Turn

  • Incorrect bearing clearances
  • Improper crankshaft machining
  • Main cap or rod cap misalignment
  • Thrust bearing installation issues
  • Debris or contamination during assembly
  • Incorrect torque sequence or values

Every one of these directly affects how the crankshaft rotates inside the block.


What “Normal” Should Feel Like

Quick takeaway: A properly assembled crankshaft should rotate smoothly with consistent resistance.

With:

  • Bearings installed
  • Caps torqued to spec
  • No pistons installed

You should be able to rotate the crankshaft by hand using a breaker bar. If you feel:

  • Tight spots
  • Binding
  • Uneven resistance

That indicates a mechanical issue: not normal assembly friction.


1. Incorrect Bearing Clearance (Most Common Cause)

Quick takeaway: Too little clearance will lock the crankshaft.

Diesel engines like Perkins rely on precise oil clearance between:

  • Crankshaft journals
  • Main and rod bearings

Typical oil clearance ranges for many Perkins engines:

  • ~0.0015″ to 0.0030″

If clearance is too tight:

  • Oil film cannot form
  • Metal-to-metal contact increases
  • Crankshaft binds or locks

This often happens when:

  • Bearings are mismatched
  • Journals are machined incorrectly
  • Clearances are not verified with plastigage or micrometers

2. Improper Crankshaft Machining

Crankshaft machining must be exact.

Common issues include:

  • Incorrect journal sizing
  • Out-of-round journals
  • Improper surface finish
  • Incorrect fillet radius after grinding

The fillet radius (the transition between journal and crank web) is critical.

If it is not properly finished:

  • Stress concentration increases
  • Bearing fit can be affected
  • Rotation can become restricted

In heavy-duty diesel applications, crankshafts are often:

  • Precision-ground
  • Sometimes shot-peened for durability

Crankshaft condition is just as important as machining accuracy. Learn more about what causes crankshaft damage in our guide on the four main causes of a bent diesel crankshaft: Bent Diesel Crankshaft Guide


3. Main Bearing Cap Misalignment

Quick takeaway: Main caps must be installed in the correct position and orientation.

Each main cap is:

  • Line-bored with the block
  • Matched to a specific position

If caps are:

  • Installed in the wrong location
  • Installed backwards
  • Torqued unevenly

This can:

  • Distort the crank bore
  • Pinch the crankshaft
  • Cause binding

Even slight misalignment can prevent rotation.


4. Thrust Bearing Installation Issues

The thrust bearing controls:

  • Crankshaft end play (forward/backward movement)

If installed incorrectly:

  • The crankshaft can bind when torqued

Common mistakes:

  • Thrust bearing installed backwards
  • Improper seating
  • End play not checked

Typical end play must be within spec—too tight and the crankshaft will not rotate freely.


5. Debris or Contamination During Assembly

Quick takeaway: Even small debris can lock a crankshaft.

After machining:

  • Metal shavings can remain in oil passages
  • Dirt or lint can contaminate surfaces

If debris gets between:

  • Bearing and journal
  • Bearing and cap

It can:

  • Reduce clearance
  • Create high spots
  • Cause immediate binding

This is why thorough cleaning after machining is critical.


6. Incorrect Torque Sequence or Values

Main caps and rod caps must be:

  • Torqued in sequence
  • Torqued to specification

If not:

  • The crankshaft bore can distort
  • Bearings can be unevenly loaded

This creates:

  • Tight spots during rotation
  • Inconsistent resistance

7. Rear Main Seal and Housing Issues (Perkins-Specific)

Some Perkins engines, such as the 4.108, use:

  • Rope-style rear main seals
  • Two-piece seal housings

If installed incorrectly:

  • The seal can drag on the crankshaft
  • Housing misalignment can create resistance

Common issues:

  • Seal trimmed incorrectly
  • Seal packed too tightly
  • Housing sealed improperly

This can make the crankshaft feel tight even if bearings are correct.


8. Connecting Rod Installation Problems

Once pistons and rods are installed, additional issues can appear:

  • Rod caps installed incorrectly
  • Bearing shells misaligned
  • Rods not properly sized

This can:

  • Add resistance
  • Cause binding at specific rotation points

How to Diagnose a Crankshaft That Won’t Turn

Quick takeaway: Isolate the problem step-by-step.

1. Remove Pistons and Rods

  • Check crank rotation with only main bearings installed

2. Check Each Main Cap Individually

  • Torque one cap at a time
  • Rotate crank after each step

3. Measure Bearing Clearance

  • Use plastigage or micrometers
  • Verify against spec

4. Check Crankshaft End Play

  • Verify thrust bearing installation
  • Measure with dial indicator

5. Inspect for Debris

  • Clean all surfaces thoroughly
  • Check oil passages

This Is a Precision Problem

We see this often:

The parts are new, but the system isn’t correct.

A crankshaft that won’t turn is not a defective part issue.
It’s almost always:

  • Machining
  • Measurement
  • Or assembly accuracy

Diesel engines require tight tolerances. Small errors create big problems.


Final Thoughts

If your Perkins engine crankshaft won’t turn after a rebuild, stop immediately.

Do not force it.

Binding is a sign that:

  • Clearances are incorrect
  • Components are misaligned
  • Or something was assembled improperly

Fixing the issue now prevents:

  • Bearing failure
  • Crankshaft damage
  • Complete engine failure

Browse our Perkins engine rebuild kits HERE

Or call 844-304-7688 to speak with a diesel expert.

From diagnosis through delivery, we’re Highway and Heavy Parts.

Posted on

Why Your ECM Report May Not Be Enough To Order Diesel Engine Parts

Ordering diesel engine parts should be simple.

Find the engine information, look up the part, place the order, and get the truck back together.

But in the real world, engine identification can get complicated fast.

A customer may have one number from an ECM report, another number stamped on the engine block, another number on the valve cover data place, and still another number cast into a component. If these numbers do not match, it can lead to the wrong part being ordered – even when the customer believed they were using the right information.

This is why Engine Serial Number (ESN) Verification matters.

The ECM can be helpful, but it should not always be treated as the final authority. If the ECM has been replaced, reflashed, cloned, or programmed with information from another engine, the data it reports may not match the physical engine in the truck.

HHP Quick Takeaway

When ordering diesel engine parts, the safest approach is to verify the physical Engine Serial Number from the engine data plate or stamped engine block—not just the ECM report. ECMs can be replaced or programmed incorrectly, and using the wrong number can lead to incorrect parts, installation delays, and avoidable returns.
Continue reading Why Your ECM Report May Not Be Enough To Order Diesel Engine Parts
Posted on

Diesel Injector Symptoms: How To Tell If Your EUI Injectors Are Failing

If you’re noticing common diesel injector symptoms like rough idle, smoke, or loss of power, there’s a good chance your fuel system is the problem.

And if you’re running an engine with Electronic Unit Injectors (EUIs), the symptoms can show up fast – and get expensive even faster.

Because with EUIs, you’re not just dealing with fuel delivery.

You’re dealing with timing, pressure, and combustion all at once.

If one injector starts to fail, it doesn’t stay isolated.

Continue reading Diesel Injector Symptoms: How To Tell If Your EUI Injectors Are Failing
Posted on

When to Replace Fuel Injectors in a Caterpillar C15 Acert

Is your fuel efficiency down? Has the performance of your CAT C15 ACERT dropped?

Continue reading When to Replace Fuel Injectors in a Caterpillar C15 Acert
Posted on

VGT Turbo Problems and Symptoms: How Variable Geometry Failures Affect Boost, Heat, and Engine Performance

A Variable Geometry Turbocharger (VGT) does more than create boost.

It actively controls airflow, exhaust energy, and turbo speed across different engine conditions.

When a VGT system starts to fail, the issue is not just loss of power – it affects:

  • Boost Pressure Control
  • Exhaust Gas Temperature (EGT)
  • Air-Fuel Ratio
  • Emissions System Performance

Understanding how a VGT works – and how it fails – is key to diagnosing problems correctly.

Continue reading VGT Turbo Problems and Symptoms: How Variable Geometry Failures Affect Boost, Heat, and Engine Performance
Posted on

Diesel Fuel Algae: What It Is, How to Treat It, and How to Prevent It

If your diesel engine keeps clogging fuel filters, losing power, stalling, or pulling dark sludge from the tank, you may hear someone say you have “diesel algae.”

That term is common, but it is not technically correct.

Diesel fuel algae is usually not algae at all. True algae needs sunlight to grow, and fuel tanks are dark environments. What people call diesel algae is usually microbial contamination made up of bacteria, fungi, yeasts, mold, and biofilm living in the fuel system.

This contamination is often called diesel bug.

The problem starts when water enters the fuel tank. Microbes live in the water and feed on hydrocarbons in the diesel fuel. Over time, they create dark, slimy sludge that can plug filters, restrict fuel flow, damage injectors, corrode tanks, and leave equipment stranded.

Continue reading Diesel Fuel Algae: What It Is, How to Treat It, and How to Prevent It
Posted on

Engine Belt Noise and Its Causes: How to Diagnose Squealing, Chirping, and More

If you’re hearing a squeal, chirp, or grinding noise coming from the front of your diesel engine, there’s a good chance the belts – or the components they drive – are involved.

But not all belt noise is actually caused by the belt itself.

The challenge is figuring out:

  • Or something deeper in the system
  • Whether it’s the belt
  • The tension
Continue reading Engine Belt Noise and Its Causes: How to Diagnose Squealing, Chirping, and More
Posted on

Diagnosing a Bad Cummins ISX Crankshaft: Symptoms and Replacement

The crankshaft is essentially the backbone of your truck’s engine. It keeps the engine moving and is vital to the overall health of your rig. When this critical component begins to fail in a Cummins ISX, it can quickly lead to severe mechanical damage and costly downtime. Recognizing the early warning signs of a worn or damaged crankshaft is essential to minimizing negative impacts to your revenue and keeping your truck out of the service bay.

Continue reading Diagnosing a Bad Cummins ISX Crankshaft: Symptoms and Replacement
Posted on

Why Flow-Matched Fuel Injectors Matter in Diesel Engines (And When They Actually Make a Difference)

When it comes to diesel engine performance, most people focus on major components: turbochargers, pistons, cylinder heads.

But one of the most overlooked factors in engine performance, efficiency, and longevity is fuel injector balance.

Specifically, how closely each injector matches the others in fuel delivery.

That’s where flow-matched fuel injectors come in.

Continue reading Why Flow-Matched Fuel Injectors Matter in Diesel Engines (And When They Actually Make a Difference)
Posted on

Most Common Engine Rebuild Kit Problems in Diesel Engines

A diesel engine rebuild kit can completely change the life of an engine — but only if everything is installed, measured, and matched correctly.

The reality is:
👉 Many engine rebuild failures are not caused by the rebuild kit itself.

They are caused by:

  • Improper installation
  • Incorrect measurements
  • Poor machining
  • Cooling system issues
  • Lubrication problems
  • Contamination left inside the engine
  • Reusing damaged components

Even the highest-quality diesel engine rebuild kit can fail quickly if the root cause of the original failure was never corrected.

That is why successful diesel rebuilds depend on:

  • Proper diagnostics
  • Precision measurements
  • Careful assembly
  • Cleanliness
  • Correct break-in procedures

A diesel engine rebuild is much more than simply “installing new parts.”

Continue reading Most Common Engine Rebuild Kit Problems in Diesel Engines
Posted on

Detroit Diesel Series 60 Fuel Injectors (Remanufactured): How They Work, When They Fail, and Why Replacement Matters

On a Detroit Diesel Series 60, fuel injectors are directly tied to how the engine builds power.

Unlike older mechanical systems, the Series 60 uses electronic unit injectors (EUI) – meaning fuel delivery is controlled by both mechanical motion and electronic timing.

When everything is working correctly, the result is:

  • Precise Fuel Delivery
  • Efficient Combustion
  • Consistent Performance Under Load

When injectors start to fail, that precision is lost – and engine performance follows.

Continue reading Detroit Diesel Series 60 Fuel Injectors (Remanufactured): How They Work, When They Fail, and Why Replacement Matters
Posted on

Cummins N14 Fuel Injectors: How They Fail, What It Affects, and When to Replace Them

On a Cummins N14, fuel injectors are one of the most critical components controlling engine performance.

They don’t just deliver fuel – they control timing, atomization, and combustion efficiency.

And when they start to fail, the issue doesn’t stay isolated to one cylinder. It begins to affect engine balance, temperature, and long-term durability.

Continue reading Cummins N14 Fuel Injectors: How They Fail, What It Affects, and When to Replace Them
Posted on

Top 5 Common Yanmar Engine Problems (and How to Prevent Them)

Yanmar engines have earned a reputation for reliability in marine, agricultural, construction, and industrial applications. Many Yanmar engines provide thousands of hours of dependable service when maintained properly.

However, no diesel engine is immune to wear, contamination, heat, or neglected maintenance.

The good news is that many of the most common Yanmar engine failures are preventable. Understanding the warning signs early can help reduce downtime, avoid expensive repairs, and extend engine life.

Let’s look at five of the most common problems seen in Yanmar diesel engines.

Quick Takeaway: Most common Yanmar engine failures involve fuel delivery, cooling system performance, exhaust restrictions, injector wear, or compression loss. Many of these problems can be prevented through routine maintenance and early diagnosis.
Continue reading Top 5 Common Yanmar Engine Problems (and How to Prevent Them)
Posted on

Problems with EGR Systems in Diesel Engines

EGR systems are a standard part of modern diesel engines – but they are also one of the most common sources of frustration.

These systems are designed to reduce emissions and meet EPA regulations. However, they also introduce additional components that operate under high heat, pressure, and contamination.

Over time, this combination can lead to performance issues, costly repairs, and system failures.

Continue reading Problems with EGR Systems in Diesel Engines
Posted on

Why One Diesel Cylinder Runs Hotter Than the Others (And What It Means)

If one cylinder in your diesel engine is running hotter than the others, it’s not random.

It’s a sign of imbalance. In a diesel engine, imbalance means:

  • Uneven combustion
  • Uneven load distribution
  • Increased stress in one area

The important part is understanding why that one cylinder is different.

Continue reading Why One Diesel Cylinder Runs Hotter Than the Others (And What It Means)
Posted on

Diesel Engine Common Rail Injectors: Potential Failures & Causes

You’ve just been told that you need to replace your diesel engine fuel injectors, but what exactly caused the failure that led to this point?

Continue reading Diesel Engine Common Rail Injectors: Potential Failures & Causes
Posted on

Problems You Might Have with Your CAT C15 ACERT Diesel Engine Oil Pump

Lubrication is key to keeping your engine functioning properly. If your diesel engine isn’t properly lubricated, components could begin to wear more quickly and even seize up, costing you more money. The oil pump is critical to keeping your engine lubricated.

Continue reading Problems You Might Have with Your CAT C15 ACERT Diesel Engine Oil Pump
Posted on

What Problems Indicate Head Gasket Failure on C15 ACERT Diesel Engines?

We all know that the head gasket is important. It’s what creates the seal between the engine block and cylinder head to allow for combustion to happen. Without it, your diesel engine won’t run properly. 

Continue reading What Problems Indicate Head Gasket Failure on C15 ACERT Diesel Engines?
Posted on

When Should You Replace Your CAT C15 ACERT Diesel Engine Turbo?

As you probably know, one of the main differences between the Caterpillar C15 diesel engine and the C15 ACERT is the fact that the ACERT is designed with two turbochargers. That makes this component even more vital to the overall function and health of your diesel engine. 

Continue reading When Should You Replace Your CAT C15 ACERT Diesel Engine Turbo?
Posted on

Cylinder Head Problems on a Caterpillar C15 ACERT

Caterpillar C15 ACERT. You’ve probably heard of it. It’s a very popular engine, and we get a lot of questions on it from our customers.

Continue reading Cylinder Head Problems on a Caterpillar C15 ACERT
Posted on

When Do You Need New Fuel Injectors for Your Cat C15 ACERT Diesel Engine?

Has the performance of your CAT C15 ACERT taken a dive? Are you going through a lot more fuel than you used to? 

Continue reading When Do You Need New Fuel Injectors for Your Cat C15 ACERT Diesel Engine?
Posted on

Why is My Diesel Engine EGR Valve Failing?

Do you know why you need your EGR valve? It’s an important component of your EGR system that takes a ton of abuse because of its environment, and it’s gotten a bad reputation over the years. People often choose to delete it because of the problems it can cause your diesel engine and VGT turbo. But, did you know that this can end up costing you more money in the long run?

Continue reading Why is My Diesel Engine EGR Valve Failing?
Posted on

An In-Depth Look at Diesel Engine Common Rail Fuel Injector Problems

If you’re experiencing problems with your common rail fuel injectors, you’ve probably noticed a difference in the way your diesel engine performs. And you’re probably eager to get the issue taken care of. 

Continue reading An In-Depth Look at Diesel Engine Common Rail Fuel Injector Problems
Posted on

Caterpillar C15 ACERT Diesel Engine Camshaft Problems

Is the camshaft in your CAT C15 ACERT diesel engine performing correctly? It’s essential that this component operates properly for your engine to function as it should. Each part of the camshaft must perform their functions at precise timing in relation to the motion of the piston. If they don’t, it could spell disaster for your diesel engine. 

Continue reading Caterpillar C15 ACERT Diesel Engine Camshaft Problems
Posted on

How to Diagnose Diesel Engine Belt Noise

Diesel engine belt noise is one of the most common drivability complaints on heavy-duty trucks and equipment.

The noise may sound like:

  • A squeal
  • A chirp
  • A screech
  • A grinding or growling sound

However, the belt itself is not always the actual problem. In many cases, the noise is caused by:

  • Improper belt tension
  • Pulley misalignment
  • Worn bearings
  • Oil contamination
  • Failing accessory components

Accurately diagnosing diesel engine belt noise is important because replacing only the belt may not solve the root issue.

Continue reading How to Diagnose Diesel Engine Belt Noise
Posted on

Problems That Require Cylinder Head Components for the CAT C15 ACERT Diesel Engine

You may not realize it, but there are a lot of components that make up the cylinder head of your C15 ACERT. If you have a failure in that part of your engine, you might be inclined to blame it on your cylinder head, but it’s possible that one of these other components could break. This would lead to problems with similar symptoms to that of a failing cylinder head.

Continue reading Problems That Require Cylinder Head Components for the CAT C15 ACERT Diesel Engine
Posted on

Problems with CAT C15 Diesel Engine Oil Pumps

Your oil pump. It’s probably not a part you’ve thought about a lot, but it serves an important role in your diesel engine.

Continue reading Problems with CAT C15 Diesel Engine Oil Pumps
Posted on

Why Oil Starvation Destroys Diesel Turbochargers

A turbocharger failure can look like a bad part.

Loss of power. Smoke. Noise. Oil leaking. Shaft play.

But in many heavy-duty diesel engines, the turbocharger is not the real starting point of the failure. The damage often begins somewhere else in the lubrication system.

The number one issue that destroys turbochargers is oil starvation. When a turbo does not receive a steady supply of clean, pressurized oil, internal damage can happen fast: sometimes within seconds under load.

Continue reading Why Oil Starvation Destroys Diesel Turbochargers
Posted on

Camshaft Failure Analysis: What Causes Excessive Lobe Wear (C15 Focus Included)

We all know how important camshafts are to engine performance – and when they fail, the damage can go far beyond the camshaft itself.

Whether you’re running a general diesel platform or a Caterpillar C15 diesel engine, one of the most common issues is camshaft lobe wear and pitting.

👉 And once it starts, it does not slow down – it accelerates.

Continue reading Camshaft Failure Analysis: What Causes Excessive Lobe Wear (C15 Focus Included)
Posted on

Diesel Problems That Only Show Up Under High Load

Some diesel engine problems only appear when the engine is working hard. A truck may:

  • Idle perfectly
  • Start normally
  • Drive fine empty

…but suddenly lose power while:

  • Pulling a trailer
  • Climbing a grade
  • Accelerating under load
  • Hauling heavy weight

This happens because high-load conditions place maximum demand on:

  • Fuel delivery
  • Airflow
  • Turbocharger performance
  • Cooling systems
  • Exhaust flow
  • Combustion efficiency

Under light driving conditions, weak components can sometimes “hide.” However, when engine demand increases, those weaknesses often become obvious very quickly.

Continue reading Diesel Problems That Only Show Up Under High Load
Posted on

Connecting Rod Failure Analysis: Common Causes, Symptoms, and Prevention

Connecting rods are among the strongest components inside a diesel engine. Built from forged steel or powdered metal, they are designed to withstand enormous combustion pressures and transfer thousands of pounds of force every second from the piston to the crankshaft.

Because they are so robust, connecting rods rarely fail on their own.

When a connecting rod bends, breaks, or suffers bearing damage, it is almost always the result of another underlying problem. Oil starvation, bearing failure, overheating, improper assembly, hydrolock, overspeed, or using outdated components during an engine overhaul can all lead to connecting rod damage.

That is why replacing a damaged connecting rod without identifying the original cause often leads to another expensive engine failure.

This failure analysis walks through one real-world example of connecting rod damage, explains why it happened, and highlights other common causes of connecting rod failure so you can diagnose the root cause—not just replace broken parts.

Quick Takeaway: Connecting rods rarely fail first. Most failures begin with another issue, such as bearing damage, low oil pressure, oil starvation, overheating, hydrolock, or an incomplete engine overhaul. Always determine why the connecting rod failed before replacing components.
Continue reading Connecting Rod Failure Analysis: Common Causes, Symptoms, and Prevention
Posted on

PACCAR MX-13 Common Engine Problems & Solutions

The PACCAR MX-13 is used in many Kenworth and Peterbilt heavy-duty trucks, especially in long-haul and fleet applications.

Like any modern diesel engine, it depends on several systems working together:

  • Fuel System
  • EGR System
  • Turbocharger
  • Cooling System
  • Sensors and ECM
  • Aftertreatment System

When one of these systems starts to fail, the symptom may show up as low power, derate, rough idle, hard starting, excessive regens, or poor fuel economy.

The key is not just replacing the part that triggered the fault code: it is identifying why the issue happened in the first place.

Continue reading PACCAR MX-13 Common Engine Problems & Solutions
Posted on

Piston Pin Failure Analysis: Common Causes, Symptoms, and Prevention

The piston pin—also known as the wrist pin or gudgeon pin—is one of the hardest-working components inside a diesel engine. Although it’s relatively small compared to the piston or connecting rod, it transfers tremendous combustion forces every time the engine fires.

Despite its strength, piston pin failures do occur.

When they do, the damage is usually severe. Excessive wear, galling, scoring, discoloration, or seizure often indicate another underlying problem, such as poor lubrication, overheating, incorrect clearances, contamination, or improper engine assembly.

Replacing the damaged piston pin alone rarely solves the problem.

Instead, it’s important to determine why the piston pin failed before rebuilding the engine. Otherwise, the same conditions that damaged the original components may quickly damage the replacement parts as well.

This failure analysis explains how piston pins work, the warning signs of failure, what causes them to wear prematurely, and how proper diagnosis can help prevent repeat engine failures.

Quick Takeaway: Piston pin damage is usually a symptom—not the root cause. Most failures begin with poor lubrication, overheating, contamination, or incorrect clearances. Before replacing damaged pistons or piston pins, identify what caused the failure to prevent it from happening again.
Continue reading Piston Pin Failure Analysis: Common Causes, Symptoms, and Prevention
Posted on

Piston Ring Failure Analysis: Common Causes, Symptoms, and Prevention

Piston rings are small compared to many other diesel engine components, but they have a major impact on engine performance, oil control, compression, and long-term reliability.

When piston rings fail, the symptoms can show up quickly: excessive oil consumption, blow-by, loss of power, poor compression, or blue exhaust smoke. The difficult part is that piston ring failure is often not the true root cause. In many cases, the rings were damaged by another issue inside the engine, such as improper installation, abrasive contamination, overheating, poor lubrication, incorrect cylinder finish, or an improper break-in procedure.

That is why failure analysis matters.

Replacing the rings without understanding what caused the failure can lead to the same problem happening again.

If your diesel engine is experiencing piston ring failure, the goal should not be to simply identify the broken part. The goal should be to understand why the ring failed, what other components may have been affected, and what needs to be corrected before the engine goes back together.

Quick Takeaway: Broken piston rings are usually the result of another underlying problem, not the root cause. Improper installation, abrasive contamination, overheating, poor lubrication, incorrect cylinder finish, and poor break-in procedures can all shorten piston ring life. Correcting the root cause is essential before installing new rings.
Continue reading Piston Ring Failure Analysis: Common Causes, Symptoms, and Prevention
Posted on

Diesel Fuel Contamination Problems: What’s Lurking in Your Fuel

Diesel fuel contamination problems are more common than most people realize.

Even when it meets specification at delivery, contamination can develop during storage, transport, or in your own fuel system. Over time, these contaminants affect fuel lubricity, combustion quality, and component life.

The most damaging contaminants are not always visible, but they leave very real mechanical consequences.

Continue reading Diesel Fuel Contamination Problems: What’s Lurking in Your Fuel
Posted on

CAT C15 ACERT Problems that Require a Diesel Engine Rebuild Kit

Did you know that performing regular maintenance can go a long way in keeping your diesel engine operating at its peak?

Continue reading CAT C15 ACERT Problems that Require a Diesel Engine Rebuild Kit
Posted on

Cummins ISX 870 Inframe Rebuild Problems: Why Engines Fail After a Rebuild

An inframe rebuild on a Cummins ISX 870 or ISX 871 is supposed to bring your engine back to life.

But for a lot of operators, that’s not what happens.

Instead, they run into problems almost immediately:

  • Oil Consumption
  • Blow-By
  • Low Power
  • Poor Fuel Economy

The issue usually isn’t the rebuild itself.

It’s what happens during – and right after – the rebuild.

Continue reading Cummins ISX 870 Inframe Rebuild Problems: Why Engines Fail After a Rebuild
Posted on

Caterpillar C15 ACERT Inframe Rebuild Kit: Why Twin Turbo Heat and Cylinder Pressure Drive Rebuild Failures

Caterpillar C15 ACERT engines don’t fail the same way older single-turbo engines do.

They operate under higher cylinder pressures, increased exhaust temperatures, and more complex airflow management due to the ACERT twin turbo system.

When these engines reach rebuild time, the failure is usually tied to one thing:

Heat and pressure overwhelming the cylinder assembly.

This is what drives liner wear, ring failure, and ultimately the need for an inframe rebuild.

Continue reading Caterpillar C15 ACERT Inframe Rebuild Kit: Why Twin Turbo Heat and Cylinder Pressure Drive Rebuild Failures
Posted on

Cummins ISB 6.7L Fuel Injectors: What Actually Fails Inside a Common Rail Injector

Fuel injectors in a Cummins ISB 6.7L common rail system don’t just deliver fuel.

They control timing, pressure, atomization, and combustion efficiency – all within milliseconds.

When an injector begins to fail, it’s not always obvious at first.

But internally, the failure has already started.

Continue reading Cummins ISB 6.7L Fuel Injectors: What Actually Fails Inside a Common Rail Injector
Posted on

International/Navistar DT466E Inframe Rebuild Kit: Wet Sleeve Wear, HEUI System Impact, and What to Verify Before Installation

The International/Navistar DT466E is known for its durability – but like all wet sleeve diesel engines, its longevity depends on cooling system condition, liner integrity, and fuel system performance.

When these engines start showing signs like blow-by, coolant loss, or hard starting, the issue is rarely isolated.

It’s typically the result of cylinder wear, liner sealing issues, or HEUI system inefficiencies affecting combustion.

If you’re planning an inframe rebuild, understanding these failure points is critical to avoiding repeat repairs.

Continue reading International/Navistar DT466E Inframe Rebuild Kit: Wet Sleeve Wear, HEUI System Impact, and What to Verify Before Installation
Posted on

Caterpillar C13 Inframe Rebuild Kit: Liner Seat Wear, Ring Seal Failure, and Combustion Efficiency

Caterpillar C13 engines are designed to handle heavy loads – but when internal wear sets in, performance loss isn’t random.

It’s the result of changes in cylinder geometry, sealing efficiency, and combustion pressure control.

If you’re considering an inframe rebuild, the key isn’t just replacing parts – it’s understanding what failed, why it failed, and what must be corrected during installation.

Continue reading Caterpillar C13 Inframe Rebuild Kit: Liner Seat Wear, Ring Seal Failure, and Combustion Efficiency
Posted on

Case IH Sprayer Pump Pressure Issues (Common Causes and How to Diagnose Them)

If you’re running a Case IH sprayer and dealing with pressure problems, you’re not alone.

Loss of pressure, inconsistent spray patterns, or pressure that won’t hold under load are some of the most common issues operators report – especially in models like the 4440 and 3340.

These problems are rarely isolated.

👉 Pump pressure issues are usually a symptom of a larger system problem.

Understanding where to look first can save time, prevent part swapping, and keep your equipment running during critical windows.

Continue reading Case IH Sprayer Pump Pressure Issues (Common Causes and How to Diagnose Them)
Posted on

Diesel Engine Blow-By: How Much Is Normal and When Should You Be Concerned?

If you’re seeing vapor coming from the breather or crankcase vent, you’re probably asking:

Is this normal or is my engine going bad?

That’s where a lot of confusion comes in.

Some blow-by is completely normal. But excessive blow-by can point to internal wear, poor sealing, or a bigger issue building over time.

The key is knowing the difference.

Continue reading Diesel Engine Blow-By: How Much Is Normal and When Should You Be Concerned?
Posted on

Cummins N14 Cylinder Head: Failure Points, Internal Stress, and What Happens When It Starts to Go

The Cummins N14 is built to handle heat and load – but the cylinder head is where those forces concentrate the most.

Over time, repeated thermal cycling, combustion pressure, and coolant flow stress begin to break things down at a microscopic level.

And when that happens, the issue usually doesn’t show up as “a bad head.”

It shows up as:

  • Coolant Loss
  • Overheating
  • Combustion Imbalance

By the time it’s obvious, the damage is already progressing.

Continue reading Cummins N14 Cylinder Head: Failure Points, Internal Stress, and What Happens When It Starts to Go
Posted on

Why Your Diesel Engine Runs Worse After Installing New Injectors

Installing new diesel injectors should make an engine run better.

So when the engine suddenly idles rough, misfires, smokes, knocks, or feels weaker after injector replacement, it can be frustrating.

The first reaction is usually: Did we get bad injectors?

Sometimes the answer is yes. A defective injector is possible.

But in many cases, the injector itself is not the first thing to blame.

A diesel engine that runs worse immediately after injector replacement may be dealing with trapped air, incorrect trim codes, installation issues, fuel pressure problems, wiring damage, injector seating problems, or an unresolved issue that was already present before the injector job.

The key is slowing down and diagnosing the system instead of replacing more parts.


Start With the Timing of the Problem

The first question is simple: Did the engine run worse immediately after the injectors were installed?

If yes, the problem is likely connected to something that changed during the repair. That could include air introduced into the fuel system, a loose connection, an injector that was not seated correctly, incorrect calibration data, damaged wiring, or a fuel line issue.

If the engine already ran poorly before the injectors were replaced, the new injectors may not have been the true root cause.

That distinction matters.

Replacing injectors can solve many fuel delivery problems, but it will not fix weak compression, valve adjustment issues, sensor problems, timing signal issues, air handling problems, or engine harness faults.


Air in the Fuel System

One of the most common reasons an engine runs rough after injector replacement is trapped air in the fuel system.

During an injector job, fuel lines, rails, injector tubes, or return lines may be opened. When that happens, air can enter the system.

Air in the fuel system can cause rough idle, misfires, surging, hard starting, hesitation, or uneven engine sound.

On some engines, the air clears quickly after proper priming. On others, the system may require a specific bleed or priming procedure.

This is especially important on high-pressure common rail systems, where fuel pressure and injector timing must be extremely precise.

If the engine starts but runs poorly right after the repair, verify the fuel system has been properly primed and that no fittings are allowing air to enter.


Incorrect or Missing Injector Trim Codes

Many modern diesel injectors are assigned calibration or trim codes.

These codes tell the ECM how that specific injector flows compared to a baseline. The ECM uses that information to fine-tune fuel delivery cylinder by cylinder.

If the trim codes are incorrect, missing, entered in the wrong cylinder, or not programmed at all, the engine may run unevenly.

Common symptoms may include rough idle, misfires, smoke, poor throttle response, increased fuel consumption, or uneven cylinder contribution.

Not every engine uses the same coding process. Some platforms require injector trim codes, some use different calibration methods, and some older systems may not require programming at all.

The safest approach is to verify the exact procedure for that engine family before assuming the repair is complete.


Injector Seating Problems

A diesel injector must seal correctly.

If the injector is not fully seated, if the sealing surface is dirty, if a washer is missing, or if the hold-down clamp is not torqued correctly, the cylinder may not seal or fuel may not be delivered correctly.

Injector seating issues can cause combustion leakage, rough running, misfires, fuel odor, poor performance, and abnormal engine noise.

This is why clean mating surfaces matter so much.

Even small debris, carbon buildup, or damaged sealing surfaces can create problems after installation.

If one cylinder sounds different after the injector job, inspect that injector location carefully.


Fuel Line, Return Line, or Connector Issues

Injector replacement often requires moving lines, fittings, harnesses, connectors, and covers.

That means something can be disturbed during the repair.

A loose high-pressure line, damaged return fitting, pinched seal, cracked connector, or improperly seated electrical plug can cause performance issues that appear immediately after the injectors are installed.

On electronic engines, wiring issues can create symptoms that look like injector failure.

Bent pins, oil intrusion, corrosion, loose connectors, damaged injector pigtails, or valve cover pass-through issues can all create intermittent misses or dead cylinders.

This is especially important if the problem comes and goes.


Wrong Injector Part Number

Diesel injectors can look similar and still be wrong for the application.

Flow rates, nozzle design, calibration requirements, emissions configuration, and engine software can vary by engine model, serial number, CPL, horsepower rating, or production year.

Installing an incorrect injector can create poor drivability, smoke, imbalance, misfires, or low power.

This is why part number verification matters before installation.

The old injector number, engine serial number, CPL, VIN, and application details should all be used to confirm fitment.

If the engine runs worse after replacement, double-check that the installed injectors are correct for that specific engine configuration.

Need Replacement Fuel Injectors?
Whether you’re diagnosing a misfire, replacing a failed injector, or planning a complete fuel system repair, browse our selection of diesel fuel injectors.

Shop Fuel Injectors

Injector Height or Overhead Adjustment

On some heavy-duty diesel engines, injector installation is closely tied to overhead adjustment.

If injector height, lash, or overhead settings are incorrect, the engine may run poorly even if the injectors are good.

Symptoms may include rough idle, low power, loud knocking, uneven cylinder contribution, or poor throttle response.

This is especially important on engines where injector actuation or adjustment is mechanically linked to the valvetrain.

If the injector job required removing the valve cover and disturbing the overhead, the adjustment should be verified against factory specifications.


Fuel Pressure Problems

A new injector installation can expose fuel system problems that were already present.

If supply pressure is low, rail pressure is unstable, filters are restricted, or the fuel pump is weak, the engine may still run poorly after the injector replacement.

Before condemning the injectors, verify fuel pressure data.

For common rail systems, rail pressure during crank, idle, acceleration, and shutdown can reveal important clues.

If rail pressure is strong and stable, the issue may be elsewhere.

If rail pressure is low or unstable, the problem may involve the fuel pump, pressure regulator, suction side restriction, return flow, filters, or a leak.


When All Cylinders Show Misfire Codes

A single-cylinder misfire after injector replacement may point toward a specific injector, connector, cylinder, or installation issue.

But when every cylinder shows a misfire or the ECM reports a general misfire across multiple cylinders, the problem may not be the injectors.

Global misfire complaints can point toward timing reference issues, crankshaft or camshaft sensor problems, wiring faults, overhead adjustment problems, airflow modeling issues, software/calibration problems, or sensor data that does not match actual engine operation.

This is where diagnostic software becomes essential.

Cylinder cutout tests, injector performance tests, rail pressure data, cam/crank correlation, active fault codes, and sensor readings should all be reviewed before replacing more parts.


When the Injector Itself May Be the Problem

A bad injector is still possible.

This is especially true if the problem is isolated to one cylinder and follows the injector during a swap test.

Signs that may point toward a faulty injector include a single-cylinder misfire, abnormal balance rate, failed injector performance test, failed buzz test, excessive return flow, fuel knock, smoke from one cylinder, or a cylinder contribution issue that moves when the injector is moved.

If the injector is remanufactured, quality and testing history matter.

A poorly rebuilt injector can have an out-of-spec spray pattern, weak solenoid, leakage, improper calibration, or internal wear.

But the injector should be diagnosed, not guessed.


A Smarter Diagnostic Order

When an engine runs worse after new injectors, work through the basics before jumping to expensive conclusions.

Start with the repair area. Confirm all injectors are seated correctly, all lines are tight, all connectors are fully installed, and all trim codes or calibration values are entered correctly.

Then verify fuel system health. Check fuel supply, rail pressure, filter restriction, return flow, and air intrusion.

Next, use diagnostic software. Look at cylinder contribution, injector tests, active codes, balance data, and sensor values.

Finally, widen the diagnosis. If the data does not point to one injector or one cylinder, look at harness issues, cam/crank signals, overhead adjustment, ECM programming, and air handling.


Final Takeaway

A diesel engine that runs worse after new injectors does not always mean the injectors are bad.

The issue may be air in the fuel system, missing trim codes, incorrect injector programming, poor seating, loose fuel lines, damaged wiring, wrong part numbers, overhead adjustment problems, or an unrelated issue that was misdiagnosed from the beginning.

The best approach is to diagnose the system carefully.

Start with what was touched during the repair. Verify the installation. Confirm the fuel system is fully primed. Check trim codes and calibration data. Review fuel pressure and cylinder contribution. Then look deeper if the symptoms do not point clearly to one injector.

If you need help identifying the correct diesel injectors or troubleshooting a fuel system issue, Highway and Heavy Parts can help.

Call 844-304-7688 or visit highwayandheavyparts.com to get the right diesel engine parts for your application.

From diagnosis through delivery, we’re Highway and Heavy Parts.

Posted on

Why Summer Heat Is Harder on Diesel Engines Than You Think

Most people think winter is the hardest season on a diesel engine.

Cold starts, thick oil, weak batteries, gelled fuel, and freezing temperatures all create obvious problems.

But summer can be just as hard on a heavy-duty diesel engine—sometimes harder—because the warning signs are often less obvious.

A truck may run perfectly in spring, then start feeling sluggish once temperatures rise, the trailer is hooked up, the A/C is running, and the engine is working under load. The temperature gauge may still look normal, but the cooling system, oil, fuel system, turbocharger, and aftertreatment system may all be operating closer to their limits.

Summer heat does not always break a diesel engine immediately.

It tests every system that was already weak.

HHP Quick Takeaway

Summer heat increases stress on the cooling system, engine oil, fuel system, turbocharger, airflow system, and aftertreatment components. The best way to protect your diesel engine is to address small maintenance issues before high temperatures, heavy loads, and long idle periods expose them.

Continue reading Why Summer Heat Is Harder on Diesel Engines Than You Think
Posted on

Caterpillar C15 Fuel Injector Problems: Why Flow-Matched Injectors Matter More Than You Think

When a Caterpillar C15 starts showing signs of poor performance, fuel injectors are usually one of the first places technicians look.

But here’s where a lot of repairs go wrong:

The issue isn’t always a “bad injector.”
It’s often injector imbalance across the engine.

That’s where flow-matched injectors come into play. If you’re working on C15 engines in trucks, fleets, or heavy equipment, understanding this difference can prevent repeat failures and unnecessary downtime.

Continue reading Caterpillar C15 Fuel Injector Problems: Why Flow-Matched Injectors Matter More Than You Think
Posted on

Diesel Fuel Injector Failure Explained: Internal Leakage, Timing Loss, and Combustion Imbalance

Diesel fuel injectors do more than deliver fuel.

They control injection timing, atomization, pressure, and combustion efficiency.

When an injector begins to fail, the issue is rarely just “bad fuel delivery.”

It is usually a breakdown in one of three critical areas:

  • Internal Sealing
  • Injection Pressure Control
  • Spray Pattern Formation

Understanding these failure modes is the key to diagnosing problems correctly – and avoiding repeat failures.

Continue reading Diesel Fuel Injector Failure Explained: Internal Leakage, Timing Loss, and Combustion Imbalance
Posted on

Caterpillar C15, 3406E Turbocharger (177148): Boost, Failure, and What Happens When It Goes Bad

On a Caterpillar C15 or 3406E, the turbocharger isn’t just about power – it’s about air control, combustion efficiency, and engine balance.

When the turbo is working correctly, you get:

  • Proper Air-to-Fuel Ratio
  • Clean Combustion
  • Consistent Power Under Load

When it starts to fail, everything changes – and it usually shows up under load first.

Continue reading Caterpillar C15, 3406E Turbocharger (177148): Boost, Failure, and What Happens When It Goes Bad
Posted on

Caterpillar C15 ACERT Fuel Injector (10R1273): Symptoms, Failure Causes, and Replacement Guide

If your Caterpillar C15 ACERT is running rough, smoking more than usual, or losing power under load, there’s a good chance the issue is in the fuel system.

More specifically – the fuel injectors.

And when an injector like the 10R1273 starts to fail, it doesn’t just affect performance. It can impact combustion, fuel economy, and long-term engine health.

Continue reading Caterpillar C15 ACERT Fuel Injector (10R1273): Symptoms, Failure Causes, and Replacement Guide
Posted on

Caterpillar 3406E Engine Rebuild Kit: What Actually Fails and What You Need to Fix It Right

The Caterpillar 3406E is known for durability – but when it starts to go, it usually doesn’t fail all at once.

It starts small.

A little blow-by.
A little oil consumption.
Maybe a slight drop in power under load.

Then it builds.

And before long, you’re not looking at a repair anymore – you’re looking at a full engine rebuild.

Continue reading Caterpillar 3406E Engine Rebuild Kit: What Actually Fails and What You Need to Fix It Right
Posted on

Most Common Cylinder Head Problems in Diesel Engines

Cylinder heads are one of the most critical components in a diesel engine. They seal combustion pressure, manage airflow, house the valves and injectors, and help transfer heat away from the combustion chamber.

Because cylinder heads operate under extreme pressure and temperature, they are also one of the most failure-prone areas in a diesel engine.

Many major engine failures eventually trace back to cylinder head problems caused by:

  • Overheating
  • Cooling system issues
  • Excessive combustion pressure
  • Poor maintenance
  • Improper installation procedures

Some cylinder head failures develop slowly over hundreds of thousands of miles. Others can happen suddenly and cause catastrophic engine damage in minutes.

A failed cylinder head can lead to:

  • Coolant loss
  • Compression loss
  • White smoke
  • Hard starting
  • Engine overheating
  • Piston and liner damage

That is why accurate diagnosis matters so much.

Continue reading Most Common Cylinder Head Problems in Diesel Engines
Posted on

Cummins ISX, QSX Cylinder Head: Symptoms, Failure Causes, and Replacement Guide

If your Cummins ISX or QSX is overheating, losing coolant, or showing signs of combustion issues, the problem may be deeper than a gasket or sensor.

It could be your cylinder head.

And when a cylinder head starts to fail, it doesn’t take long before it affects the entire engine.

Continue reading Cummins ISX, QSX Cylinder Head: Symptoms, Failure Causes, and Replacement Guide
Posted on

Detroit Diesel Series 60 Inframe Rebuild Kit: Liner Height, Bearing Wear, and What Actually Fails

Detroit Diesel Series 60 engines are known for durability – but when they reach high mileage, failure doesn’t happen all at once.

It happens in stages.

Most rebuild decisions start with symptoms like oil consumption, blow-by, or low oil pressure—but the real question is:

What’s actually worn out inside the engine – and what needs to be replaced to fix it correctly?

This guide breaks down the technical failure points and measurements that determine whether your Series 60 rebuild lasts – or comes back.

Continue reading Detroit Diesel Series 60 Inframe Rebuild Kit: Liner Height, Bearing Wear, and What Actually Fails
Posted on

Diesel Engine Noise During Clutch Engagement: Diagnosing Drag, Slip, and Hydraulic Failure

If you’re hearing noise when engaging the clutch, don’t ignore it.

What might seem like a minor issue – grinding, chatter, or a harsh engagement – can point to mechanical or hydraulic problems that will only get worse over time.

On heavy-duty diesel applications, clutch engagement issues typically fall into three categories:

  • Clutch Drag (Not Fully Disengaging)
  • Clutch Slip (Not Fully Engaging)
  • Hydraulic System Failure Or Imbalance

Understanding the difference is critical – because each one leads to very different failure paths.

Continue reading Diesel Engine Noise During Clutch Engagement: Diagnosing Drag, Slip, and Hydraulic Failure
Posted on

The Top Ways to Kill a Caterpillar Turbocharger

Turbochargers play a critical role in modern Caterpillar diesel engines.

They help increase power, improve combustion efficiency, maintain emissions performance, and support fuel economy by forcing additional air into the engine. Without proper turbocharger operation, even a healthy diesel engine can experience power loss, excessive smoke, poor fuel economy, and high exhaust temperatures.

Yet one of the most common mistakes made during a turbocharger replacement has nothing to do with the turbo itself.

Many failed turbochargers are replaced without identifying the root cause of the original failure.

As a result, the replacement turbocharger often suffers the same fate.

Understanding why Caterpillar turbochargers fail—and how to prevent repeat failures—can help reduce downtime, avoid unnecessary repairs, and improve long-term engine reliability.

Continue reading The Top Ways to Kill a Caterpillar Turbocharger
Posted on

Caterpillar C15, 3406E Camshaft: Symptoms, Failure Causes, and Replacement Guide

If your Caterpillar C15 or 3406E isn’t running like it used to – losing power, misfiring, or making unusual noise – the problem might not be what you think.

It could be your camshaft.

And if that’s the case, waiting too long can turn a manageable repair into a full engine rebuild.

Continue reading Caterpillar C15, 3406E Camshaft: Symptoms, Failure Causes, and Replacement Guide
Posted on

Caterpillar 3406E Camshaft: Symptoms, Failure Causes, and Replacement Guide

If your Caterpillar 3406E is losing power, popping through the intake, or backfiring through the exhaust, the problem may not be fuel-related at all. In many cases, those symptoms point back to camshaft or valve train wear. When those components start to fail, performance can drop quickly, and if the issue is ignored, it can lead to more extensive engine damage and a much more expensive repair.

This article breaks down what the camshaft does, common signs of failure, why proper installation matters, and what to keep in mind when replacing a 3406E camshaft. If you are already looking for replacement parts, you can start by reviewing our Caterpillar 3406E Camshaft here.

Continue reading Caterpillar 3406E Camshaft: Symptoms, Failure Causes, and Replacement Guide
Posted on

Caterpillar C12 Camshaft Problems, Symptoms, and Replacement

If your Caterpillar C12 is losing power, running rough, or showing signs of valve train issues, the camshaft may be part of the problem. A worn camshaft can affect valve timing, engine efficiency, fuel economy, and overall performance. Left too long, what starts as a drivability issue can turn into a much larger repair.

Because the camshaft plays such a major role in how the engine breathes and performs, wear in this area should never be ignored. If you are already narrowing down the repair, our Caterpillar C12 Camshaft is a good place to start, and you can also browse more Caterpillar Engine Parts if the repair involves other related components.

Continue reading Caterpillar C12 Camshaft Problems, Symptoms, and Replacement
Posted on

Cummins ISL G Cylinder Head Failures: Why Valve Seats Drop and How to Prevent It

The Cummins ISL G natural gas engine is built for a different type of combustion.

And that difference is exactly why the cylinder head fails the way it does.

Unlike diesel engines, ISL G failures are not typically caused by pressure.

They are caused by heat, material fatigue, and valve seat wear.

Continue reading Cummins ISL G Cylinder Head Failures: Why Valve Seats Drop and How to Prevent It
Posted on

Diesel Engine Smoke Colors: What White, Black, and Blue Smoke Mean

A healthy diesel engine should produce little to no visible smoke once it reaches normal operating temperature.

So when smoke starts coming out of the exhaust, it is usually a sign that something inside the engine is not working as intended.

The good news is that the color of the smoke can provide valuable clues about what is happening. In many cases, experienced diesel technicians can narrow down potential causes simply by observing the exhaust before they ever connect a diagnostic tool.

Whether you’re operating a Caterpillar, Cummins, Detroit Diesel, International/Navistar, Paccar, Mack, Volvo, John Deere, Ford, Mercedes-Benz, Chevy/GMC, Dodge, Perkins, or another diesel platform, understanding what your exhaust is trying to tell you can help identify problems before they become major repairs.

Continue reading Diesel Engine Smoke Colors: What White, Black, and Blue Smoke Mean
Posted on

Cummins ISX In-Frame Rebuild Failure: Why Your New Liners Aren’t Sealing (And How to Fix It)

You finished the in-frame. New liners, pistons, rings – everything looks right.

But now you’re seeing:

  • Blow-By
  • Oil Consumption
  • Low Compression
  • Or Worse… It’s Smoking Under Load

This isn’t uncommon on Cummins ISX engines – and it usually comes down to one issue:

Improper liner protrusion and ring seating during install.

If you don’t get this right, your rebuild won’t last – no matter how good your parts are.

Continue reading Cummins ISX In-Frame Rebuild Failure: Why Your New Liners Aren’t Sealing (And How to Fix It)
Posted on

Diesel Engine Ticking vs Knocking: How to Diagnose Valve Train Noise Before It Causes Damage

Not all engine noise is the same.

A ticking sound and a knocking sound may seem similar, but they point to very different issues inside your diesel engine.

In many cases, both originate in the valve train system – and both can escalate into major engine damage if ignored.

Continue reading Diesel Engine Ticking vs Knocking: How to Diagnose Valve Train Noise Before It Causes Damage
Posted on

How to Diagnose Diesel Engine Belt Noise: Identifying Pulley, Tensioner, and Accessory Failures

Belt noise on a diesel engine is not just an annoyance.

It is often an early warning sign of misalignment, bearing failure, or improper belt tension.

Ignoring it can lead to:

  • Accessory Failure
  • Loss Of Charging System
  • Cooling System Issues
  • Unexpected Downtime

Proper diagnosis requires understanding how the belt system operates under load.

Continue reading How to Diagnose Diesel Engine Belt Noise: Identifying Pulley, Tensioner, and Accessory Failures
Posted on

Caterpillar C10 and C12 Cylinder Head Failure: Cracking, Valve Seat Wear, and When Replacement Is Required

The cylinder head on a Caterpillar C10 or C12 isn’t just a casting – it’s where combustion, airflow, and cooling all come together.

And when it fails, it usually doesn’t fail quietly.

Cracked heads, worn valve seats, and injector cup issues are some of the most common – and most expensive – problems we see on these engines. If you’re already chasing coolant loss, misfires, or compression issues, there’s a good chance the cylinder head is involved.

Continue reading Caterpillar C10 and C12 Cylinder Head Failure: Cracking, Valve Seat Wear, and When Replacement Is Required
Posted on

Why Diesel Fuel Systems Are So Sensitive (And How Small Issues Turn Into Major Repairs)

If you’ve ever dealt with a diesel fuel system issue, you know how quickly things can escalate. What starts as a minor problem – like a slight misfire, rough idle, or extra smoke – can quickly turn into major engine damage if it’s not addressed early.

That’s what makes modern diesel fuel systems so challenging.

They’re not just sensitive – they’re precise to the point where even small disruptions can create serious problems. When something in the system changes – even slightly – it directly impacts combustion. If you’re already dealing with fuel system issues or looking to prevent them, you can explore our full range of diesel fuel system components designed for reliability and performance.

Continue reading Why Diesel Fuel Systems Are So Sensitive (And How Small Issues Turn Into Major Repairs)
Posted on

Detroit Diesel Series 60 Common Issues and Failures

Do you own a Detroit Diesel Series 60 engine? It probably runs well for the most part. All three versions of this electronically-controlled engine have a favorable reputation; despite being out of production for years, the Series 60 remains a popular choice for many truck drivers.

Continue reading Detroit Diesel Series 60 Common Issues and Failures
Posted on

Dirty Diesel Fuel Injectors: What’s Really Happening Inside (And Why Cleaning Isn’t Enough)

Dirty or clogged diesel fuel injectors are one of the most common – and most misunderstood – fuel system problems.

A lot of people think it’s just a restriction issue. Spray some cleaner, maybe swap a filter, and you’re good to go.

But in reality, injector contamination leads to precision failure inside the injector itself – and once that starts, performance drops fast.

Before you try a quick fix, it’s important to understand what’s actually happening inside your injectors.

Continue reading Dirty Diesel Fuel Injectors: What’s Really Happening Inside (And Why Cleaning Isn’t Enough)
Posted on

Detroit Diesel Series 60 Oil Pump Failure: Causes, Oil Pressure Loss, and When to Replace

The oil pump in your Detroit Diesel Series 60 isn’t just another component – it’s the heart of your lubrication system. When it starts to fail, the damage doesn’t stay isolated. It spreads fast.

Low oil pressure, bearing wear, and even full engine failure can all trace back to one root issue: inconsistent oil delivery.

If you’re working on a Series 60, understanding how the oil pump fails – and how to catch it early – can be the difference between a simple repair and a full rebuild.

Continue reading Detroit Diesel Series 60 Oil Pump Failure: Causes, Oil Pressure Loss, and When to Replace
Posted on

Diesel Engine Overheating: How to Diagnose the Problem

Diesel engine overheating is one of the most common – and most damaging – issues you can face.

What starts as a slight temperature increase can quickly turn into major engine damage if not diagnosed correctly.

If your diesel engine is overheating, identifying the root cause early is critical to preventing expensive repairs and downtime.

Continue reading Diesel Engine Overheating: How to Diagnose the Problem
Posted on

Cummins L10 Cam Follower Failure: How Cam Lever Rollers Control Valve Train Geometry

The cam follower in a Cummins L10 is a small component with a very large job.

It directly transfers motion from the camshaft to the valve train.

And when it fails, it doesn’t just affect performance – it can lead to catastrophic engine damage.

What the Cam Lever Follower Actually Does

In the Cummins L10 valve train, the camshaft does not directly actuate the valves.

Instead, motion is transferred through a cam follower (cam lever with roller).

This component:

  • Converts Rotational Camshaft Motion Into Linear Movement
  • Maintains Correct Valve Timing And Lift
  • Reduces Friction Through A Roller Contact Surface

The roller rides directly on the cam lobe, making this a high-load, high-contact stress interface.


Why Roller Followers Are Used Instead of Flat Tappets

The Cummins L10 uses a roller-style follower to reduce friction and wear.

Compared to flat tappets, roller followers:

  • Reduce Sliding Friction At The Cam Lobe Interface
  • Lower Heat Generation
  • Improve Camshaft Longevity
  • Maintain More Consistent Valve Timing Over Time

However, this design introduces a different failure risk — roller bearing failure.


Contact Stress and Load Distribution at the Cam Lobe

The cam-to-roller interface experiences extreme contact pressure.

This is a classic Hertzian contact stress scenario, where:

  • Load Is Concentrated Over A Small Contact Area
  • Surface Hardness And Lubrication Are Critical
  • Any Imperfection Leads To Accelerated Wear

Under normal conditions, a hydrodynamic oil film separates the surfaces.

But when lubrication is compromised, metal-to-metal contact occurs.


How Cam Followers Fail

Cam follower failures typically start small but escalate quickly.

Common failure modes include:

  • Roller Bearing Wear Or Seizure
  • Flat Spots On The Roller Surface
  • Spalling Or Pitting Of The Roller
  • Misalignment Of The Follower

Once the roller stops rotating:

  • Sliding Friction Replaces Rolling Contact
  • Heat Increases Rapidly
  • Cam Lobe Wear Accelerates

What Happens When the Roller Stops Turning

This is where failure becomes severe.

A seized roller creates:

  • Direct Sliding Contact Against The Cam Lobe
  • Rapid Material Removal From The Camshaft
  • Loss Of Proper Valve Lift Profile

This leads to:

  • Incorrect Valve Timing
  • Reduced Airflow And Combustion Efficiency
  • Increased Stress On Other Valve Train Components

Eventually, this can damage:

  • Camshaft Lobes
  • Pushrods
  • Rocker Arms

Lubrication: The Critical Failure Variable

The cam follower depends entirely on proper lubrication.

Oil must:

  • Reach The Roller Bearing
  • Maintain A Film Between Cam And Roller
  • Remove Heat From The Contact Area

Failure causes related to lubrication include:

  • Low Oil Pressure
  • Contaminated Oil (Debris Or Soot)
  • Oil Starvation During Startup

Without lubrication, failure accelerates rapidly.


Secondary Damage from Cam Follower Failure

A failing cam follower rarely fails alone.

It creates a chain reaction:

  • Camshaft Lobe Wear Alters Valve Timing
  • Metal Debris Circulates Through The Engine
  • Additional Components Experience Accelerated Wear

In severe cases, this can lead to:

  • Complete Valve Train Failure
  • Engine Tear-Down Requirements

Signs of a Failing Cam Follower

Early detection can prevent major damage.

Watch for:

  • Unusual Valve Train Noise (Ticking Or Knocking)
  • Loss Of Engine Performance
  • Metal Particles In Oil Analysis
  • Irregular Valve Operation

These symptoms often appear before catastrophic failure.


Why Inspection During Rebuild Is Critical

Cam followers should always be inspected during an overhaul.

Key checks include:

  • Roller Rotation Smoothness
  • Surface Condition Of The Roller
  • Bearing Integrity
  • Alignment And Wear Patterns

Reusing worn components increases the risk of immediate failure.


When to Replace Cam Followers

Replacement is recommended when:

  • Roller Wear Or Pitting Is Visible
  • Bearing Play Exists
  • The Roller Does Not Rotate Freely
  • Camshaft Wear Is Present

It is often best practice to replace followers when replacing the camshaft.


Shop Cummins L10 Cam Followers

If you’re rebuilding your engine or diagnosing valve train issues, cam followers should not be overlooked.

👉 Shop Cummins L10 Products

At Highway and Heavy Parts:

  • Verified Fitment Before Shipping
  • High-Quality Components Built For Heavy-Duty Applications
  • Fast Shipping (1–2 Days In Most Areas)
  • Expert Diesel Support
  • Parts And Labor Warranty

Small Component, Major Consequences

The cam follower may seem minor.

But it directly affects:

  • Valve Timing
  • Engine Efficiency
  • Component Longevity

Ignoring it can lead to major repairs.


Protect Your Valve Train System

Proper function depends on correct operation across all components.

👉 Maintain Proper Oil Quality And Pressure
👉 Inspect Valve Train Components During Service
👉 Replace Worn Components Before Failure Occurs

Call 844-304-7688 to speak with a diesel parts specialist
or visit highwayandheavyparts.com to find the right rebuild kit for your engine.

From diagnosis to delivery, Highway and Heavy Parts has your back.

Cummins L10 Cam Followers For Sale From Highway and Heavy Parts!

Continue reading Cummins L10 Cam Follower Failure: How Cam Lever Rollers Control Valve Train Geometry

Posted on

Diesel Engine Failure Diagnosis: Compression Issues

There are many possible causes of engine failure. You can see our earlier post on diagnosing engine failures, too.

Continue reading Diesel Engine Failure Diagnosis: Compression Issues
Posted on

Volvo D13 / Mack MP8 Turbo Overspeed Failure: What Causes It And Why Replacing The Turbo Isn’t Enough

Turbocharger failure on a Volvo D13 or Mack MP8 engine isn’t always caused by wear – it’s often the result of turbo overspeed conditions driven by VGT control issues, exhaust imbalance, or air system faults.

In many cases, the turbo fails because it was forced to operate outside of its design limits – not because the turbo itself was defective.

Understanding what causes turbo overspeed is critical to preventing repeat failures.

Continue reading Volvo D13 / Mack MP8 Turbo Overspeed Failure: What Causes It And Why Replacing The Turbo Isn’t Enough
Posted on

Cummins ISX Inframe Rebuild Failure: Why Your New Liners Aren’t Sealing (And How to Fix It)

You finished the inframe. New liners, pistons, rings – everything looks right.

But now you’re seeing:

  • Blow-By
  • Oil Consumption
  • Low Compression
  • Or Worse… It’s Smoking Under Load

This isn’t uncommon on Cummins ISX engines – and it usually comes down to one issue:

Improper liner protrusion and ring seating during install.

If you don’t get this right, your rebuild won’t last – no matter how good your parts are.

Continue reading Cummins ISX Inframe Rebuild Failure: Why Your New Liners Aren’t Sealing (And How to Fix It)
Posted on

DD15 Diesel Engine Pistons: How They Control Blow-By and What Causes Failure

Blow-by is not just a symptom.

It is a direct result of combustion pressure escaping past the piston assembly.

On a Detroit Diesel DD15, controlling blow-by comes down to one thing:

How well the piston, rings, and liner seal under load.

If that seal fails, everything else starts to follow.

Continue reading DD15 Diesel Engine Pistons: How They Control Blow-By and What Causes Failure
Posted on

Cummins ISX Crankshaft Failure: Signs, Causes, and What to Do Before It Costs You an Engine

When a Cummins ISX starts running rough, vibrating, or misfiring, most people don’t immediately think about the crankshaft.

That’s the problem.

Because by the time the crankshaft shows obvious symptoms, the damage is usually already happening inside the engine – and it doesn’t take long before it turns into a full rebuild.

If you’re dealing with vibration, low oil pressure, or unusual engine noise, this is one issue you don’t want to ignore.

Continue reading Cummins ISX Crankshaft Failure: Signs, Causes, and What to Do Before It Costs You an Engine
Posted on

Detroit Diesel Series 60 14L Turbocharger: Symptoms, Failure Causes, and When to Replace

The turbocharger on a Detroit Diesel Series 60 14L engine does more than add power.

It controls airflow, and airflow controls combustion.

When the turbo isn’t performing correctly, the entire engine starts to fall out of balance.

Continue reading Detroit Diesel Series 60 14L Turbocharger: Symptoms, Failure Causes, and When to Replace
Posted on

Caterpillar C15 and 3406E Oil Pump: Symptoms, Failure Causes, and When to Replace

Low oil pressure isn’t something you ignore on a diesel engine.

On a Caterpillar C15 or 3406E, it’s often a warning sign that something deeper is going wrong inside the engine.

And in many cases, the issue starts with the oil pump.

Continue reading Caterpillar C15 and 3406E Oil Pump: Symptoms, Failure Causes, and When to Replace
Posted on

Before You Replace That Caterpillar Turbo, Check Your Injectors First

When a Caterpillar engine starts losing power, producing excessive smoke, struggling with recurring DPF issues, or experiencing turbocharger problems, the turbocharger is often the first component blamed.

Sometimes the turbocharger is the problem. But many times, it is simply the victim.

What many technicians and equipment owners don’t realize is that fuel injectors and turbochargers work together as part of the same combustion process. When injector performance begins to decline, the effects can spread throughout the entire engine, eventually impacting the turbocharger, aftertreatment system, fuel economy, and overall performance.

Before replacing another turbocharger, it may be worth taking a closer look at the fuel system.


Continue reading Before You Replace That Caterpillar Turbo, Check Your Injectors First
Posted on

What Happens When a Diesel Engine Sits Too Long? (Fuel, DEF, and Internal Damage Explained)

Diesel engines are built to run – not sit.

At Highway and Heavy Parts, we regularly work with engines that come out of storage with unexpected performance issues. In many cases, the root cause isn’t a failed part: it’s what happened while the engine wasn’t running.

Whether it’s a backup truck, seasonal equipment, or a unit waiting on work, extended downtime can quietly create problems that don’t show up until the engine is put back into service.

And in many cases, those problems get misdiagnosed.

From fuel degradation to DEF crystallization and internal wear, here’s exactly what happens when a diesel engine sits too long – and what to look for before putting it back to work.

Continue reading What Happens When a Diesel Engine Sits Too Long? (Fuel, DEF, and Internal Damage Explained)
Posted on

What Does It Cost to Replace a Diesel Fuel Injector in 2026?

If your diesel engine is running rough, smoking, or losing power, a failing fuel injector could be the cause.

One of the first questions most people ask is: How much does it cost to replace a diesel fuel injector?

The answer depends on your engine, injector type, and how far the issue has progressed. Some injector problems are caught early. Others turn into much larger repairs.

Let’s break down what actually impacts the cost – and what you can expect in 2026.

Continue reading What Does It Cost to Replace a Diesel Fuel Injector in 2026?
Posted on

10 Common Causes of Excessive Oil Consumption in Diesel Engines

Diesel engines are built for durability, but excessive oil consumption can quickly turn into a costly repair if the root cause is ignored.

If you’re constantly adding oil, noticing blue or gray smoke, or seeing a drop in performance, there’s usually an underlying mechanical reason. The key is figuring out whether the oil is being burned, leaked, pushed through the intake system, or lost because of internal engine wear.

In this guide, we’ll break down the most common causes of excessive oil consumption in diesel engines, what each one means, and what to check before it turns into a major failure.

Continue reading 10 Common Causes of Excessive Oil Consumption in Diesel Engines
Posted on

Cummins ISX Fuel Injector Problems: Symptoms, Causes, and Replacement Guide

If your Cummins ISX is hard starting, losing power, or producing excessive smoke, failing fuel injectors could be the cause.

Injector issues don’t usually show up all at once.

They start small, but if ignored, they can quickly turn into major engine problems.

Understanding the symptoms – and addressing them early – can save you time, money, and downtime.

Continue reading Cummins ISX Fuel Injector Problems: Symptoms, Causes, and Replacement Guide
Posted on

Caterpillar C15 and 3406E Oil Cooler: How It Works, Failure Symptoms, and Why It Matters

The oil cooler on a Caterpillar C15 or 3406E does more than regulate temperature.

It protects:

  • Oil Viscosity
  • Bearing Life
  • Internal Engine Clearances

If the oil cooler fails, it doesn’t just affect oil temperature.

It affects the entire engine.

Continue reading Caterpillar C15 and 3406E Oil Cooler: How It Works, Failure Symptoms, and Why It Matters
Posted on

7 Common Detroit Diesel Series 60 Problems

Do you have a Series 60 engine from Detroit? For the most part, it probably runs great for you. This electronically controlled engine has a favorable history, shared between all three versions, and despite having been out of production for years now, it remains a popular choice for many operators.

Continue reading 7 Common Detroit Diesel Series 60 Problems
Posted on

Diesel Turbocharger Sounds: What They Mean and When to Inspect

A diesel turbocharger is not silent.

A light whistle, whoosh, or spool sound under load can be completely normal. However, when the sound changes suddenly, gets louder, or comes with smoke, low power, or oil consumption, it can point to a problem in the turbocharger system.

The key is not just hearing the sound.

It is understanding what kind of sound it is, when it happens, and what else the engine is doing at the same time.

Turbocharger noise can come from the turbo itself, but it can also come from boost leaks, exhaust leaks, restricted air filters, fuel system problems, damaged exhaust components, or lubrication issues. Garrett specifically notes that noisy performance, low power, smoke, and oil consumption can come from underlying engine problems—not always the turbocharger itself.

Continue reading Diesel Turbocharger Sounds: What They Mean and When to Inspect
Posted on

Diesel Cylinder Head Cracking: 4 Causes, Symptoms & Prevention

Diesel cylinder head cracking is one of the most serious issues an engine can face – and one of the most expensive if it’s not caught early.

What makes it worse is that it often starts small.

A minor overheating event, a stress point in the casting, or an installation issue can eventually turn into coolant loss, compression problems, and complete engine failure.

Understanding what causes cylinder head cracking – and what to look for – can help prevent repeat failures and unnecessary downtime.

Continue reading Diesel Cylinder Head Cracking: 4 Causes, Symptoms & Prevention
Posted on

Caterpillar C15, C15 ACERT, and 3406E Cylinder Head: Failure Symptoms, Causes, and When to Replace

The cylinder head on a Caterpillar C15, C15 ACERT, or 3406E is one of the most critical components in the engine.

It controls:

  • Combustion Sealing
  • Airflow into the Cylinders
  • Exhaust Flow out of the Engine
  • Fuel Injector Operation

When the cylinder head starts to fail, it doesn’t stay contained. It affects the entire engine.

Continue reading Caterpillar C15, C15 ACERT, and 3406E Cylinder Head: Failure Symptoms, Causes, and When to Replace
Posted on

Why Correct Fuel Injector Trim Codes Still Result in Poor Engine Performance

You’ve replaced the injectors.
You’ve programmed the trim codes correctly.
Everything checks out – and the engine still runs rough.

This is more common than most people realize.

Fuel injector trim codes are designed to fine-tune fuel delivery, but they are not a fix-all. If the engine is still underperforming, the issue is almost always outside the trim code itself.

Continue reading Why Correct Fuel Injector Trim Codes Still Result in Poor Engine Performance
Posted on

Caterpillar C15 Head Gasket Problems: Failure Points, Diagnosis, and Replacement

Head gasket problems on the Caterpillar C15 are rarely random.

They are almost always tied to:

  • Heat
  • Clamping force
  • Or failure in related components like the spacer plate or cylinder head

If you’re seeing coolant, oil, or pressure issues – especially toward the left side or rear of the engine – you’re already looking in the right place.

Continue reading Caterpillar C15 Head Gasket Problems: Failure Points, Diagnosis, and Replacement
Posted on

Low Boost Diesel No Check Engine Light: Causes and Diagnosis

If you’re dealing with low boost diesel no check engine light, you’re not alone.

This is one of the most common complaints we hear.

It’s also one of the most misdiagnosed. And because there’s no fault code, it’s easy to assume:

  • The issue isn’t serious
  • It’s electrical
  • Or nothing is actually wrong

In reality, low boost with no warning light is usually a mechanical or system efficiency issue.

Continue reading Low Boost Diesel No Check Engine Light: Causes and Diagnosis
Posted on

Caterpillar C15 Fuel Injector Failures: Precise Diagnosis, Failure Modes, and Replacement Strategy

If a Caterpillar C15 starts to smoke, miss, haze at idle, or loses power under load, injectors are high on the list: but guessing is what gets engines hurt.

On many C15 variants (notably HEUI systems), injectors are hydraulically actuated by high-pressure engine oil. That means injector performance depends on two systems at once:

  • Fuel supply (clean, stable pressure)
  • Actuation oil (ICP/IAP pressure, clean oil, correct viscosity)

When either side is off, injector behavior changes.

What “Correct” Looks Like

With a healthy system:

  • Smooth idle, even exhaust note
  • Stable rail/actuation pressure under load
  • Balanced cylinder contribution
  • Minimal visible smoke once warm

Any deviation should be traced to a cylinder, then to a cause – not straight to parts replacement.


Primary C15 Injector Failure Modes (What Actually Fails)

1) Internal Leakage → Fuel Dilution (High Risk)

Mechanism

  • Worn check valve or sealing surfaces inside injector
  • Failed injector O-rings (upper/middle/lower) allowing cross-leakage

What happens

  • Fuel bypasses normal metering
  • Fuel can enter the cylinder uncontrollably or migrate past rings

Hard indicators

  • Engine oil level rising with no external leak
  • Oil smells like diesel
  • Reduced oil viscosity → bearing risk

Why it matters

  • Fuel-diluted oil cannot maintain hydrodynamic film
  • Main and rod bearings are at risk quickly

2) Solenoid / Electrical Control Failure

Mechanism

  • Coil failure, high resistance, intermittent connection
  • Damaged injector pigtail or harness

What happens

  • Injector fails to open/close precisely
  • Timing and duration errors

Hard indicators

  • Misfire at specific cylinder
  • Contribution test shows weak cylinder
  • Electrical codes may or may not set

Key point
Electrical faults can look identical to mechanical injector failure – verify before replacing.


3) Nozzle Wear, Erosion, or Coking

Mechanism

  • High-pressure fuel erodes or deforms nozzle holes
  • Carbon buildup (“coking”) distorts spray pattern

What happens

  • Poor atomization
  • Larger droplets → incomplete burn

Hard indicators

  • Black smoke under load (overfueling/poor burn)
  • Elevated EGT on affected cylinder
  • Soot accumulation increases

Result

  • Higher piston crown temperature
  • Long-term risk to valves and liners

4) Sticking Injector (Open or Closed Behavior)

Mechanism

  • Deposits or wear cause internal components to hang

What happens

  • Injector stuck open → overfueling
  • Injector stuck closed → dead cylinder

Hard indicators

  • White/gray smoke (raw fuel) or dead miss
  • Engine may clear up as it warms (thermal expansion)
  • Severe cases: cylinder washdown

5) Seal/O-Ring Failure (Fuel/Air Cross-Leak)

Mechanism

  • O-ring degradation from heat, age, or contamination

What happens

  • Air intrusion into fuel system
  • Fuel pressure instability
  • Cross-port leakage

Hard indicators

  • Hard start after sitting
  • Aerated fuel symptoms
  • Inconsistent performance

6) HEUI-Specific: Actuation Oil Problems Misdiagnosed as Injectors

Mechanism

  • Low ICP/IAP pressure
  • Aerated or contaminated oil
  • High-pressure oil leaks (o-rings, rail)

What happens

  • Injectors cannot achieve commanded fuel pressure
  • Poor response, misfires under load

Hard indicators

  • Low actuation pressure vs commanded
  • Multiple cylinders affected
  • Improves with RPM (sometimes)

Key point
This is often misdiagnosed as “bad injectors”.


Diagnostic Workflow (What Actually Works)

Do not start with parts. Start with isolation.

1) Cylinder Cut-Out / Contribution Test

  • Disable one cylinder at a time (via Cat ET or manual method)
  • Watch RPM drop or fuel correction

Result

  • Weak change → suspect that cylinder

2) Verify Fuel Supply Pressure

  • Check at filter base or test port
  • Ensure stable pressure during crank and load

Why
Low supply pressure affects all injectors and mimics failure.

3) Check Actuation Oil Pressure (HEUI)

  • Compare actual vs commanded ICP/IAP
  • Look for lag, drop, or instability

Why
No actuation pressure = no injector performance.

4) Valve Cover Inspection

Look for:

  • Fuel wash (clean, stripped oil areas)
  • Oil dilution signs

Fuel wash indicates:
→ injector leaking into that cylinder

5) Temperature Comparison (Advanced but Effective)

  • Use IR gun on exhaust manifold runners

Result

  • Cold cylinder → underfueling/misfire
  • Hot cylinder → overfueling/poor atomization

Replacement Strategy (What Actually Makes Sense)

Replace One Injector vs Set?

  • Single failure, low hours: targeted replacement is acceptable
  • High mileage / multiple symptoms: replace as a set

Reason:

  • Injector balance matters
  • Mixed wear levels create uneven combustion

Always Replace:

  • Injector O-ring kits
  • Any damaged cups (if applicable)
  • Verify harness/pigtails

After Replacement:

  • Prime fuel system
  • Verify pressures
  • Recheck contribution balance

What Causes Repeat Injector Failures

Injectors rarely fail in isolation.

Common root causes:

  • Contaminated fuel
  • Poor filtration maintenance
  • Low fuel pressure
  • Air intrusion
  • Oil system issues (HEUI engines)

If the root cause isn’t fixed:
→ new injectors will fail again


HHP Insight: Don’t Treat Injectors as the Root Problem

Most repeat failures come from:

  • Fuel system imbalance
  • Actuation pressure issues
  • Contamination

Injectors are often the symptom, not the cause.


Final Thoughts

C15 injector problems are not just about replacing parts.

They’re about:

  • Identifying the failing cylinder
  • Verifying fuel and oil systems
  • Understanding combustion behavior

That’s how you prevent:

  • Repeat failures
  • Engine damage
  • Unnecessary costs

Need Caterpillar C15 fuel injectors?

Shop here:
👉 Caterpillar C15 Fuel Injectors

Or call 844-304-7688 to speak with a diesel expert.

From diagnosis through delivery, we’re Highway and Heavy Parts.

Posted on

Caterpillar C15 Head Gasket Failure: Root Causes, Symptoms, And Proper Repair Process

A failed head gasket on a Caterpillar C15 isn’t just a sealing issue – it’s usually the result of improper clamping force, liner height variation, or thermal stress inside the engine.

Replacing the gasket without addressing the underlying cause often leads to repeat failure.

Understanding why the gasket failed is critical before installing a new cylinder head gasket set.

Continue reading Caterpillar C15 Head Gasket Failure: Root Causes, Symptoms, And Proper Repair Process
Posted on

Why Intake Valve Seats Fall Out In Diesel Cylinder Heads After Overheating

A dropped valve seat in a diesel engine isn’t just a cylinder head issue – it’s a direct result of thermal stress, material expansion, and loss of interference fit.

This type of failure is most commonly seen after an overheating event, and once it happens, the damage is usually severe enough to require cylinder head replacement and, in many cases, piston repair.

Understanding why valve seats fail – and what leads up to it – is critical to preventing repeat engine damage.

Continue reading Why Intake Valve Seats Fall Out In Diesel Cylinder Heads After Overheating
Posted on

Bosch High Pressure Diesel Oil Pump: Signs of Failure and the Benefits of a Replacement

Is your Navistar/International DT466/I530 HEUI High Pressure Oil Pump showing signs of reduced power, decreased fuel economy, increased emissions, or rough running? We can help you recognize the signs of failure and inform you on all of the benefits of replacing your oil pump with a Genuine Bosch oil pump from HHP.

Continue reading Bosch High Pressure Diesel Oil Pump: Signs of Failure and the Benefits of a Replacement
Posted on

Why Your Caterpillar C15 ACERT Turbocharger Might Not Be the Real Problem

If you’re dealing with low power, smoke, or oil around the turbo on a Caterpillar C15 ACERT, it’s easy to assume the turbocharger has failed.

But that’s not always the case.

At Highway and Heavy Parts, we see this all the time – turbos get replaced, but the original problem is still there. That’s because many turbo “failures” are actually symptoms of fuel system issues, oil problems, or internal engine wear.

Before replacing your turbo, it’s critical to understand what’s really going on.

Continue reading Why Your Caterpillar C15 ACERT Turbocharger Might Not Be the Real Problem
Posted on

Dinex Emission: The Solution to Diesel Pollution

Dinex Emission is a company that has been dedicated to helping diesel operators meet the high standards of the EPA for a very long time. Though the EPA’s goal is to reduce the emissions of dangerous gasses into the air, their restrictions can often make transporting goods, completing construction projects, and harvesting large crops more difficult. As an expert in the field of diesel emissions control, Dinex has long been the solution to this obstacle.

Continue reading Dinex Emission: The Solution to Diesel Pollution
Posted on

Common Diesel Engine Problems and Solutions

Diesel engines are workhorses, powering everything from trucks to heavy machinery. However, like any complex machinery, they can encounter problems. Let’s explore some of the most common issues and their solutions:

Continue reading Common Diesel Engine Problems and Solutions
Posted on

How To Know If Your Fuel Pump Is Failing

Do you think you need a new high-pressure pump for your Detroit engine, but aren’t sure how to tell if it’s really time? Do you know what your options are?

Continue reading How To Know If Your Fuel Pump Is Failing
Posted on

Symptoms of a Failing C15 ACERT Turbocharger

Your turbocharger is important to the overall health of your CAT C15 ACERT diesel engine. So, it’s important to replace it when something goes wrong.

Continue reading Symptoms of a Failing C15 ACERT Turbocharger
Posted on

Failing Fuel Injectors In Cummins N14 Diesel Engines

Having properly operating fuel injectors is vital to the health of your diesel engine. If they’re not working at their best, then you might be experiencing a lot of other problems as well.

Continue reading Failing Fuel Injectors In Cummins N14 Diesel Engines
Posted on

Camshaft Problems with Caterpillar C15 ACERT Engines

Camshaft problems can spell major issues for your Caterpillar C15 ACERT. This component needs to be functioning at its best for optimal engine performance.

Continue reading Camshaft Problems with Caterpillar C15 ACERT Engines
Posted on

Head Gasket Failure In Your Caterpillar C15 Acert Engine

Your head gasket creates the seal between the engine block and the cylinder head, allowing for combustion. It’s vital to the overall performance of your engine, and without it, your engine couldn’t run properly.

Continue reading Head Gasket Failure In Your Caterpillar C15 Acert Engine
Posted on

Rocker Lever Issues In Your Overhead Cam Engine

If you have an overhead cam engine—a Detroit Diesel Series 60, a Cummins ISX, a Caterpillar 3406E or C15, for example—you might have some questions about rocker levers.

Continue reading Rocker Lever Issues In Your Overhead Cam Engine
Posted on

Piston Crown Failure Analysis

The internal combustion engine is a true marvel of modern engineering. Diesel engines are found in almost all heavy-duty machinery, trucks, construction equipment, etc. But what happens when they fail? We are going to dive deeper into piston crown failure, why it happens, and what can be done to possibly prevent future issues. If you find yourself with damaged pistons crowns, count on Highway and Heavy Parts to help get you back up and running with as little downtime as possible. Here are the most common causes of piston crown failure.

Continue reading Piston Crown Failure Analysis
Posted on

Ultra Performance Cylinder Heads

At Highway and Heavy Parts, we’re dedicated to bringing you the best information about diesel engine parts around. We want you to feel confident as you shop for parts, grow your business, and successfully identify what you need for the job at hand.

Continue reading Ultra Performance Cylinder Heads
Posted on

Problems with Caterpillar C15 Oil Pumps

Have you ever thought much about your oil pump?

Continue reading Problems with Caterpillar C15 Oil Pumps
Posted on

Caterpillar C15 ACERT Oil Pump Failure

Diesel engines are made up of thousands of moving parts, and keeping them lubricated comes down to having a correctly working oil pump. If the oil pump on your Cat C15 ACERT Diesel engine is not working properly, failure and damage is the only possible outcome.

Continue reading Caterpillar C15 ACERT Oil Pump Failure
Posted on

Experiencing Cylinder Head Problems On A Caterpillar C15 ACERT

The Caterpillar C15 ACERT diesel engine is no doubt one of the most popular heavy-duty machinery engines. Unfortunately, it has been documented as being a little problematic, to say the least, especially when it comes to their cylinder heads.

Continue reading Experiencing Cylinder Head Problems On A Caterpillar C15 ACERT
Posted on

Is Your Caterpillar C15 Turbo Working Right? Symptoms of Failure and Causes

Maybe you’ve noticed lower power or boost in your CAT C15. Or maybe the overall performance just isn’t where it should be.

Continue reading Is Your Caterpillar C15 Turbo Working Right? Symptoms of Failure and Causes
Posted on

7 Common Caterpillar C15 Cylinder Head Problems

Caterpillar has been a renowned manufacturer of heavy-duty diesel engines since its inception nearly 100 years ago. The C15 has been an integral part of helping keep the Caterpillar name at the top of everyone’s list. Have a look at our Cat C15 engine spotlight here!

Continue reading 7 Common Caterpillar C15 Cylinder Head Problems
Posted on

Symptoms Your Mack Diesel Fuel System Is Failing

It’s vital that the fuel system on your diesel engine is functioning properly. So, when it comes time to replace some of the fuel system components on your Mack diesel engine, you want to make sure that you’re getting the best!

Continue reading Symptoms Your Mack Diesel Fuel System Is Failing
Posted on

Common Symptoms Your Diesel Fuel Pump Is Failing

When your engine is down, we know you want to get it back up and running as soon as possible. Highway & Heavy Parts has you covered! We’ve got the best quality parts at the best prices to get your engine performing like it should, saving you time and money!

Continue reading Common Symptoms Your Diesel Fuel Pump Is Failing
Posted on

Why Did My Diesel Camshaft Bearings Fail?

Camshafts are responsible for telling both your intake and exhaust valves exactly when to open and close. Camshaft bearings are responsible for keeping everything within very tight tolerances

Continue reading Why Did My Diesel Camshaft Bearings Fail?
Posted on

Cummins ISX Camshaft Wear Causes And Problems With ISX Engines

Are you hearing a sudden engine knock or is your engine running rough? These can be signs that your camshaft is failing. Replacing a camshaft can be an expensive and frustrating repair. Especially if it needs to be done outside of an engine overhaul.

Continue reading Cummins ISX Camshaft Wear Causes And Problems With ISX Engines
Posted on

4 Signs You Need To Replace Your Diesel Engine Cylinder Head

WHAT IS THE FUNCTION OF A CYLINDER HEAD? Your cylinder head is a critical part of your diesel engine. Along with the head gasket, it creates the combustion chamber that allows the combustion process to occur properly.

Continue reading 4 Signs You Need To Replace Your Diesel Engine Cylinder Head
Posted on

The 3 Most Common Cummins ISX Issues

The ISX diesel engine by Cummins is one of the most popular engines on the road today. The first ISX was produced in 1998, as a response to the EPA’s tighter emissions restrictions. It soon replaced the N14, the other workhorse engine produced by Cummins.

Continue reading The 3 Most Common Cummins ISX Issues
Posted on

VGT Actuator Failure In Cummins 6.7L

Is your truck showing signs of low boost, lag, sticking turbo vanes, or throwing actuator failure codes? Rob from HHP’s Technical Sales is here to discuss a viewer’s question on a failing Cummins 6.7L turbo actuator.
Continue reading VGT Actuator Failure In Cummins 6.7L
Posted on

6 Common Issues with Caterpillar C15 ACERT Cylinder Heads

Over time we’ve noticed similar questions related to common issues with Caterpillar C15 ACERT cylinder heads. In this post we’re covering those symptoms, why it’s happening, and what solutions we have for you!

Continue reading 6 Common Issues with Caterpillar C15 ACERT Cylinder Heads
Posted on

7 Reasons You Have Low or No Compression In Diesel Engine Cylinders

As we talked about in an earlier post, there are many things that could lead to an engine failure or the need for an engine rebuild. One such indicator is low or no compression in your engine cylinders.
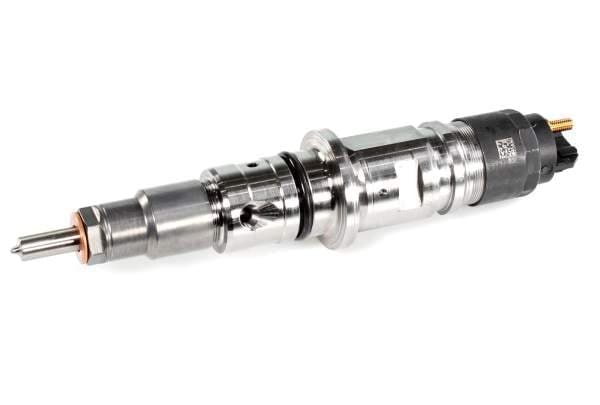
Continue reading 7 Reasons You Have Low or No Compression In Diesel Engine Cylinders
Posted on

Navistar HEUI High Pressure Oil Pump Failure

We know how frustrating it can be when your equipment fails and you’re facing down time and lost profits. And paying those high OEM dealer prices only makes it worse.

Continue reading Navistar HEUI High Pressure Oil Pump Failure
Posted on

Common Rail Injector Symptoms and Failures

Whether you’re on the road or in the fields, we know that an engine failure in your diesel engine is more than just a minor inconvenience. It means lost time and lost profits. And if it’s a failure in your fuel system, you can be looking at thousands of dollars in repairs.

Continue reading Common Rail Injector Symptoms and Failures
Posted on

Camshaft Failure Causes

Is It Camshaft Lobe Wear Or Damage? We all know how important camshafts are to the function of your diesel engine, and when they fail it can spell big trouble. Whether you have a flat tappet or a roller camshaft, you’re at risk for one of the most common causes of camshaft issues: lobe wear or damage.

Continue reading Camshaft Failure Causes