Posted on

Common Diesel Fuel Injector Problems: Symptoms, Causes, and What to Check

Is your diesel engine taking longer to start, idling rough, or struggling to deliver the power you need? Are you noticing more smoke or making more frequent stops for fuel? This could be a common diesel fuel injector problem!

Injectors work under demanding conditions. Wear, contamination, leaks, and electrical faults can affect their performance. But those warning signs don’t automatically mean an injector has failed.

Before replacing parts, it’s important to check the fuel system and related engine components. Finding the cause can help you avoid unnecessary repairs and protect replacement injectors from the same problem.

What Does a Diesel Fuel Injector Do?

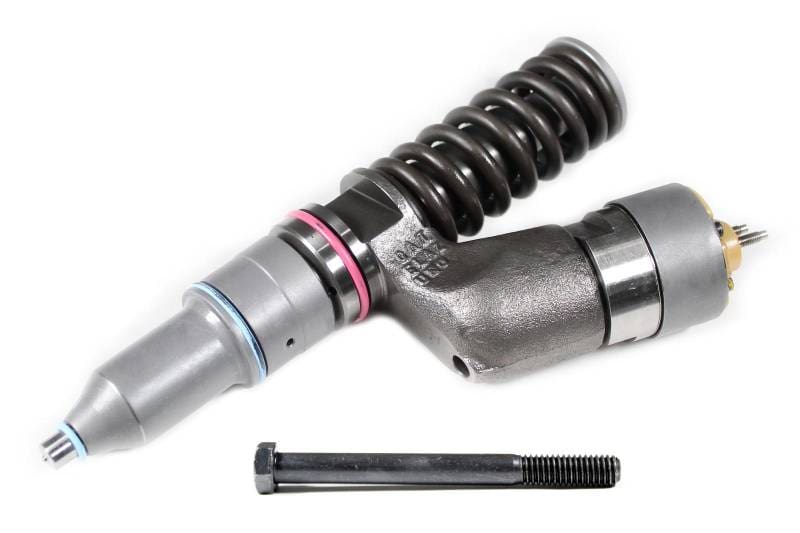
A diesel fuel injector delivers a controlled amount of fuel into the combustion chamber. Correct timing, fuel quantity, pressure, and spray pattern help the fuel mix with air and burn efficiently.

When fuel delivery is disrupted, starting, power, fuel economy, and emissions can suffer. However, diesel injection systems aren’t all the same. Mechanical injectors, electronic unit injectors, and common rail injectors operate differently, so testing and service procedures must match the engine and fuel system.

Common Signs of Diesel Fuel Injector Problems

Watch for changes in how your engine starts, runs, and responds under load. Warning signs may include:

  • Hard starting or extended cranking: The engine takes longer than usual to start.
  • Rough idle or misfires: It shakes, runs unevenly, or has a cylinder that isn’t contributing properly.
  • Reduced power: Acceleration feels sluggish, or the engine struggles under load.
  • Increased fuel consumption: Fuel use rises without a clear change in workload.
  • Excessive smoke: Black, white, or gray exhaust appears or becomes more noticeable.
  • Unusual combustion noise: New knocking or a change in engine sound develops.
  • Fuel leaks or odors: Diesel is visible around fuel-system components, or you notice a fuel smell.
  • Warning lights or fault codes: The engine reports an injection, cylinder contribution, or fuel-system fault.

These are reasons to investigate, not proof that an injector needs replacement. Smoke color alone cannot identify the failed component, and an injector-related code may involve wiring or another system fault.

Common Injector Problems and Their Causes

Contaminated or Restricted Injectors

Dirt, debris, water, and deposits can interfere with injector operation. Small particles may damage precision surfaces, while deposits can restrict fuel delivery or affect nozzle operation. Water can cause corrosion and reduce the fuel’s ability to lubricate moving components.

The result may be an altered spray pattern, incorrect fuel delivery, or premature wear. Poor fuel quality, contaminated storage, and inadequate filtration can all contribute. Replacing an injector without correcting contamination leaves the new part exposed to the same conditions.

Worn or Damaged Components

Injector nozzles and internal components can wear with operating hours. Wear or damage may prevent proper sealing and fuel control, leading to poor atomization, leakage, or uneven combustion. Depending on the failure, you may notice reduced performance, increased fuel use, smoke, or unusual noise.

Internal and External Leaks

An external leak allows fuel to escape outside the system, potentially leaving visible wetness or a fuel odor. The source could be an injector, seal, fitting, or line.

Internal leakage is different. On some systems, excessive fuel returning through an injector can make it difficult to maintain the pressure needed for starting and operation. Normal return flow is part of many injector designs; testing determines whether it exceeds the application’s limits. Test methods vary by injector type.

Electrical and Connection Problems

On electronically controlled systems, damaged wiring, loose connectors, corrosion, or a failed injector solenoid can interrupt operation. A circuit fault does not automatically mean the injector itself has failed. Inspecting the harness and connections is an important part of diagnosis.

Improper installation can also cause problems. Incorrectly seated seals, unsuitable hardware, or missed application-specific procedures can compromise an otherwise correct replacement.

Other Problems That Can Look Like Injector Failure

Several issues can produce similar symptoms:

  • Restricted fuel filters or insufficient fuel supply
  • Air entering the fuel system
  • Weak transfer pumps or high-pressure pump problems
  • Incorrect fuel pressure or pressure-control faults
  • Sensor, wiring, or engine-control problems
  • Low compression or other mechanical engine issues

For example, a restricted filter can limit fuel delivery, while air entering the system can disrupt starting and running. Replacing injectors would not resolve either cause.

How Are Diesel Fuel Injector Problems Diagnosed?

Diagnosis should follow the engine manufacturer’s procedures. Depending on the application, a qualified technician may use:

  • Diagnostic trouble codes and operating data to identify conditions requiring investigation.
  • Visual inspection to check for leaks, damaged wiring, or loose connections.
  • Cylinder contribution or balance testing to assess how individual cylinders perform.
  • Fuel-pressure and supply testing to check delivery against specifications.
  • Return-flow or leakage testing where appropriate for the injector design.
  • Specialist bench testing to evaluate injector operation under controlled conditions.
  • Compression and related engine checks when a mechanical problem is suspected.

No single result should be interpreted without the relevant specifications and supporting checks. A weak cylinder, for example, can have a fuel-delivery problem or a mechanical fault.

High-pressure diesel fuel can cause serious injury. Fuel-system service requires the correct equipment and pressure-release procedures. Never use your hands to search for leaks or loosen high-pressure lines to bleed the system. Follow the manufacturer’s instructions.

Should You Replace One Injector or the Complete Set?

There is no universal answer. Replacing one confirmed failed injector may be appropriate when testing shows the remaining injectors are serviceable and the manufacturer’s guidance supports that repair.

A broader evaluation may make sense when the injectors have similar age, substantial operating hours, repeated failures, or shared exposure to contamination. However, those factors alone don’t establish that every injector needs replacement.

Base the decision on testing, repair history, manufacturer guidance, and the overall condition of the fuel system. Consider your budget alongside downtime and the likelihood of additional repairs.

What to Check Before Installing Replacement Injectors

Before installation, make sure the repair addresses the original cause:

  • Check tanks, lines, and filters for contamination and correct it as required.
  • Verify proper fuel supply and pressure.
  • Inspect wiring and electrical connections.
  • Confirm injector compatibility using the engine serial number and application details.
  • Use the required seals, O-rings, hardware, and installation components; replace single-use parts as specified.
  • Keep exposed fuel-system openings clean and protected during service.
  • Follow the correct torque specifications and installation procedures.
  • Complete any required injector coding, calibration, or programming.
  • Follow the manufacturer’s priming and startup instructions.

Requirements vary. An injector that fits physically may still have the wrong fuel-delivery characteristics for the engine.

How to Help Prevent Injector Problems

Buy fuel from reliable sources and keep storage and transfer equipment clean. Drain water separators as required, replace fuel filters at the recommended intervals, and use filters and fuel that meet the engine’s specifications.

During service, prevent dirt from entering open lines and connections. Address leaks, warning lights, and performance changes promptly rather than waiting for a breakdown. Maintenance requirements vary with the application, operating conditions, and engine, so follow the appropriate service schedule.

Choosing the Correct Replacement Injector

Appearance alone is not enough to identify an injector. Have your engine serial number, application details, and available part numbers ready when contacting a supplier.

Compare more than the purchase price. Ask about compatibility, testing, included installation components, warranty coverage, and any core-return requirements. New, remanufactured, and other replacement options can differ in how they are produced, tested, and supported.

Diagnose the Problem Before Replacing the Part

Hard starting, rough running, power loss, increased fuel use, and excessive smoke deserve attention. Injectors may be involved, but other fuel-system and engine problems can create the same symptoms. Confirming the cause helps you choose the right repair and reduce the risk of repeat failure.

Experiencing fuel injector trouble? Highway & Heavy Parts can help you identify the correct replacement for your application. Give our diesel experts a call at 844-304-7688, or explore our selection of fuel injectors online.

Frequently Asked Questions

Can a bad injector cause excessive smoke?

Yes, disrupted fuel delivery can affect combustion. However, smoke can have other causes and needs diagnosis.

Can a clogged fuel filter act like a failed injector?

Yes. Restricted fuel supply can cause starting or performance problems that resemble injector trouble.

Should all diesel injectors be replaced together?

Not automatically. Testing and manufacturer guidance should determine whether one injector or a set needs replacement.

Can contaminated fuel damage new injectors?

Yes. Correct contamination before installing replacements to avoid exposing them to the original cause.

Do replacement injectors require programming?

Some require coding, calibration, or other setup procedures. Check the requirements for your specific engine and injector.

Posted on

What Happens to Your Old Core? The Life of a Remanufactured Diesel Part

You order a remanufactured turbocharger, fuel injector, or cylinder head, pay the core charge, and install the replacement. Your truck is getting back to work, and the old component is ready to ship back. But where does it go after that? A diesel core return can be the beginning of another part’s working life. Even when a component no longer works properly, some of its underlying pieces may still be suitable for recovery. Qualifying cores give remanufacturers a starting point for producing replacement parts.

Here’s a look at the journey: returned, inspected, remanufactured, tested, and back to work.

What Is a Diesel Core?

A core is the used component you remove when installing its replacement. In a remanufacturing program, that old part may have value because eligible pieces can be recovered, reconditioned, and reused.

Certain remanufactured diesel parts are sold with a core charge in addition to the part’s purchase price. That charge encourages the return of old components and helps maintain the supply of cores needed for remanufacturing. When you return an eligible core and it is approved under the applicable program, you can receive core credit.

The credit depends on the return requirements for your purchase. Sending back any old part does not automatically qualify you for a refund.

Step 1: The Core Is Returned

The process starts when you send back the component you replaced. Before boxing it up, check the instructions supplied with your order. The correct component, its completeness, its condition, and the return deadline can all affect eligibility for core credit.

Keep the old assembly together and save the packaging from your replacement until you know what is required. If you are unsure whether an attached piece should stay with the core, ask before removing or discarding it.

Before returning a core: Don’t throw away parts or pieces from the component you’re replacing. A missing piece could affect your core’s eligibility.

Step 2: The Core Is Inspected

Once received, the core is evaluated under the applicable return program. The inspection may check whether it matches the purchased part, whether required pieces are present, and whether there is visible damage such as cracks, broken housings, or other major physical damage.

A failed part is not automatically a worthless core. The purpose of the inspection is to determine whether it meets the program’s acceptance criteria. However, not every returned core will qualify, and not every accepted assembly will have every internal piece reused.

Core acceptance and detailed remanufacturing inspection are different stages. An initial evaluation can establish eligibility for credit, while later disassembly reveals which individual pieces are suitable for recovery.

Step 3: The Remanufacturing Process Begins

For suitable cores selected for remanufacturing, the work goes beyond cleaning the outside and putting the part in a new box. The exact process depends on the component and the remanufacturer, but it can include these steps:

  • Disassembly: The assembly is taken apart so its individual components can be evaluated.
  • Cleaning: Oil residue, carbon, dirt, and other contaminants are removed using methods appropriate for the components.
  • Detailed inspection and measurement: Reusable pieces are checked for wear, damage, and dimensions that affect fit or function.
  • Reconditioning and replacement: Eligible pieces are restored where appropriate. Components that do not meet the program’s requirements are replaced or excluded from reuse.
  • Reassembly: Approved recovered components and replacement parts are assembled into the finished unit.

A core can therefore contribute reusable material without every original piece staying in the finished part. The remanufacturer’s requirements determine what can remain and what needs to be replaced.

Remanufactured Doesn’t Just Mean Used

When comparing replacement parts, it helps to understand what the seller means by used, rebuilt, and remanufactured.

Used parts have previously operated in another application and are sold for reuse. The term alone does not tell you how extensively they have been inspected or tested.

Rebuilt parts have been repaired or reconditioned. The work performed can vary by supplier, so ask what was inspected, replaced, and tested.

Remanufactured parts go through an established process that includes inspection, reconditioning or replacement as required, reassembly, and testing against the remanufacturer’s requirements.

The product’s documented process matters more than a label alone. HHP offers products from multiple manufacturers, and the standards, replacement practices, testing, and warranty coverage should be checked for the specific part you are considering.

Step 4: The Remanufactured Component Is Tested

After reassembly, testing and quality checks help determine whether the finished component meets the remanufacturer’s requirements. Those checks depend on what the part does.

  • Fuel injectors: Checks may evaluate fuel delivery and calibration using a test stand.
  • Turbochargers: The process may include balancing rotating assemblies, calibration, and checks of operation.
  • Cylinder heads: Checks may include pressure testing for leaks and evaluation of valve sealing.

These are examples of procedures used in manufacturer programs, rather than a single test sequence followed by every supplier. The relevant product documentation explains which checks apply to a particular remanufactured part.

Step 5: Back to Work

Once it completes the applicable process and passes the required checks, the remanufactured component can become a replacement for another diesel application. Your returned core has helped support the supply of parts that keeps that cycle moving.

The replacement you receive is not necessarily your own old component remanufactured and sent back to you. In an exchange program, your returned core supports future remanufacturing after you have received your replacement.

Returned. Inspected. Remanufactured. Tested. Back to work.

[Insert core journey infographic here.]

Why Core Condition Matters

A diesel core return can become an issue when the wrong component is sent back, required pieces are missing, severe damage exceeds the program’s criteria, or the return instructions are not followed. These issues can affect whether you receive credit and how much credit is available.

After installing your replacement, use this checklist to prepare your old component:

  • Confirm the core matches the purchased part and review the applicable acceptance criteria.
  • Keep required components together. Ask HHP about any missing pieces or damage before shipping.
  • Follow the supplied instructions for draining fluids and preparing the component.
  • Package it securely and include the required return paperwork.
  • Use the specified shipping documents and carrier, follow the return deadline, and keep tracking information.

For packaging and shipping details, see HHP’s guide, How Do I Return My Cores? Your order’s return instructions should guide your shipment.

Have a Core to Return? HHP Can Help

Have questions about a core charge or returning your old diesel component? HHP can help you understand the return requirements for your part before you ship it.

Questions about your diesel core return? Call HHP: 844-304-7688.

Shopping for a replacement? Contact HHP for help finding remanufactured diesel parts for your application.

Shop Diesel Parts →

From Diagnosis to Delivery, we are Highway & Heavy Parts.

Posted on

More Than a Diesel Engine Part: What to Expect From Your Parts Supplier After the Sale

Anybody can sell you a diesel engine part.

There are plenty of places to purchase parts for Caterpillar, Cummins, Detroit Diesel, and other heavy-duty engines. When the correct part arrives and the repair goes as planned, one diesel engine parts supplier may seem much like another.

The difference becomes much clearer when something goes wrong after the purchase.

Price, availability, and shipping speed all matter when a truck or piece of equipment is down. But there is another question worth asking before you choose a supplier:

What happens if I have a problem after I install the part?

A dependable supplier should still be there after the sale. That means helping you understand what information is needed, guiding you through the applicable warranty process, and helping investigate why the component failed.

But there is an important distinction to make:

A failed part tells you what stopped working. It does not automatically tell you why it failed.

Why Does a Diesel Engine Part Fail?

When a newly installed component fails, it is understandable to think, “The part was bad.”

Sometimes a manufacturing defect is the cause. In other cases, the failure may be related to the installation, another engine system, the operating conditions, or an incorrect application.

Depending on the component and engine, possible causes may include:

  • A manufacturing defect
  • An installation issue
  • Oil, fuel, or debris contamination
  • Insufficient lubrication or restricted oil flow
  • Fuel-system problems
  • Overheating
  • Another failing engine component
  • An incorrect part or application

Determining what failed and determining why it failed are two different things.

That distinction matters during any diesel engine parts warranty review. Confirming that a component no longer works is only one part of the process. The available evidence must also be reviewed to understand what may have caused the failure and whether the issue falls within the applicable warranty terms.

Why Doesn’t Replacing the Part Always Solve the Problem?

Replacing a failed component may get the repair moving again, but it does not correct an underlying engine, system, or installation problem.

If the root cause is still present, the replacement part may be exposed to the same damaging conditions.

Turbocharger Example

A turbocharger depends on proper oil supply and drainage. If inadequate lubrication contributed to the original turbo failure, installing another turbo without correcting the oil-flow problem may put the replacement at risk.

The failed turbo needs attention, but so does the condition that caused it to fail.

Fuel Injector Example

Fuel injectors can be damaged by contamination in the fuel system. Replacing the injector without correcting the source of the contamination may leave the replacement vulnerable to the same damage.

In both examples, the failed component may be where the problem appeared. It may not be where the problem started.

Don’t ask only, “Did the part fail?” Ask, “What caused it to fail?”

What Should a Good Diesel Engine Parts Supplier Do When Something Goes Wrong?

A good heavy-duty diesel parts supplier should do more than send you a warranty form and disappear.

The exact process varies by product and manufacturer, but helpful after-sale support should include several basic steps.

Understand What Happened

The supplier should ask about the symptoms, engine application, installation, and circumstances surrounding the failure. These details provide context that the failed component alone may not reveal.

Gather the Right Information

Photos, diagnostic findings, engine information, installation details, mileage or operating hours, and service records may help explain what occurred.

Complete information can also help prevent delays if the manufacturer requires specific documentation to review the claim.

Evaluate the Failed Component

When appropriate, the failed component may need to be retained, inspected, or returned for additional evaluation.

Do not throw it away or disassemble it until you receive instructions. Its condition may be important to the review.

Work With the Manufacturer

If the issue qualifies for warranty review, the supplier can help organize the information the manufacturer requires and support the claim through the applicable process.

The manufacturer or warranty provider ultimately determines coverage under its warranty terms.

Keep You Informed

You should understand what information is needed, whether the component must be returned, and what happens next.

A supplier may not be able to provide an immediate decision, but it should communicate clearly throughout the process.

Have a question about a part or warranty process? Call HHP at 844-304-7688. Our team can help you identify the information needed for the next step.

Why Does HHP Ask for Photos and Information?

If HHP asks for photos, installation details, diagnostic findings, or the failed component, those requests are not simply extra paperwork.

A warranty review may depend on details that are not visible from a part number or order record. Photos can document the damage. Installation information can show how the component was fitted. Diagnostic results can help explain what the engine was doing before and after the failure.

The failed component itself may also contain physical evidence that helps identify what happened.

The goal is not only to confirm that a part failed. It is to understand why it failed.

Providing complete information helps HHP and the applicable manufacturer evaluate the situation as accurately and efficiently as possible.

What Information Should You Save If a Part Fails?

If a diesel engine part fails, do not immediately throw it away or make additional changes. First, find out what the diesel parts warranty process requires.

Keep the following information when available:

  • The failed component and its packaging
  • Clear photos of the complete component
  • Close-up photos of visible damage
  • Your invoice, order number, or other purchase information
  • The engine serial number and application information
  • Installation records and the installer’s findings
  • Mileage or operating hours at installation and failure
  • Diagnostic codes, test results, or technician notes
  • A description of the symptoms and what happened before the failure

Warranty requirements vary by product, brand, and manufacturer. Contact your supplier as soon as possible so you know what must be documented, whether the part must be returned, and which steps to follow before continuing the repair.

Does a Warranty Decision Solve the Entire Problem?

Not always.

A warranty approval can help address the cost of a covered component. It does not automatically correct the condition that caused the component to fail.

The repair may still require:

  • An accurate diagnosis
  • The correct replacement part
  • Correction of the underlying engine, system, or installation problem
  • Verification that the complete system is ready to return to service

At HHP, our goal is not only to help process a warranty claim. We want to help customers work toward the right solution and get their equipment back to work as quickly as the situation allows.

What Support Should You Expect Before, During, and After the Sale?

The value of a diesel engine parts supplier should be clear throughout the purchase, not only when the order is placed.

Before the Sale

The first step is identifying the correct component for the engine and application.

Whether you need an injector, turbocharger, cylinder head, rebuild kit, gasket set, or another engine component, accurate engine information helps reduce the risk of ordering the wrong part.

HHP supports customers working on Caterpillar, Cummins, Detroit Diesel, and other heavy-duty engines, with aftermarket diesel engine parts and other available product options depending on the application.

During the Sale

You should understand the available product options, availability, product condition, core requirements, and other purchasing considerations before placing the order.

Clear information helps you choose the option that fits the repair, schedule, and budget.

After the Sale

If an issue develops, HHP is still available to help gather information, review what happened, explain the applicable warranty procedure, and coordinate with the manufacturer when required.

You are not only buying the component. You are also choosing the support available after the sale.

Why Does Your Diesel Parts Supplier Matter?

Price matters. Availability matters. Shipping speed matters. Product quality matters.

Support matters too, especially when a truck or piece of equipment is down and the repair has not gone as expected.

At that point, you are going to care about practical questions:

  • Can I reach someone who will help?
  • Does the supplier understand these engines and components?
  • Will the supplier help me gather the information needed to investigate the failure?
  • Can the supplier guide me through the applicable warranty process?
  • Will the supplier continue communicating after the sale?

The answers show the difference between a website that lists diesel parts and a supplier that is prepared to support the customer when the repair becomes more complicated.

Need Help Finding the Right Diesel Engine Part?

Whether you are working on a Caterpillar, Cummins, Detroit Diesel, or another heavy-duty engine, Highway & Heavy Parts can help you identify the parts you need and provide support when you need it after the sale.

Have your engine serial number, application information, and current part information available when you call so our parts specialists can help identify the correct option for your repair.

Call HHP: 844-304-7688

From Diagnosis to Delivery, we are Highway & Heavy.

Posted on

How to Test Diesel Fuel Injector Return Rate (Fuel Return/Leak-Off Test)

Cummins diesel engine fuel injector

The common rail injector system is widely used in diesel applications. Fuel injectors in a common rail system operate like electronic valves, receiving high-pressure fuel from a shared rail and opening at precise timing to spray it into the engine cylinders. This system relies on constant pressure and highly-tuned timing. Diesel fuel injector issues can show up in the fuel return rate.

The diesel fuel injector return rate describes how much high-pressure fuel bypasses the injector’s internal clearances and returns to the fuel tank rather than entering the engine. If the bypass is low and controlled, this is normal for cooling and lubrication. However, a high return flow rate drops rail pressure and can cause engine failure.

Why the Fuel Return Rate Test is Important

In high-pressure common rail diesel systems, fuel injectors rely on internal hydraulic control valves to regulate injection timing and pressure. A precise amount of fuel is designed to bypass the valve and return to the fuel tank during normal operation. However, as internal components wear down from heat, high mileage, or contaminated fuel, these valves begin to leak excessive fuel back through the return circuit.

Performing a fuel return rate test (or leak-off test) is one of the most effective non-invasive diagnostics for finding the reason behind diesel engine horsepower loss. Here’s why it’s critical:

1. Identifying No-Start and Hard-Start Conditions

Modern common rail systems require a minimum threshold of fuel rail pressure—typically between 3,000 to 5,000 PSI depending on the engine—before the ECM will allow the injectors to fire.

When an injector’s internal control valve wears out, high-pressure fuel escapes into the low-pressure return line during cranking. If one or more injectors are leaking excessively back to the tank, the high-pressure fuel pump can’t build enough pressure in the rail to meet the firing threshold, resulting in extended cranking times or a total no-start condition.

2. Isolating Performance Drops and Misfires

Excessive return flow directly robs the fuel rail of hydraulic pressure while the engine is running under load. This loss of pressure leads to several obvious drivability symptoms:

Engine Misfires and Rough Idling: Low rail pressure prevents proper fuel atomization, causing incomplete combustion in the affected cylinders.

Power Loss Under Acceleration: As fuel demand increases, a high return rate prevents the system from maintaining rail pressure, often triggering a “Limp Mode” condition or rail pressure low codes.

Excessive Smoke and Drivability Issues: Poor pressure management disrupts the precise multi-injection events needed for clean diesel combustion.

3. Preventing Unnecessary Replacements

Common rail diagnostic trouble codes rarely point directly to a single failed injector; instead, you will often see generic low rail pressure or cylinder balance fault codes.

Without a return rate test, it is nearly impossible to tell whether a low-pressure issue is caused by a failing high-pressure pump, a faulty rail pressure regulator, or a single leaking injector. The leak-off test measures the mechanical return output of each injector individually, allowing you to isolate what’s failing and avoid replacing unnecessary parts.

Tools and Safety Gear Needed

Before you get started in conducting a fuel return rate test, it’s important to gather some tools and safety gear.

Specialized Diagnostic Tools:

  • Diesel common rail injector flow meter kit
  • Clear vinyl tubing (if building a custom DIY rig)

General Shop Hand Tools: Hose clamp pliers, pick set for retaining clips, line plugs/caps.

Scan Tool (Optional but Recommended): OBD2 scanner capable of reading real-time fuel rail pressure.

Personal Protective Equipment (PPE): Safety glasses, nitrile gloves, and shop towels.

Step-by-Step Fuel Return Test Procedure

Performing a fuel return test allows you to measure the internal leakage of each injector under actual operating conditions. Follow these steps to safely and accurately isolate failing injectors.

Step 1: Safety and System Preparation

Park the vehicle on a level surface, set the parking brake, and allow the engine to cool down. Turn off the ignition and wait at least 5–10 minutes for residual pressure in the rail to bleed down completely.

Clean the cylinder head around the injectors, return lines, and fuel rail with brake cleaner and compressed air. Preventing dirt or debris from entering open fuel ports is critical to avoiding component damage.

Put on safety glasses and chemical-resistant gloves.

Step 2: Disconnect Factory Return Lines

Locate the fuel return circuit running across the top of the injectors. Carefully remove the retaining clips or spring clamps securing the fuel return line fittings to each injector using a pick tool or hose clamp pliers. These plastic fittings can be brittle, so apply gentle pressure.

Pull the return line assembly off each injector return port. Plug or cap the main rubber return line leading back to the fuel tank or fuel filter housing to prevent air intrusion or siphon spills.

Step 3: Install the Flow Meter Test Kit

Select the correct quick-connect adapters from your flow meter kit that match your injector return ports. Push the adapters securely onto the return port of each injector until they snap into place.

Run the tubing from each adapter to its corresponding graduated bottle in the flow meter rack. Mount or hang the bottle rack securely in the engine bay, ensuring the tubes are equal in length, routed away from hot exhaust components, and clear of belt drives.

Step 4: Execute the Test Run

For a No-Start Condition (Cranking Test):

Disconnect the camshaft position sensor or crank sensor to prevent the engine from starting during the test. Crank the engine for 10 to 15 seconds. Observe the fuel rising in the clear tubes or bottles. Stop cranking immediately if one container fills rapidly.

For a Running / Hard-Start Condition (Idle Test):

Start the engine and let it idle. Allow the engine to run for 2 to 3 minutes, or until fuel reaches a clear, readable mark in the graduated cylinders. If necessary, hold the engine at a steady 1,500–2,000 RPM for 30–60 seconds to test return rates under moderate rail pressure (refer to manufacturer specs for exact test parameters).

Shut the engine off as soon as you see a clear difference in fuel levels.

Step 5: Record Volume and Tear Down

Read the fuel level in milliliters across all graduated cylinders at eye level. Record the exact volume for each corresponding cylinder number. Carefully disconnect the adapters, catching any residual fuel with shop towels.

Inspect the O-rings on the factory return line fittings. Replace any damaged O-rings before reattaching the return line harness and securing the retaining clips. Start the engine and inspect all return connections for fuel leaks before reinstalling any engine covers.

Interpreting the Results

Once you have completed the test run, evaluating the collected fuel volume is straightforward. By comparing the fluid levels across all graduated cylinders, you can quickly identify whether your injectors are operating within normal tolerances or if excessive internal wear is compromising your fuel system.

A uniform low return indicates healthy control valves across all injectors. However, an injector returning significantly more fuel than the others (between 20 and 30% variance) has an internally leaking control valve and requires replacement.

If all cylinders show a high volume of returned fuel, it indicates widespread internal valve wear—frequently caused by contaminated fuel or high mileage. In this scenario, multiple injectors will need to be replaced.

If you get zero return on a cylinder, that indicates a blocked return port or severely stuck nozzle.

Next Steps and Best Practices

After you’ve confirmed an abnormal return rate on one or more cylinders, resolving the issue is fairly straightforward with a few best practices.

Replace in Sets vs. Individually: If a single injector shows extreme back-leakage on a lower-mileage engine, replacing just that unit is usually fine. However, if the vehicle has high mileage or the test reveals marginally high return rates across all cylinders, replace the entire set to ensure balanced combustion and prevent additional problems.

Always Use New Sealing Hardware: Never reuse old sealing components. Always install a new copper crush washer at the base of the injector and replace the rubber O-rings on the body. Reusing old copper washers allows combustion gases to blow past the seal, creating heavy carbon buildup that locks the injector into the cylinder head.

Use New Hold-Down Bolts: Most diesel injector hold-down bolts are torque-to-yield fasteners designed to stretch when torqued to specification. Reusing old bolts risks snapping them off in the head or failing to maintain proper clamping force, which leads to premature washer failure.

Clean the Injector Bore Thoroughly

Before dropping the new injector into place, clean the injector bore and seating surface in the cylinder head using specialized brass bore brushes and a vacuum attachment. Any carbon deposit, grit, or residue left at the bottom of the bore will prevent the new copper washer from sealing correctly, causing compression leaks and incorrect nozzle protrusion.

Prime and Bleed the Fuel System

Don’t crank a diesel engine dry after opening the fuel system. High-pressure pumps and injectors rely on diesel fuel for lubrication, and dry cranking can cause damage quickly.

Low-Pressure Priming: Cycle the ignition key to the “RUN” position several times (or activate the fuel pump prime function with a scan tool) to purge air from the low-pressure lines and fuel filter housing.

Bleeding High-Pressure Lines: On systems that require manual bleeding, crack the high-pressure line fittings at the injectors slightly while cranking until the fuel emerges without bubbles, then torque them to spec before final starting.

Verify the Repair

After starting the engine, let it reach normal operating temperature and perform a thorough inspection by checking for any fuel leaks around the fuel rail, line fittings, and return circuit connections.

Monitor real-time fuel rail pressure PIDs on a scan tool to ensure desired vs. actual pressure matches closely during idle and under load. If necessary, re-run a brief leak-off test to verify that return rates across all cylinders are now uniform and within manufacturer specifications.

Get Everything You Need to Perform a Leak-Off Test

At Highway and Heavy Parts, we have the expert advice and quality parts you need to perform a fuel return test on your diesel engine. Get in touch today for detailed diagnostic advice or to find out more about what you need to test your rig and get back on the road.

FAQs: Diesel Fuel Injector Return Rate

What is diesel fuel injector return rate?

The return rate is how much high-pressure fuel bypasses an injector’s internal clearances and flows back to the fuel tank instead of spraying into the cylinder. A small, controlled amount is normal and helps cool and lubricate the injector. A high return rate drops rail pressure and can lead to poor performance or engine failure.

What is a diesel injector leak-off test?

A leak-off test, also called a fuel return rate test, measures how much fuel each injector sends back to the tank during cranking or idle. By capturing the return flow from every injector in graduated cylinders, you can compare volumes side by side and pinpoint which injector has an internally leaking control valve.

What are the symptoms of a leaking diesel injector?

Common signs of excessive injector return include hard starting or a no-start condition, rough idle, misfires, power loss under acceleration, excessive smoke, and low rail pressure trouble codes or limp mode. These happen because leaking injectors bleed off the rail pressure the engine needs for proper fuel atomization.

How do you test diesel fuel injector return rate?

After the engine cools and the rail pressure bleeds down, disconnect the factory return lines and install a flow meter kit on each injector return port. Route the tubing to graduated bottles, then crank the engine for a no-start test or idle it for a running test. Measure the fuel collected from each cylinder and compare the volumes.

Why does a leaking injector cause a no-start condition?

Common rail engines need a minimum rail pressure, often between 3,000 and 5,000 PSI, before the ECM lets the injectors fire. When an injector’s control valve leaks during cranking, the high-pressure pump cannot build enough pressure to reach that threshold, which causes long crank times or a complete no-start.

What is a normal diesel injector return rate?

A healthy engine shows a uniform, low return across all injectors. An injector returning roughly 20 to 30 percent more fuel than the others has an internally leaking control valve and needs replacement. Zero return usually points to a blocked return port or a severely stuck nozzle.

What causes high fuel return on a diesel injector?

Excessive return flow comes from worn internal hydraulic control valves. Heat, high mileage, and contaminated fuel break these components down over time, letting high-pressure fuel escape into the return circuit. When every cylinder returns a high volume, it usually signals widespread wear across the whole set.

Should you replace diesel injectors individually or as a set?

If one injector shows extreme back-leakage on a lower-mileage engine, replacing that single unit is usually fine. On high-mileage engines, or when several cylinders show marginally high return rates, replace the full set to keep combustion balanced and prevent repeat failures.

What tools do you need for a fuel return rate test?

You need a diesel common rail injector flow meter kit with graduated cylinders, hose clamp pliers, a pick set for retaining clips, and line plugs or caps. An OBD2 scanner that reads real-time fuel rail pressure is helpful, along with safety glasses, nitrile gloves, and shop towels.

Posted on

Why is My Diesel Fuel Injector Sleeve Leaking? Diagnose and Repair!

Diesel Fuel Injector Sleeve

The purpose of the fuel injector sleeve in diesel engines is to provide a protective barrier between the fuel components and the coolant. The sleeve is sometimes also called an injector cup. In many diesel engines, the injector passes through the cylinder head into the combustion chamber, and the surrounding area of the head may contain coolant passages.

Fuel injector sleeve leaks can be a serious problem. It allows fuel dilution and coolant contamination, both of which can cause engine damage. Many heavy-duty diesel engines have fuel injector sleeves.

Function of a Fuel Injector Sleeve

The function of a fuel injector sleeve is to separate coolant passages from the injector bore. It also provides a mounting surface for the injectors. The precise bore and sealing surface of the sleeve allow for proper injector alignment, which ensures accurate fuel spray into the injection chamber. 

A typical fuel injector sleeve is constructed from brass, copper alloy, or steel. The sleeves are sealed with O-rings, sealant, or a press-fit. The sleeve acts as a replaceable wear surface. Instead of the fuel injector contacting the cylinder head directly, it sits inside the sleeve. If damage occurs, the sleeve can usually be replaced instead of the entire cylinder head.

 Common Symptoms of a Leaking Injector Sleeve

There are several common symptoms of a leaking fuel injector sleeve. However, the most common one is found in the coolant system. You might notice a fuel smell in the coolant or see diesel floating in the coolant reservoir. Coolant is also sometimes pushed out of the overflow bottle.

Symptoms may appear in the fuel system as well. This can include loss of fuel pressure, air in the fuel system, or an extended crank time. Performance symptoms include misfires or rough idle, white exhaust smoke, and reduced fuel economy.

In some cases, these drivability and performance issues may point to injector wear beyond the sleeve itself. Hard starts, excessive smoke, rough operation, or fuel delivery problems can all be signs that the injectors are beginning to fail.

If you’re running a Caterpillar C15 ACERT engine, understanding when injector replacement becomes necessary can help prevent additional engine damage and downtime. Read our guide on When To Replace Fuel Injectors in a Caterpillar C15 ACERT to learn the most common warning signs and what to check before failure gets worse.

 Diagnostic Tests for a Leaking Diesel Fuel Injector Sleeve

Need Help Diagnosing a Leaky Diesel Fuel Injector Sleeve?

There are a few diagnostic steps you can take for a leaking diesel fuel injector sleeve. The first is a visual inspection. Check the coolant reservoir for fuel contamination, and inspect the injectors and cylinder head area for residue and wetness.

The next step to take is a cooling system pressure test. Pressurize the system with the engine off, and then observe the injector bore for coolant seepage. A fuel system leak test can check for excessive fuel returning through the injectors and show whether fuel is entering the cooling system.

A cylinder leak test checks for combustion gases entering the coolant, while dye or UV testing involves adding dye to the coolant to identify leaks at the injector sleeves.

Common Causes of Fuel Injector Sleeve Failure

There are several possible reasons for fuel injector sleeve failure. Some mechanical causes include sleeve corrosion, a cracked sleeve due to wear, or damage due to improper installation. Worn or damaged o-rings, incorrect sealant, and heat cycling deterioration can also lead to sleeve failure.

Sleeve damage might occur due to certain engine operating conditions. For example, if the engine overheats or the coolant becomes contaminated for another reason. Maintenance-related causes include incorrect injector torque, reusing damaged sleeves, and improper cleaning of the injector bore.

Engines with wet sleeves or coolant-jacketed injectors are most prone to injector sleeve leaks. These are most often found on heavy-duty engines.

Inspection Procedure (Step-by-Step)

Step 1 – Remove the injector

Carefully disconnect the fuel lines and electrical connectors (if applicable), then remove the injector hold-down hardware according to the manufacturer’s procedure. Gently extract the injector using the proper puller or removal tool to avoid damaging the injector body or disturbing the injector sleeve in the cylinder head.

Step 2 – Inspect sleeve bore

After the injector is removed, visually inspect the inside of the sleeve bore for signs of coolant, fuel residue, corrosion, or carbon buildup. Any wetness, pitting, or discoloration may indicate sleeve leakage or deterioration of the sleeve material.

Step 3 – Pressure test the cooling system with the injector removed

Install a cooling system pressure tester and pressurize the system to the engine manufacturer’s recommended pressure. Observe the exposed injector sleeve bore for coolant seepage, which would indicate a compromised sleeve or failed seal.

Step 4 – Check sleeve seating and sealing surfaces

Inspect the top lip of the sleeve and the surrounding cylinder head surface where seals or o-rings seat. Look for damage such as cracks, deformation, scoring, or erosion that could prevent the sleeve from sealing properly against the injector or cylinder head.

Diesel Fuel Injector Sleeve Repair Options

Replacing the fuel injector sleeve or sleeves is the most common repair option for damaged or failed sleeves. It’s also important to install new seals and/or o-rings at the same time. Use the correct installation tools to ensure the sleeves are installed properly. In the event that the sleeves can’t be extracted in place, you may have to remove the head.

Prevent Fuel Injector Sleeve Leaks

To prevent sleeve damage, it’s crucial to use proper injector torque procedures when replacing injectors. Correct coolant maintenance is also necessary to avoid contamination, which can damage sleeves. Always use manufacturer-approved installation tools and consider periodic fuel system inspections to catch problems early.

Key symptoms to watch for include coolant contamination and performance issues such as white exhaust smoke and difficulty starting. It’s important to diagnose this problem early, as it can cause serious engine damage if left alone.

Where to Get the Best Replacement Diesel Fuel Injector Sleeves

If you’re wondering why your diesel fuel injector sleeves are leaking, contact our experts at Highway and Heavy Parts for timely advice. We can help you diagnose this problem before it causes major damage to your engine. Our extensive catalog is also the best place to get replacement fuel injector sleeves for your rig.

Posted on

Bad Diesel Injector Symptoms: How to Diagnose a Failing Fuel Injector

A bad diesel fuel injector is likely to cause a variety of symptoms that should help you narrow it down. Some of the main symptoms include poor fuel economy, rough idling, difficulty starting, and excessive exhaust smoke. A modern vehicle should also display a warning light, which might be just a check engine light.

Some of these symptoms can also intersect with other problems, so narrowing them down to indicate a bad diesel fuel injector involves carefully investigating several issues, including exhaust smells, engine sounds, and overall performance. A diagnostic tool can help give you a firm conclusion as well.

Bad Diesel Injector Symptoms

To figure out whether you have a bad injector or another problem, it’s important to look at all the symptoms together. Let’s take a look at the various symptoms by category. The more that match up with your problem, the more likely it is to be a bad fuel injector. A bad injector causes uneven fuel delivery, which results in some or all of the symptoms discussed below.

Performance and Starting Problems

 Many of the symptoms of a failing injector or injectors come in the form of performance and starting problems. One of the most common is a rough idle or misfires. When this happens, the engine seems to shake or stumble, running unevenly at rest due to inconsistent fuel delivery. If you have a tachometer, you might notice the needle moving a lot and dipping down below normal.

Another issue is hard starting. In this case, you’ll experience longer cranking, or the engine might fail to start at all. This is especially noticeable when it’s cold. When the vehicle is in motion, you might notice loss of power, such as sluggish acceleration, bogging down on hills, or stumbling. The engine might also cut out unexpectedly.

Exhaust Look and Smell

Another area to look at when you’re trying to diagnose a bad fuel injector is the exhaust. You’re likely to notice excessive smoke, and it might be different colors from the usual gray. Black smoke indicates too much fuel, while white indicates unburned fuel passing through. Blue smoke can indicate burning oil, but it might be linked to bad injectors if they’re washing oil off the cylinder walls. A strong fuel smell is also common.

Sounds and Warning Lights

There are also sounds and warning lights associated with failing fuel injectors. Engine knocking or pinging is a common sound that is caused by bulk delivery of fuel instead of the usual fine mist. In most cases, failing injectors will also trigger a check engine light to let you know that something has gone wrong. Once you’ve confirmed multiple symptoms and there’s a CEL present, it’s time to diagnose the problem and find out if one or more bad injectors are the culprit.

How to Diagnose a Bad Diesel Fuel Injector

Need Help Diagnosing a Bad Diesel Fuel Injector?

The easiest way to diagnose a bad diesel fuel injector is to use an OBD-II scanner for light-duty trucks made from 1997 on. Specialized diagnostic equipment, such as the J1939 protocol, for medium-duty and heavy-duty trucks and equipment. Both look for diagnostic trouble codes, but scanners won’t tell you exactly what’s wrong; you can use the codes they give to narrow down the possibilities. Another method is to inspect the engine for leaks. Look for wet spots and a diesel smell near the injectors. Modern diesel systems can show injector balance/return rates through diagnostic tools.

Tools For Diagnosing a Bad Injector

 Let’s take a closer look at the tools for diagnosing a bad diesel fuel injector. As mentioned above, the easiest way is to use a code scanning tool (OBD-II or J1939 Protocol scanners). You can also use a digital multimeter to measure injector electrical resistance and a mechanic’s stethoscope to listen for injector clicking. To measure fuel delivery and pressure, you’ll need a fuel pressure gauge and a fuel return line kit. A compression test can help you rule out other mechanical engine issues that cause the symptoms we’ve discussed.

Fuel Injector Diagnostic Steps

Step 1 – In the initial check, use the stethoscope to listen for a steady click. No click or an unusual sound suggests failure. Look for fuel leaks, wet spots, or clean streaks around the injectors.

Step 2 – Use the proper scanning tool for your diesel engine to reveal diagnostic trouble codes for misfires or fuel pressure. You can also do a cylinder isolation test. With the engine idling, disable one injector at a time. If the injector is good, it will cause the RPM to drop. If the RPM doesn’t change significantly, then the injector is likely bad.

Step 3 – Use the multimeter to check injector resistance against manufacturer specs. If you get a reading that’s way off, it indicates an electrical fault. You can also use a scan tool to check if each cylinder is producing equal power and balanced fuel delivery. A large deviation likely means a bad injector.

Step 4 – The most accurate method used by professional shops is a bench test with specialized equipment to simulate real-world conditions and check spray patterns, pressure, and flow.

Where To Get the Best Replacement Diesel Injectors

Does your diesel engine have the above signs? Don’t wait until it gets worse. At Highway and Heavy Parts, we have an expansive range of high-quality diesel engine parts for various makes and models. Our diesel experts are standing by to help you diagnose any issues you might have with bad diesel fuel injectors. Contact us today for assistance and find the best replacement injectors in our catalog. Highway and Heavy Parts is here to ensure that you have the parts and knowledge to keep your diesel engine running.

Get the Right Fuel Injector the First Time

If your fuel injector is starting to fail, don’t wait for it to turn into a bigger problem.

👉 Verify your Engine Setup
👉 Replace Worn Injectors
👉 Restore Proper Combustion and Performance

Call our diesel experts at 844-304-7688 or browse parts online at Highway and Heavy Parts to get the right parts, faster.

Posted on

Diesel Injector Symptoms: How To Tell If Your EUI Injectors Are Failing

If you’re noticing common diesel injector symptoms like rough idle, smoke, or loss of power, there’s a good chance your fuel system is the problem.

And if you’re running an engine with Electronic Unit Injectors (EUIs), the symptoms can show up fast – and get expensive even faster.

Because with EUIs, you’re not just dealing with fuel delivery.

You’re dealing with timing, pressure, and combustion all at once.

If one injector starts to fail, it doesn’t stay isolated.

Continue reading Diesel Injector Symptoms: How To Tell If Your EUI Injectors Are Failing
Posted on

When to Replace Fuel Injectors in a Caterpillar C15 Acert

Is your fuel efficiency down? Has the performance of your CAT C15 ACERT dropped?

Continue reading When to Replace Fuel Injectors in a Caterpillar C15 Acert
Posted on

Why Flow-Matched Fuel Injectors Matter in Diesel Engines (And When They Actually Make a Difference)

When it comes to diesel engine performance, most people focus on major components: turbochargers, pistons, cylinder heads.

But one of the most overlooked factors in engine performance, efficiency, and longevity is fuel injector balance.

Specifically, how closely each injector matches the others in fuel delivery.

That’s where flow-matched fuel injectors come in.

Continue reading Why Flow-Matched Fuel Injectors Matter in Diesel Engines (And When They Actually Make a Difference)
Posted on

Detroit Diesel Series 60 Fuel Injectors (Remanufactured): How They Work, When They Fail, and Why Replacement Matters

On a Detroit Diesel Series 60, fuel injectors are directly tied to how the engine builds power.

Unlike older mechanical systems, the Series 60 uses electronic unit injectors (EUI) – meaning fuel delivery is controlled by both mechanical motion and electronic timing.

When everything is working correctly, the result is:

  • Precise Fuel Delivery
  • Efficient Combustion
  • Consistent Performance Under Load

When injectors start to fail, that precision is lost – and engine performance follows.

Continue reading Detroit Diesel Series 60 Fuel Injectors (Remanufactured): How They Work, When They Fail, and Why Replacement Matters
Posted on

Cummins N14 Fuel Injectors: How They Fail, What It Affects, and When to Replace Them

On a Cummins N14, fuel injectors are one of the most critical components controlling engine performance.

They don’t just deliver fuel – they control timing, atomization, and combustion efficiency.

And when they start to fail, the issue doesn’t stay isolated to one cylinder. It begins to affect engine balance, temperature, and long-term durability.

Continue reading Cummins N14 Fuel Injectors: How They Fail, What It Affects, and When to Replace Them
Posted on

Product Spotlight: Case and New Holland Diesel Fuel Injectors

Agricultural equipment is perhaps the most critical machinery in use today, directly providing for someone’s livelihood.  Properly functioning diesel fuel injectors for your Case or New Holland farm equipment are just as important.

Continue reading Product Spotlight: Case and New Holland Diesel Fuel Injectors
Posted on

Replace the Injector Hold-Down Bolts on Your Diesel Injectors

Are you looking to replace the fuel injectors on your CAT 3406E, C15, or C15 ACERT diesel engine? If so, it’s probably fair to assume that you want the best quality, highest functioning injectors you can get. And, if you’re spending money on quality injectors, you want them to work correctly. 

Continue reading Replace the Injector Hold-Down Bolts on Your Diesel Injectors
Posted on

Original OEM Diesel Injector Compared to Genuine Bosch Injector

What do you do when you need new injectors for your DD13, DD15, or DD16 diesel engine? If you’re like a lot of people, you head to the dealership to get the OEM parts. But that’s not always convenient and can be expensive. In fact, you could end up paying way more at the dealership then some of your other supplier options.

Continue reading Original OEM Diesel Injector Compared to Genuine Bosch Injector
Posted on

Diesel Engine Common Rail Injectors: Potential Failures & Causes

You’ve just been told that you need to replace your diesel engine fuel injectors, but what exactly caused the failure that led to this point?

Continue reading Diesel Engine Common Rail Injectors: Potential Failures & Causes
Posted on

Choosing the Right Diesel Engine Common Rail Fuel Injectors

The common rail fuel injector system is a relatively new development in diesel engines, but it brings with it quite a few advantages. With a quality common rail system, you’ll see quieter performance, improved fuel economy, higher torque, and lower emissions. 

Continue reading Choosing the Right Diesel Engine Common Rail Fuel Injectors
Posted on

When Do You Need New Fuel Injectors for Your Cat C15 ACERT Diesel Engine?

Has the performance of your CAT C15 ACERT taken a dive? Are you going through a lot more fuel than you used to? 

Continue reading When Do You Need New Fuel Injectors for Your Cat C15 ACERT Diesel Engine?
Posted on

An In-Depth Look at Diesel Engine Common Rail Fuel Injector Problems

If you’re experiencing problems with your common rail fuel injectors, you’ve probably noticed a difference in the way your diesel engine performs. And you’re probably eager to get the issue taken care of. 

Continue reading An In-Depth Look at Diesel Engine Common Rail Fuel Injector Problems
Posted on

Cummins ISB 6.7L Fuel Injectors: What Actually Fails Inside a Common Rail Injector

Fuel injectors in a Cummins ISB 6.7L common rail system don’t just deliver fuel.

They control timing, pressure, atomization, and combustion efficiency – all within milliseconds.

When an injector begins to fail, it’s not always obvious at first.

But internally, the failure has already started.

Continue reading Cummins ISB 6.7L Fuel Injectors: What Actually Fails Inside a Common Rail Injector
Posted on

Why Your Diesel Engine Runs Worse After Installing New Injectors

Installing new diesel injectors should make an engine run better.

So when the engine suddenly idles rough, misfires, smokes, knocks, or feels weaker after injector replacement, it can be frustrating.

The first reaction is usually: Did we get bad injectors?

Sometimes the answer is yes. A defective injector is possible.

But in many cases, the injector itself is not the first thing to blame.

A diesel engine that runs worse immediately after injector replacement may be dealing with trapped air, incorrect trim codes, installation issues, fuel pressure problems, wiring damage, injector seating problems, or an unresolved issue that was already present before the injector job.

The key is slowing down and diagnosing the system instead of replacing more parts.


Start With the Timing of the Problem

The first question is simple: Did the engine run worse immediately after the injectors were installed?

If yes, the problem is likely connected to something that changed during the repair. That could include air introduced into the fuel system, a loose connection, an injector that was not seated correctly, incorrect calibration data, damaged wiring, or a fuel line issue.

If the engine already ran poorly before the injectors were replaced, the new injectors may not have been the true root cause.

That distinction matters.

Replacing injectors can solve many fuel delivery problems, but it will not fix weak compression, valve adjustment issues, sensor problems, timing signal issues, air handling problems, or engine harness faults.


Air in the Fuel System

One of the most common reasons an engine runs rough after injector replacement is trapped air in the fuel system.

During an injector job, fuel lines, rails, injector tubes, or return lines may be opened. When that happens, air can enter the system.

Air in the fuel system can cause rough idle, misfires, surging, hard starting, hesitation, or uneven engine sound.

On some engines, the air clears quickly after proper priming. On others, the system may require a specific bleed or priming procedure.

This is especially important on high-pressure common rail systems, where fuel pressure and injector timing must be extremely precise.

If the engine starts but runs poorly right after the repair, verify the fuel system has been properly primed and that no fittings are allowing air to enter.


Incorrect or Missing Injector Trim Codes

Many modern diesel injectors are assigned calibration or trim codes.

These codes tell the ECM how that specific injector flows compared to a baseline. The ECM uses that information to fine-tune fuel delivery cylinder by cylinder.

If the trim codes are incorrect, missing, entered in the wrong cylinder, or not programmed at all, the engine may run unevenly.

Common symptoms may include rough idle, misfires, smoke, poor throttle response, increased fuel consumption, or uneven cylinder contribution.

Not every engine uses the same coding process. Some platforms require injector trim codes, some use different calibration methods, and some older systems may not require programming at all.

The safest approach is to verify the exact procedure for that engine family before assuming the repair is complete.


Injector Seating Problems

A diesel injector must seal correctly.

If the injector is not fully seated, if the sealing surface is dirty, if a washer is missing, or if the hold-down clamp is not torqued correctly, the cylinder may not seal or fuel may not be delivered correctly.

Injector seating issues can cause combustion leakage, rough running, misfires, fuel odor, poor performance, and abnormal engine noise.

This is why clean mating surfaces matter so much.

Even small debris, carbon buildup, or damaged sealing surfaces can create problems after installation.

If one cylinder sounds different after the injector job, inspect that injector location carefully.


Fuel Line, Return Line, or Connector Issues

Injector replacement often requires moving lines, fittings, harnesses, connectors, and covers.

That means something can be disturbed during the repair.

A loose high-pressure line, damaged return fitting, pinched seal, cracked connector, or improperly seated electrical plug can cause performance issues that appear immediately after the injectors are installed.

On electronic engines, wiring issues can create symptoms that look like injector failure.

Bent pins, oil intrusion, corrosion, loose connectors, damaged injector pigtails, or valve cover pass-through issues can all create intermittent misses or dead cylinders.

This is especially important if the problem comes and goes.


Wrong Injector Part Number

Diesel injectors can look similar and still be wrong for the application.

Flow rates, nozzle design, calibration requirements, emissions configuration, and engine software can vary by engine model, serial number, CPL, horsepower rating, or production year.

Installing an incorrect injector can create poor drivability, smoke, imbalance, misfires, or low power.

This is why part number verification matters before installation.

The old injector number, engine serial number, CPL, VIN, and application details should all be used to confirm fitment.

If the engine runs worse after replacement, double-check that the installed injectors are correct for that specific engine configuration.

Need Replacement Fuel Injectors?
Whether you’re diagnosing a misfire, replacing a failed injector, or planning a complete fuel system repair, browse our selection of diesel fuel injectors.

Shop Fuel Injectors

Injector Height or Overhead Adjustment

On some heavy-duty diesel engines, injector installation is closely tied to overhead adjustment.

If injector height, lash, or overhead settings are incorrect, the engine may run poorly even if the injectors are good.

Symptoms may include rough idle, low power, loud knocking, uneven cylinder contribution, or poor throttle response.

This is especially important on engines where injector actuation or adjustment is mechanically linked to the valvetrain.

If the injector job required removing the valve cover and disturbing the overhead, the adjustment should be verified against factory specifications.


Fuel Pressure Problems

A new injector installation can expose fuel system problems that were already present.

If supply pressure is low, rail pressure is unstable, filters are restricted, or the fuel pump is weak, the engine may still run poorly after the injector replacement.

Before condemning the injectors, verify fuel pressure data.

For common rail systems, rail pressure during crank, idle, acceleration, and shutdown can reveal important clues.

If rail pressure is strong and stable, the issue may be elsewhere.

If rail pressure is low or unstable, the problem may involve the fuel pump, pressure regulator, suction side restriction, return flow, filters, or a leak.


When All Cylinders Show Misfire Codes

A single-cylinder misfire after injector replacement may point toward a specific injector, connector, cylinder, or installation issue.

But when every cylinder shows a misfire or the ECM reports a general misfire across multiple cylinders, the problem may not be the injectors.

Global misfire complaints can point toward timing reference issues, crankshaft or camshaft sensor problems, wiring faults, overhead adjustment problems, airflow modeling issues, software/calibration problems, or sensor data that does not match actual engine operation.

This is where diagnostic software becomes essential.

Cylinder cutout tests, injector performance tests, rail pressure data, cam/crank correlation, active fault codes, and sensor readings should all be reviewed before replacing more parts.


When the Injector Itself May Be the Problem

A bad injector is still possible.

This is especially true if the problem is isolated to one cylinder and follows the injector during a swap test.

Signs that may point toward a faulty injector include a single-cylinder misfire, abnormal balance rate, failed injector performance test, failed buzz test, excessive return flow, fuel knock, smoke from one cylinder, or a cylinder contribution issue that moves when the injector is moved.

If the injector is remanufactured, quality and testing history matter.

A poorly rebuilt injector can have an out-of-spec spray pattern, weak solenoid, leakage, improper calibration, or internal wear.

But the injector should be diagnosed, not guessed.


A Smarter Diagnostic Order

When an engine runs worse after new injectors, work through the basics before jumping to expensive conclusions.

Start with the repair area. Confirm all injectors are seated correctly, all lines are tight, all connectors are fully installed, and all trim codes or calibration values are entered correctly.

Then verify fuel system health. Check fuel supply, rail pressure, filter restriction, return flow, and air intrusion.

Next, use diagnostic software. Look at cylinder contribution, injector tests, active codes, balance data, and sensor values.

Finally, widen the diagnosis. If the data does not point to one injector or one cylinder, look at harness issues, cam/crank signals, overhead adjustment, ECM programming, and air handling.


Final Takeaway

A diesel engine that runs worse after new injectors does not always mean the injectors are bad.

The issue may be air in the fuel system, missing trim codes, incorrect injector programming, poor seating, loose fuel lines, damaged wiring, wrong part numbers, overhead adjustment problems, or an unrelated issue that was misdiagnosed from the beginning.

The best approach is to diagnose the system carefully.

Start with what was touched during the repair. Verify the installation. Confirm the fuel system is fully primed. Check trim codes and calibration data. Review fuel pressure and cylinder contribution. Then look deeper if the symptoms do not point clearly to one injector.

If you need help identifying the correct diesel injectors or troubleshooting a fuel system issue, Highway and Heavy Parts can help.

Call 844-304-7688 or visit highwayandheavyparts.com to get the right diesel engine parts for your application.

From diagnosis through delivery, we’re Highway and Heavy Parts.

Posted on

Caterpillar C15 Fuel Injector Problems: Why Flow-Matched Injectors Matter More Than You Think

When a Caterpillar C15 starts showing signs of poor performance, fuel injectors are usually one of the first places technicians look.

But here’s where a lot of repairs go wrong:

The issue isn’t always a “bad injector.”
It’s often injector imbalance across the engine.

That’s where flow-matched injectors come into play. If you’re working on C15 engines in trucks, fleets, or heavy equipment, understanding this difference can prevent repeat failures and unnecessary downtime.

Continue reading Caterpillar C15 Fuel Injector Problems: Why Flow-Matched Injectors Matter More Than You Think
Posted on

Diesel Fuel Injector Failure Explained: Internal Leakage, Timing Loss, and Combustion Imbalance

Diesel fuel injectors do more than deliver fuel.

They control injection timing, atomization, pressure, and combustion efficiency.

When an injector begins to fail, the issue is rarely just “bad fuel delivery.”

It is usually a breakdown in one of three critical areas:

  • Internal Sealing
  • Injection Pressure Control
  • Spray Pattern Formation

Understanding these failure modes is the key to diagnosing problems correctly – and avoiding repeat failures.

Continue reading Diesel Fuel Injector Failure Explained: Internal Leakage, Timing Loss, and Combustion Imbalance
Posted on

Caterpillar C15 ACERT Fuel Injector (10R1273): Symptoms, Failure Causes, and Replacement Guide

If your Caterpillar C15 ACERT is running rough, smoking more than usual, or losing power under load, there’s a good chance the issue is in the fuel system.

More specifically – the fuel injectors.

And when an injector like the 10R1273 starts to fail, it doesn’t just affect performance. It can impact combustion, fuel economy, and long-term engine health.

Continue reading Caterpillar C15 ACERT Fuel Injector (10R1273): Symptoms, Failure Causes, and Replacement Guide
Posted on

Dirty Diesel Fuel Injectors: What’s Really Happening Inside (And Why Cleaning Isn’t Enough)

Dirty or clogged diesel fuel injectors are one of the most common – and most misunderstood – fuel system problems.

A lot of people think it’s just a restriction issue. Spray some cleaner, maybe swap a filter, and you’re good to go.

But in reality, injector contamination leads to precision failure inside the injector itself – and once that starts, performance drops fast.

Before you try a quick fix, it’s important to understand what’s actually happening inside your injectors.

Continue reading Dirty Diesel Fuel Injectors: What’s Really Happening Inside (And Why Cleaning Isn’t Enough)
Posted on

Why Cummins Injector System Upgrades Change Failure Patterns (Mechanical vs CELECT vs HPI vs XPI)

Cummins didn’t just evolve injector systems to improve performance – they fundamentally changed how engines fail, how they’re diagnosed, and how repairs need to be approached.

From mechanical injectors to XPI common rail systems, each generation introduced new advantages – but also new failure modes.

If you’re diagnosing fuel system issues on a Cummins engine, understanding these differences is critical.

Continue reading Why Cummins Injector System Upgrades Change Failure Patterns (Mechanical vs CELECT vs HPI vs XPI)
Posted on

Before You Replace That Caterpillar Turbo, Check Your Injectors First

When a Caterpillar engine starts losing power, producing excessive smoke, struggling with recurring DPF issues, or experiencing turbocharger problems, the turbocharger is often the first component blamed.

Sometimes the turbocharger is the problem. But many times, it is simply the victim.

What many technicians and equipment owners don’t realize is that fuel injectors and turbochargers work together as part of the same combustion process. When injector performance begins to decline, the effects can spread throughout the entire engine, eventually impacting the turbocharger, aftertreatment system, fuel economy, and overall performance.

Before replacing another turbocharger, it may be worth taking a closer look at the fuel system.


Continue reading Before You Replace That Caterpillar Turbo, Check Your Injectors First
Posted on

What Does It Cost to Replace a Diesel Fuel Injector in 2026?

If your diesel engine is running rough, smoking, or losing power, a failing fuel injector could be the cause.

One of the first questions most people ask is: How much does it cost to replace a diesel fuel injector?

The answer depends on your engine, injector type, and how far the issue has progressed. Some injector problems are caught early. Others turn into much larger repairs.

Let’s break down what actually impacts the cost – and what you can expect in 2026.

Continue reading What Does It Cost to Replace a Diesel Fuel Injector in 2026?
Posted on

Cummins ISX Fuel Injector Problems: Symptoms, Causes, and Replacement Guide

If your Cummins ISX is hard starting, losing power, or producing excessive smoke, failing fuel injectors could be the cause.

Injector issues don’t usually show up all at once.

They start small, but if ignored, they can quickly turn into major engine problems.

Understanding the symptoms – and addressing them early – can save you time, money, and downtime.

Continue reading Cummins ISX Fuel Injector Problems: Symptoms, Causes, and Replacement Guide
Posted on

About Diesel Injector Trim Codes

Your fuel injectors are what keep your diesel engine running at its best. If you want solid diesel engine performance, then you need to use your injectors effectively. There’s a specific system your injector uses to improve engine performance: trim codes. 

Continue reading About Diesel Injector Trim Codes
Posted on

Why Correct Fuel Injector Trim Codes Still Result in Poor Engine Performance

You’ve replaced the injectors.
You’ve programmed the trim codes correctly.
Everything checks out – and the engine still runs rough.

This is more common than most people realize.

Fuel injector trim codes are designed to fine-tune fuel delivery, but they are not a fix-all. If the engine is still underperforming, the issue is almost always outside the trim code itself.

Continue reading Why Correct Fuel Injector Trim Codes Still Result in Poor Engine Performance
Posted on

Caterpillar C15 Fuel Injector Failures: Precise Diagnosis, Failure Modes, and Replacement Strategy

If a Caterpillar C15 starts to smoke, miss, haze at idle, or loses power under load, injectors are high on the list: but guessing is what gets engines hurt.

On many C15 variants (notably HEUI systems), injectors are hydraulically actuated by high-pressure engine oil. That means injector performance depends on two systems at once:

  • Fuel supply (clean, stable pressure)
  • Actuation oil (ICP/IAP pressure, clean oil, correct viscosity)

When either side is off, injector behavior changes.

What “Correct” Looks Like

With a healthy system:

  • Smooth idle, even exhaust note
  • Stable rail/actuation pressure under load
  • Balanced cylinder contribution
  • Minimal visible smoke once warm

Any deviation should be traced to a cylinder, then to a cause – not straight to parts replacement.


Primary C15 Injector Failure Modes (What Actually Fails)

1) Internal Leakage → Fuel Dilution (High Risk)

Mechanism

  • Worn check valve or sealing surfaces inside injector
  • Failed injector O-rings (upper/middle/lower) allowing cross-leakage

What happens

  • Fuel bypasses normal metering
  • Fuel can enter the cylinder uncontrollably or migrate past rings

Hard indicators

  • Engine oil level rising with no external leak
  • Oil smells like diesel
  • Reduced oil viscosity → bearing risk

Why it matters

  • Fuel-diluted oil cannot maintain hydrodynamic film
  • Main and rod bearings are at risk quickly

2) Solenoid / Electrical Control Failure

Mechanism

  • Coil failure, high resistance, intermittent connection
  • Damaged injector pigtail or harness

What happens

  • Injector fails to open/close precisely
  • Timing and duration errors

Hard indicators

  • Misfire at specific cylinder
  • Contribution test shows weak cylinder
  • Electrical codes may or may not set

Key point
Electrical faults can look identical to mechanical injector failure – verify before replacing.


3) Nozzle Wear, Erosion, or Coking

Mechanism

  • High-pressure fuel erodes or deforms nozzle holes
  • Carbon buildup (“coking”) distorts spray pattern

What happens

  • Poor atomization
  • Larger droplets → incomplete burn

Hard indicators

  • Black smoke under load (overfueling/poor burn)
  • Elevated EGT on affected cylinder
  • Soot accumulation increases

Result

  • Higher piston crown temperature
  • Long-term risk to valves and liners

4) Sticking Injector (Open or Closed Behavior)

Mechanism

  • Deposits or wear cause internal components to hang

What happens

  • Injector stuck open → overfueling
  • Injector stuck closed → dead cylinder

Hard indicators

  • White/gray smoke (raw fuel) or dead miss
  • Engine may clear up as it warms (thermal expansion)
  • Severe cases: cylinder washdown

5) Seal/O-Ring Failure (Fuel/Air Cross-Leak)

Mechanism

  • O-ring degradation from heat, age, or contamination

What happens

  • Air intrusion into fuel system
  • Fuel pressure instability
  • Cross-port leakage

Hard indicators

  • Hard start after sitting
  • Aerated fuel symptoms
  • Inconsistent performance

6) HEUI-Specific: Actuation Oil Problems Misdiagnosed as Injectors

Mechanism

  • Low ICP/IAP pressure
  • Aerated or contaminated oil
  • High-pressure oil leaks (o-rings, rail)

What happens

  • Injectors cannot achieve commanded fuel pressure
  • Poor response, misfires under load

Hard indicators

  • Low actuation pressure vs commanded
  • Multiple cylinders affected
  • Improves with RPM (sometimes)

Key point
This is often misdiagnosed as “bad injectors”.


Diagnostic Workflow (What Actually Works)

Do not start with parts. Start with isolation.

1) Cylinder Cut-Out / Contribution Test

  • Disable one cylinder at a time (via Cat ET or manual method)
  • Watch RPM drop or fuel correction

Result

  • Weak change → suspect that cylinder

2) Verify Fuel Supply Pressure

  • Check at filter base or test port
  • Ensure stable pressure during crank and load

Why
Low supply pressure affects all injectors and mimics failure.

3) Check Actuation Oil Pressure (HEUI)

  • Compare actual vs commanded ICP/IAP
  • Look for lag, drop, or instability

Why
No actuation pressure = no injector performance.

4) Valve Cover Inspection

Look for:

  • Fuel wash (clean, stripped oil areas)
  • Oil dilution signs

Fuel wash indicates:
→ injector leaking into that cylinder

5) Temperature Comparison (Advanced but Effective)

  • Use IR gun on exhaust manifold runners

Result

  • Cold cylinder → underfueling/misfire
  • Hot cylinder → overfueling/poor atomization

Replacement Strategy (What Actually Makes Sense)

Replace One Injector vs Set?

  • Single failure, low hours: targeted replacement is acceptable
  • High mileage / multiple symptoms: replace as a set

Reason:

  • Injector balance matters
  • Mixed wear levels create uneven combustion

Always Replace:

  • Injector O-ring kits
  • Any damaged cups (if applicable)
  • Verify harness/pigtails

After Replacement:

  • Prime fuel system
  • Verify pressures
  • Recheck contribution balance

What Causes Repeat Injector Failures

Injectors rarely fail in isolation.

Common root causes:

  • Contaminated fuel
  • Poor filtration maintenance
  • Low fuel pressure
  • Air intrusion
  • Oil system issues (HEUI engines)

If the root cause isn’t fixed:
→ new injectors will fail again


HHP Insight: Don’t Treat Injectors as the Root Problem

Most repeat failures come from:

  • Fuel system imbalance
  • Actuation pressure issues
  • Contamination

Injectors are often the symptom, not the cause.


Final Thoughts

C15 injector problems are not just about replacing parts.

They’re about:

  • Identifying the failing cylinder
  • Verifying fuel and oil systems
  • Understanding combustion behavior

That’s how you prevent:

  • Repeat failures
  • Engine damage
  • Unnecessary costs

Need Caterpillar C15 fuel injectors?

Shop here:
👉 Caterpillar C15 Fuel Injectors

Or call 844-304-7688 to speak with a diesel expert.

From diagnosis through delivery, we’re Highway and Heavy Parts.

Posted on

What Are Electronic Unit Injectors (EUIs)?

If you’re working on engines like the Detroit Diesel Series 60, Caterpillar C15, or Cummins ISX, you’ve probably heard the term EUI.

But understanding what an Electronic Unit Injector (EUI) actually does – and how it fails – is key to diagnosing a lot of performance issues.

Because when an EUI starts to go, it doesn’t just affect fuel delivery.

It affects timing, pressure, combustion, and overall engine balance.

Continue reading What Are Electronic Unit Injectors (EUIs)?