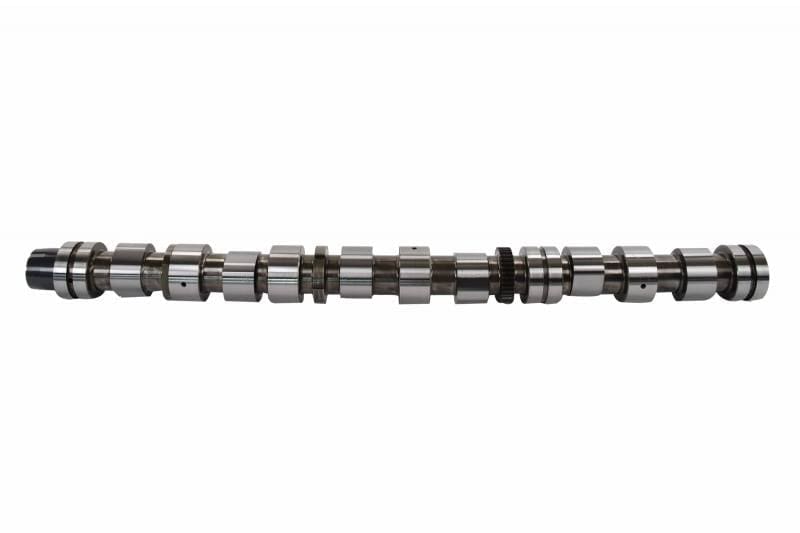
Is the camshaft in your CAT C15 ACERT diesel engine performing correctly? It’s essential that this component operates properly for your engine to function as it should. Each part of the camshaft must perform their functions at precise timing in relation to the motion of the piston. If they don’t, it could spell disaster for your diesel engine.
Continue reading Caterpillar C15 ACERT Diesel Engine Camshaft ProblemsTag: Camshaft
Camshaft Failure Analysis: What Causes Excessive Lobe Wear (C15 Focus Included)
We all know how important camshafts are to engine performance – and when they fail, the damage can go far beyond the camshaft itself.
Whether you’re running a general diesel platform or a Caterpillar C15 diesel engine, one of the most common issues is camshaft lobe wear and pitting.
👉 And once it starts, it does not slow down – it accelerates.
Caterpillar C15, 3406E Camshaft: Symptoms, Failure Causes, and Replacement Guide
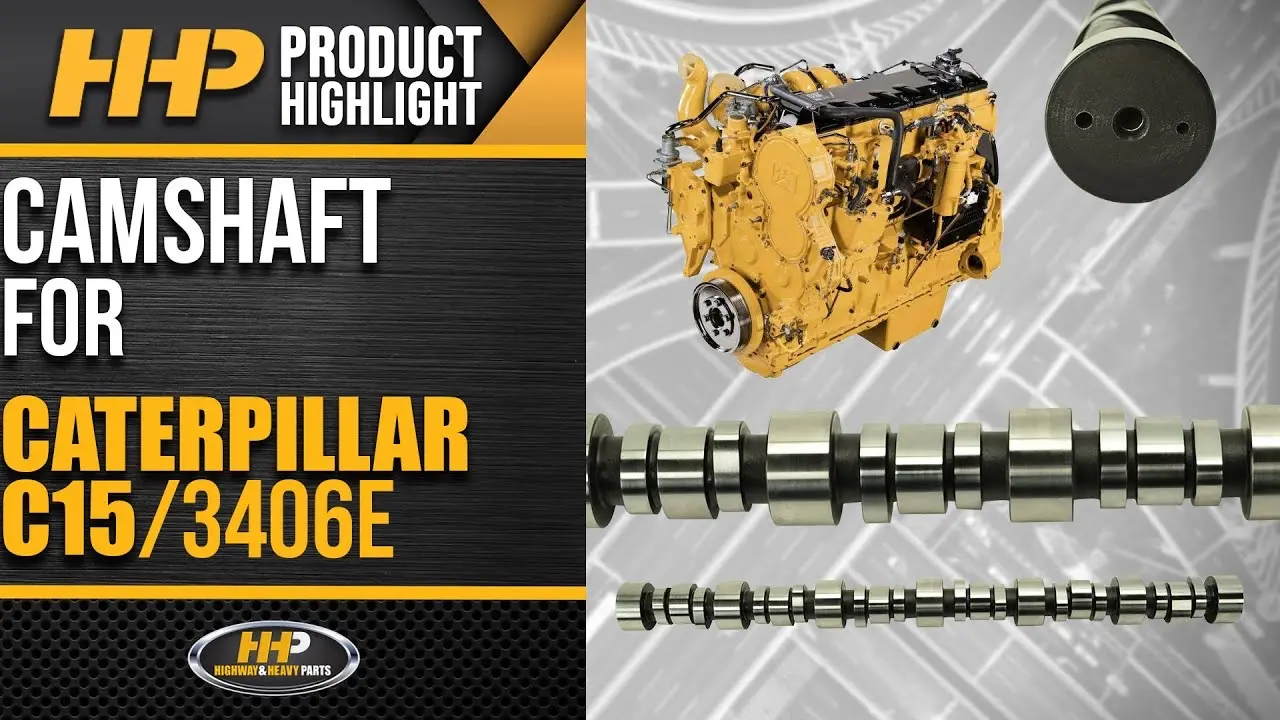
If your Caterpillar C15 or 3406E isn’t running like it used to – losing power, misfiring, or making unusual noise – the problem might not be what you think.
It could be your camshaft.
And if that’s the case, waiting too long can turn a manageable repair into a full engine rebuild.
Continue reading Caterpillar C15, 3406E Camshaft: Symptoms, Failure Causes, and Replacement GuideCaterpillar 3406E Camshaft: Symptoms, Failure Causes, and Replacement Guide
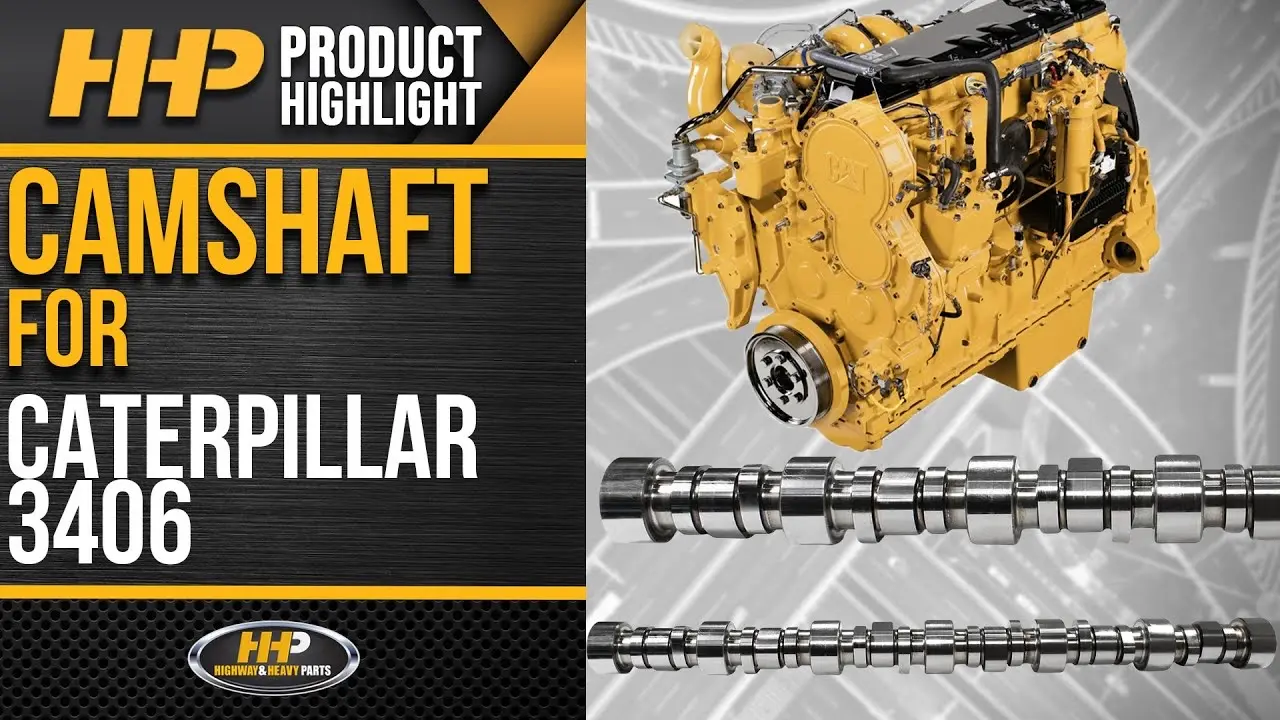
If your Caterpillar 3406E is losing power, popping through the intake, or backfiring through the exhaust, the problem may not be fuel-related at all. In many cases, those symptoms point back to camshaft or valve train wear. When those components start to fail, performance can drop quickly, and if the issue is ignored, it can lead to more extensive engine damage and a much more expensive repair.
This article breaks down what the camshaft does, common signs of failure, why proper installation matters, and what to keep in mind when replacing a 3406E camshaft. If you are already looking for replacement parts, you can start by reviewing our Caterpillar 3406E Camshaft here.
Continue reading Caterpillar 3406E Camshaft: Symptoms, Failure Causes, and Replacement GuideCaterpillar C12 Camshaft Problems, Symptoms, and Replacement

If your Caterpillar C12 is losing power, running rough, or showing signs of valve train issues, the camshaft may be part of the problem. A worn camshaft can affect valve timing, engine efficiency, fuel economy, and overall performance. Left too long, what starts as a drivability issue can turn into a much larger repair.
Because the camshaft plays such a major role in how the engine breathes and performs, wear in this area should never be ignored. If you are already narrowing down the repair, our Caterpillar C12 Camshaft is a good place to start, and you can also browse more Caterpillar Engine Parts if the repair involves other related components.
Continue reading Caterpillar C12 Camshaft Problems, Symptoms, and ReplacementCummins L10 Cam Follower Failure: How Cam Lever Rollers Control Valve Train Geometry

The cam follower in a Cummins L10 is a small component with a very large job.
It directly transfers motion from the camshaft to the valve train.
And when it fails, it doesn’t just affect performance – it can lead to catastrophic engine damage.
What the Cam Lever Follower Actually Does
In the Cummins L10 valve train, the camshaft does not directly actuate the valves.
Instead, motion is transferred through a cam follower (cam lever with roller).
This component:
- Converts Rotational Camshaft Motion Into Linear Movement
- Maintains Correct Valve Timing And Lift
- Reduces Friction Through A Roller Contact Surface
The roller rides directly on the cam lobe, making this a high-load, high-contact stress interface.
Why Roller Followers Are Used Instead of Flat Tappets
The Cummins L10 uses a roller-style follower to reduce friction and wear.
Compared to flat tappets, roller followers:
- Reduce Sliding Friction At The Cam Lobe Interface
- Lower Heat Generation
- Improve Camshaft Longevity
- Maintain More Consistent Valve Timing Over Time
However, this design introduces a different failure risk — roller bearing failure.
Contact Stress and Load Distribution at the Cam Lobe
The cam-to-roller interface experiences extreme contact pressure.
This is a classic Hertzian contact stress scenario, where:
- Load Is Concentrated Over A Small Contact Area
- Surface Hardness And Lubrication Are Critical
- Any Imperfection Leads To Accelerated Wear
Under normal conditions, a hydrodynamic oil film separates the surfaces.
But when lubrication is compromised, metal-to-metal contact occurs.
How Cam Followers Fail
Cam follower failures typically start small but escalate quickly.
Common failure modes include:
- Roller Bearing Wear Or Seizure
- Flat Spots On The Roller Surface
- Spalling Or Pitting Of The Roller
- Misalignment Of The Follower
Once the roller stops rotating:
- Sliding Friction Replaces Rolling Contact
- Heat Increases Rapidly
- Cam Lobe Wear Accelerates
What Happens When the Roller Stops Turning
This is where failure becomes severe.
A seized roller creates:
- Direct Sliding Contact Against The Cam Lobe
- Rapid Material Removal From The Camshaft
- Loss Of Proper Valve Lift Profile
This leads to:
- Incorrect Valve Timing
- Reduced Airflow And Combustion Efficiency
- Increased Stress On Other Valve Train Components
Eventually, this can damage:
- Camshaft Lobes
- Pushrods
- Rocker Arms
Lubrication: The Critical Failure Variable
The cam follower depends entirely on proper lubrication.
Oil must:
- Reach The Roller Bearing
- Maintain A Film Between Cam And Roller
- Remove Heat From The Contact Area
Failure causes related to lubrication include:
- Low Oil Pressure
- Contaminated Oil (Debris Or Soot)
- Oil Starvation During Startup
Without lubrication, failure accelerates rapidly.
Secondary Damage from Cam Follower Failure
A failing cam follower rarely fails alone.
It creates a chain reaction:
- Camshaft Lobe Wear Alters Valve Timing
- Metal Debris Circulates Through The Engine
- Additional Components Experience Accelerated Wear
In severe cases, this can lead to:
- Complete Valve Train Failure
- Engine Tear-Down Requirements
Signs of a Failing Cam Follower
Early detection can prevent major damage.
Watch for:
- Unusual Valve Train Noise (Ticking Or Knocking)
- Loss Of Engine Performance
- Metal Particles In Oil Analysis
- Irregular Valve Operation
These symptoms often appear before catastrophic failure.
Why Inspection During Rebuild Is Critical
Cam followers should always be inspected during an overhaul.
Key checks include:
- Roller Rotation Smoothness
- Surface Condition Of The Roller
- Bearing Integrity
- Alignment And Wear Patterns
Reusing worn components increases the risk of immediate failure.
When to Replace Cam Followers
Replacement is recommended when:
- Roller Wear Or Pitting Is Visible
- Bearing Play Exists
- The Roller Does Not Rotate Freely
- Camshaft Wear Is Present
It is often best practice to replace followers when replacing the camshaft.
Shop Cummins L10 Cam Followers
If you’re rebuilding your engine or diagnosing valve train issues, cam followers should not be overlooked.
At Highway and Heavy Parts:
- Verified Fitment Before Shipping
- High-Quality Components Built For Heavy-Duty Applications
- Fast Shipping (1–2 Days In Most Areas)
- Expert Diesel Support
- Parts And Labor Warranty
Small Component, Major Consequences
The cam follower may seem minor.
But it directly affects:
- Valve Timing
- Engine Efficiency
- Component Longevity
Ignoring it can lead to major repairs.
Protect Your Valve Train System
Proper function depends on correct operation across all components.
👉 Maintain Proper Oil Quality And Pressure
👉 Inspect Valve Train Components During Service
👉 Replace Worn Components Before Failure Occurs
Call 844-304-7688 to speak with a diesel parts specialist
or visit highwayandheavyparts.com to find the right rebuild kit for your engine.
From diagnosis to delivery, Highway and Heavy Parts has your back.
Cummins L10 Cam Followers For Sale From Highway and Heavy Parts!

How to Replace a Camshaft on a Caterpillar C15 (Step-by-Step Guide)
The camshaft plays a critical role in how your engine runs.
On a Caterpillar C15 diesel engine, even minor camshaft wear can affect:
- Valve timing
- Fuel delivery performance
- Overall engine efficiency
👉 If the camshaft fails, it can lead to serious internal engine damage.
A Caterpillar C15 camshaft replacement is not a small job. It requires proper timing, precision, and a clear understanding of the engine’s setup.

Signs of a Bad Camshaft
Before a Caterpillar C15 camshaft replacement, it’s important to confirm the failure.
Before jumping into a full replacement, it’s important to confirm the camshaft is actually the issue.
👉 If you’re not sure yet, this guide breaks down the symptoms and failure causes in detail:
Caterpillar C15, 3406E Camshaft Guide
Common symptoms include:
- Loss Of Power Under Load
- Rough Idle Or Engine Stalling
- Excessive Engine Noise (Knocking Or Ticking)
- Reduced Fuel Economy
- Hard Starting Or No Start Condition
Even small wear can affect performance.
👉 As little as .001″ wear can change valve timing by several degrees, impacting how the engine runs.
What Causes Camshaft Failure on a C15
Camshaft failure is rarely random.
Most failures are caused by:
- Poor Lubrication (Oil Issues)
- Contaminated Engine Oil
- Worn Rollers Or Lifters
- Improper Installation From Previous Repairs
👉 Before installing a new camshaft, always identify the root cause to prevent repeat failure.
How to Replace a Caterpillar C15 Camshaft
This is a high-level process. Exact procedures may vary depending on your engine configuration.
1. Preparation
- Disconnect batteries
- Drain engine oil
- Remove valve covers
- Inspect visible valvetrain components
2. Set Engine to Top Dead Center (TDC)
Rotate the engine and lock it at Top Dead Center (TDC).
- Use a timing pin to secure the flywheel
- This ensures proper timing during reassembly
👉 This step is critical – incorrect timing can cause engine damage.
3. Remove Front Timing Components
- Remove the front timing cover (“peanut cover”)
- Gain access to the cam gear
4. Remove the Cam Gear
- Use a proper gear puller or removal tool
- Carefully remove the cam gear without damaging surrounding components
5. Remove Rocker Assemblies
- Remove rocker arms and shaft assemblies
- Keep components organized for reinstallation
6. Remove the Camshaft
- Carefully slide the camshaft out
- Avoid damaging cam bearings during removal
👉 This is where many installs go wrong – any scoring or damage can lead to premature failure.
7. Inspect and Replace Bearings
- Always install new camshaft bearings
- Inspect for wear, scoring, or oiling issues
8. Install the New Camshaft
- Lubricate bearings and camshaft thoroughly
- Carefully slide the new camshaft into place
9. Reinstall Components and Set Timing
- Reinstall cam gear
- Align timing marks correctly (typically 12 o’clock alignment)
- Install retainer plate and torque bolts properly
👉 Camshaft bolt torque: ~180 ft-lbs (verify per spec)
10. Final Assembly
- Reinstall rocker assemblies
- Set valve lash to specification
- Reinstall timing cover and remaining components
Important Installation Tips
When replacing a camshaft on a C15, pay attention to:
- Always Verify Fitment Using ESN
- Replace Bearings and Related Components
- Keep All Components Clean
- Follow Torque Specifications Exactly
- Double-Check Timing Alignment
👉 One mistake here can lead to complete engine failure.
Why Camshaft Installs Fail (And How to Prevent It)
Most repeat failures are caused by:
- Reusing worn components
- Improper timing alignment
- Skipping bearing replacement
- Not addressing oil system issues
👉 A camshaft replacement is not just a part swap – it’s a system repair.
At Highway and Heavy Parts, we help you identify the problem and get the right parts the first time.
Call 844-304-7688 or visit highwayandheavyparts.com to place your order today.
From diagnosis through delivery, we’re Highway and Heavy Parts.


